Display conditions: how to personalize content in the editor
Display conditions allow you to control when specific content appears in an email, banner, or pop-up. By using customer data – such as purchase history, location, or loyalty status – you can tailor messages dynamically without needing technical expertise.
For example:
- If a customer has a VIP membership, show them an exclusive discount.
- If they haven’t made a purchase recently, highlight popular products.
This ensures that each recipient sees the most relevant content, improving engagement and personalization.
How do display conditions work?
Display conditions use simple if-then logic to determine what content should be displayed. Below are the key structures:
IF condition
The IF statement checks if a condition is met. If true, the specified content is displayed.
Example:
@if (Model.CustomerAttribute("MembershipLevel") == "VIP")
{
   Your exclusive VIP discount code:
   @(Model.UseDiscountCode(discountCodeSetId))
}
If the customer’s membership level is VIP, they receive a discount code.
ELSE IF condition
The ELSE IF statement defines an alternative condition when the first one is false.
Example:
@if (!string.IsNullOrEmpty(Name))
{
    <p>Dear @Model.CustomerFirstName</p>
}
else
{
    <p>Dear customer</p>
}
If the customer has a “Loyal” status, they receive a discount. Otherwise, they see a product recommendation banner.
ELSE condition
The ELSE statement acts as a fallback when none of the previous conditions apply.
Example:
@if (condition1)
{
   Content for condition1
}
@else
{
   Content when no conditions are met
}
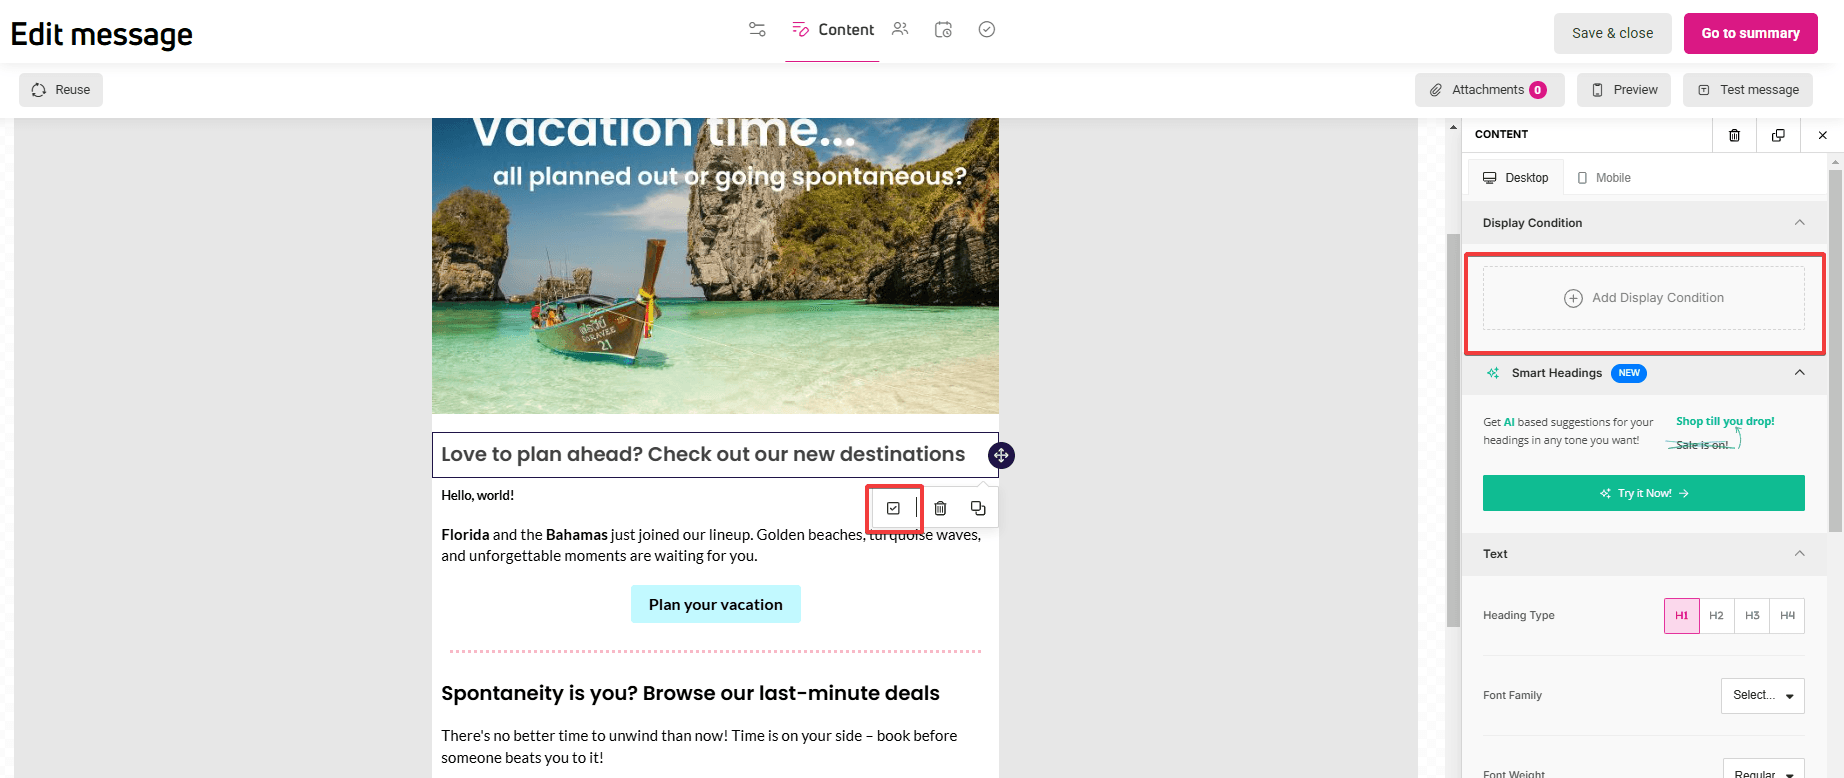
How to add a display condition?
- Click the block where you want to add the condition.
- Then click the checkbox visible in the context menu or the Add display condition section in the right-hand menu.

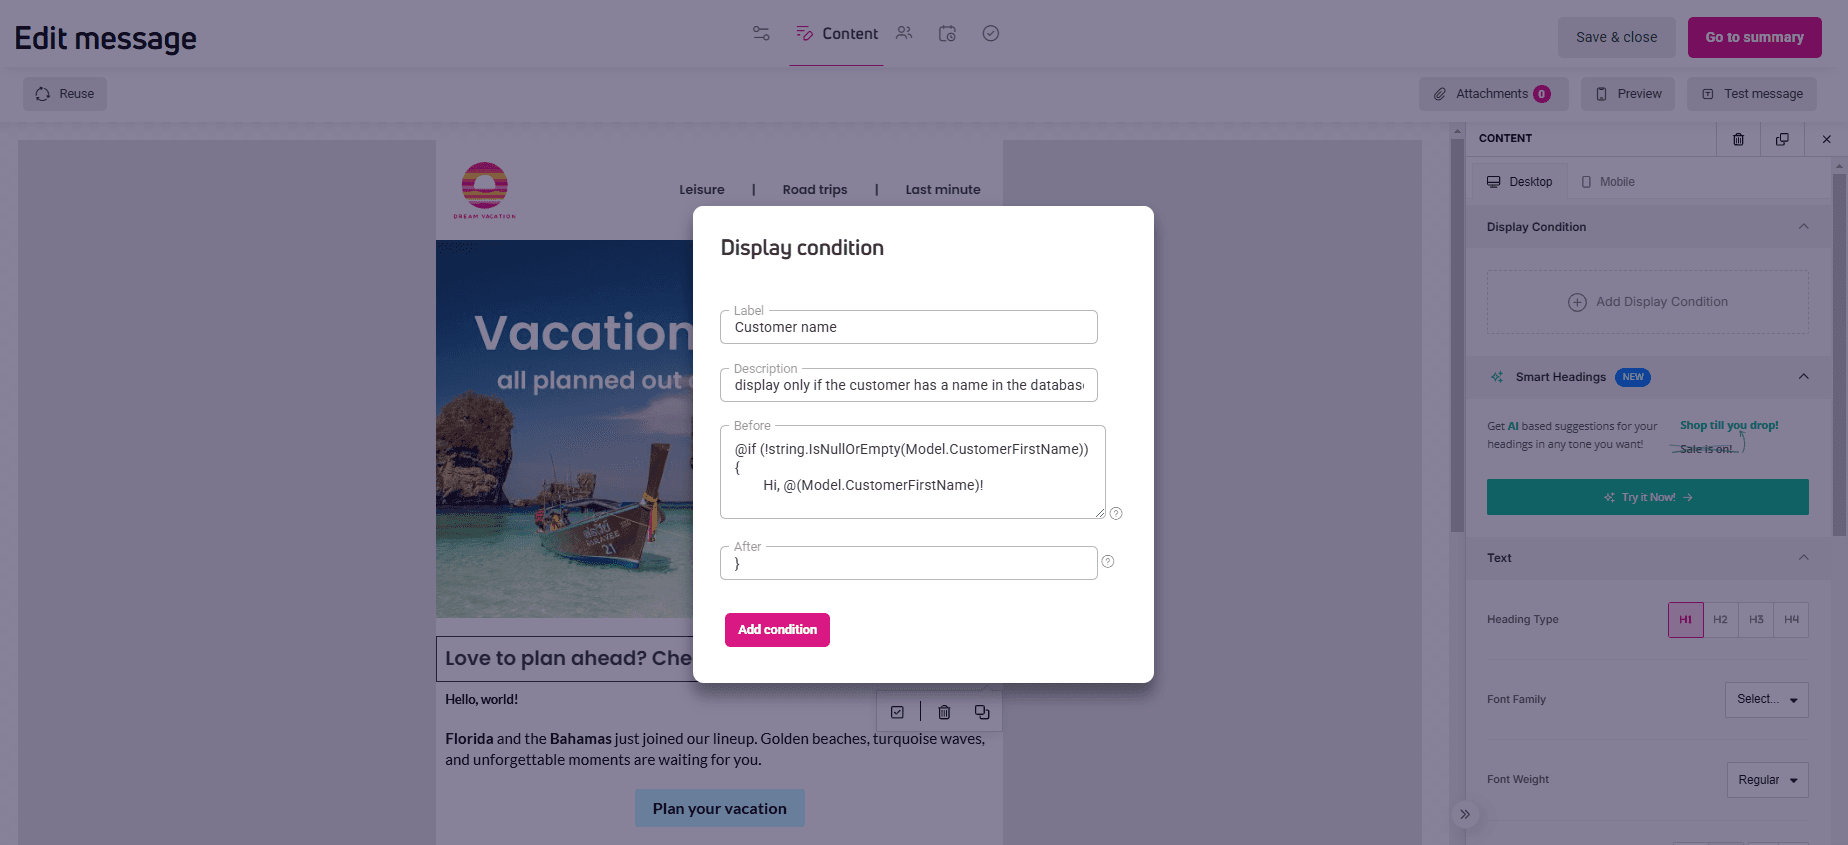
- Enter the condition name and description.
- In the Before window, enter the condition syntax. You can use the examples below. If you want to use dynamic content, you’ll find the complete list in this article: What is dynamic content?

- In the After field, enter the closing curly bracket «}«. If you see the same bracket in the ‘Before’ window, delete it.
- Save the condition.
How to use display conditions in a content#
Personalizing based on customer name
If the customer’s name is available, display it in the email:
@if (!string.IsNullOrEmpty(Model.CustomerFirstName))
{
   Hello, @(Model.CustomerFirstName)!
}
Displaying cart details dynamically
If a customer has items in their cart, show relevant messages:
@{
    var newProductsArray = Model.GetCurrentCart(8)?.ToArray();
    int numberOfNewProducts = 1;
}

<p>Total number of products in cart: @numberOfNewProducts</p>

@if (numberOfNewProducts == 1)
{
    <p>There is 1 product in the cart.</p>
}

@if (numberOfNewProducts > 1)
{
    <p>There are @numberOfNewProducts products in the cart.</p>
}
This helps personalize reminders for abandoned carts or upsell opportunities.
Where can display conditions be used?
This feature works not only in emails but also in:
- Pop-ups: Show different messages based on user behavior.
- Banners: Display promotions for specific customer segments.
- Forms: Personalize form fields based on user data.
Using display conditions, you can customize content dynamically to enhance user engagement. Whether you’re showing personalized greetings, exclusive offers, or abandoned cart reminders, these simple logic rules make your campaigns smarter and more effective.