Business Unit Settings
Business Unit settings are the fundamental settings used in creating and orchestrating your messaging activity.
Business unit settings fall into following categories:
- General
- Sender address
- Default domains
- Channels
- DKIM
- API
- TowerData
- Indicators
- Tags
- Subscribers
- Users
- IP Blacklist
- URL integrations
- SMS/MMS
General
Under the General tab you may adjust some of the most basic settings relevant for your messages.
- Default values for From and Reply-To fields: you may adjust what sender name and email address your subscriber will see in the message they will receive. Remember that you may override the default values with the values entered in the newsletter wizard for each message individually.
- ClickTracking mode: select the mode in which click tracking works:
- no click tracking: click tracking is disabled
- whole links: entire links are tracked; this setting is not recommended unless there are fewer than 1,000 links
- link templates: the default option. ExpertSender database can store up to 1,000 track links per message. However, please note that the counting method is different when you use personalizations tags and when you use Dynamic Content. Each personalization tag integrated in a message is counted as 1, no matter to how many subscribers the message is sent. In contrast, Dynamic Content links will be counted as 1 per subscriber. This means that if you send a message to 10,000 subscribers, 999 of them will be tracked and all remaining subscribers will fall into the «Other» category (i.e. they will not be tracked).
- link templates with url embeddings: an option recommended for personalization tags which frequently change. Please note that a tag can change after the message is sent and before the link is clicked. With this setting enabled, the personalization tag is parsed when the user clicks the link.
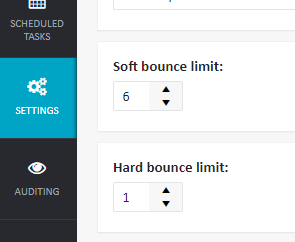
- Soft bounce limit and Hard bounce limit: a bounce is a situation in which an email is rejected by a subscriber’s server. You can decide how many times you want to make an attempt to deliver your message.
Learn more on soft and hard bounces#
Bounces are divided into two types: hard and soft.
Hard bounces arise due to nonexistent mailboxes, and by default, they are automatically removed from the database after each send (the default Hard bounce limit is 1). If you want to change this behavior, you may raise the limit, although it is not recommended.
Other bounces, which occur temporarily and can be corrected, are soft. They can be caused by the following situations:
- the recipient’s mailbox is full
- message is blocked
- other errors (non-standard server responses)
Since soft bounces are usually temporary, you can select all subscribers who returned such errors in response to a specific message and try to send them this message again. The default soft bounce limit is 3, although you are free to change this value to anything you like.

- Automatic throttling settings: throttling slows down the delivery of your message and allows you to adjust sending time to the number of receivers. Since ISPs have certain limits on messages they accept per hour from each IP, by sending too many emails simultaneously you may easily reach the limit and get your message blocked. By choosing throttling you may deliver all of your messages, albeit some of them with a small delay. Here you can decide how many messages per hour you want to send.
- Interface time zone: the time zone which will be used in the interface of the current business unit. This setting cannot be manipulated by a user.
- Enable «Precedence: bulk» header: with this option enabled, email messages are sent with the information that they target a bulk recipient. This helps ISPs and spam filters classify a message and, in the long run, improves deliverability.
- What should be used at the SMTP MAIL FROM greeting: by default, the VERP mechanism is used, which sets a different MAIL FROM value for each recipient and is thus more effective at handling undeliverable email addresses. Optionally, you may choose to use the address set in the From: email field, but this is not recommended, as it will prevent bounces from being recorded in the system.
- Disable click tracking of registered URI schemes: enabling this feature will prevent ExpertSender from tracking URLs which start with prefixes defined by IANA as permanent or provisional, such as callto: or mailto:. Links that start with http:, https: and ftp: will always be tracked regardless of this setting.
- Error percentage tolerance in automatic import of subscribers and suppressions: the permissible percentage of invalid entries in an imported subscriber list or suppression list. If this value is exceeded, the import will fail.
Sender Address
You may enter the name of your company and its physical address. These data may be later used in, for example, message footers.
Default Domains
Within this tab you may set the following default domains:
- Default domain for feedback (bounces, complaints): the domain used in the headers of a message (set by ExpertSender). For customers using shared IP numbers, the domain is expertsender.com, while customers who have purchased dedicated IPs may use their own domain names.
- Subdomain for bounces: the subdomain used for bounces (set by ExpertSender, non-editable by the customer)
- Subdomain for Link-Unsubscribe header: the subdomain used for the Link-Unsubscribe header (set by ExpertSender, non-editable by the customer)
- Default domain for links: a domain at which links included in your messages (including, but not limited to, such links as Unsubscribe and Preference Center) will be placed by default.
- Short domain for links: a domain which will be used only in SMS/MMS messages. If this field is empty, the default domain for links will be used.
- Add Sender header to emails: the Sender header is usually the same as the From: header, but it may differ if you send a message on behalf of somebody else. By default, ExpertSender adds a Sender header when the domain in the From: field differs from the private key domain.
- Forward all bounces to this email: you may set an email address to which all bounces will be forwarded. Fill in this field if you find it useful to have all bounce information in one mailbox.
- Forward all non-bounces to this email: you may also want to forward all of your non-bouncing messages to a specified email address. Fill in this field if you find it useful to have quick access to all sent messages in one mailbox.
Channels
If you use more than one IP address, within the Channels tab you may decide how to divide the message load you are sending between all your addresses. In this way you minimize the risk of building bad reputation for each individual IP. This is especially important if you are sending many messages. Consult the Warming up IPs article for more details.
The total value of the load must be equal to 100%. Otherwise, the settings will not be saved. You can use the Distribute Equally button to let the system distribute the load automatically for you. You may also use the padlock icon to lock the load of a specific to a specific value and prevent it from being affected by later modifications.
DKIM
DKIM (DomainKeys Identified Mail) is a tool which helps you certify the authenticity of your messages. It does it by attaching a «digital signature» to your message which is associated with your domain name.
ExpertSender supports the use of DKIM. In the DKIM tab you can add the private key domain, private key selector, and your RSA private key.
You may also choose to disable DKIM signatures, although this is not recommended.
API
The API tab contains information on the ExpertSender API and your API keys.
To add a new API key, follow these steps:
- Click the Add new API Key button. You will be redirected to the Edit API key: (new API Key) website.
- A new API Key should be generated at the top of the page. If you want to generate it again, click the Generate API key button.
- Select all permissions which will be associated with the new API key. Note that not all keys need to have the same permissions — you may choose to create keys with a limited set of permissions which you will give to your employees who, in your opinion, should not have full control of the system.
- Click Save.
TowerData
TowerData is an external email intelligence tool for marketers which helps you manage and grow your subscriber lists. It is possible to use TowerData alongside ExpertSender. In the TowerData tab you may enter your TowerData API key to gain full access to the TowerData API.
Indicators
In the Indicators tab, you may set up alerts which will be displayed on the dashboard when the system performs worse than expected:
- Alert on average delivery rate for the last 7 days (in %): an alert will be triggered when the delivery rate falls below the specified threshold (typically < 90-95%)
- Alert on user unknown bounce rate for the last 7 days (in %): an alert will be triggered when the unknown bounce rate exceeds the specified threshold (typically > 5%)
- Alert on complaint rate for the last 7 days (in %): an alert will be triggered when the complaint rate exceeds the specified threshold (typically > 0.4%)
- Alert on negative list growth for the last 7 days: an alert will be triggered when more subscribers are removed a subscriber list than are added to it.
Tags
In this tab, you will find all of the tags used in email and/or SMS/MMS messages in the current business unit.
To add a new tag, click the Add new tag button, enter the name of the tag and click OK.
To delete a tag or several tags, select them by putting a tick next to them and click Delete selected.
Subscribers
In the Subscribers tab a number of general settings on handling your subscribers can be adjusted.
- Default subscriber name: a value used by default as subscriber name when it is missing from the subscriber data stored in the subscriber list
- Default subscriber firstname: a value used by default as a subscriber’s first name when it is missing from the subscriber data stored in the subscriber list
- Default subscriber lastname: a value used by default as a subscriber’s last name when it is missing from the subscriber data stored in the subscriber list
- Remove from all lists upon unsubscribe: when a user unsubscribes from any list, he or she is automatically removed from all subscriber lists
- Remove from all channels upon unsubscribe: when a user unsubscribes from any list, he or she is automatically removed from all channels of communication (email, SMS/MMS)
- Halt messages from all lists upon snooze: when a user chooses to snooze his or her subscription, they stop receiving messages from all lists
- Halt messages from all channels upon snooze: when a user chooses to snooze his or her subscription, they stop receiving messages from all channels
- Show all lists in the preference center: by default, a subscriber can see all lists he or she belongs to in the preference center
- Add URL to your logo: you may personalize your signup, unsubscribe and preference center pages by including your own logo. Paste its URL into this field (the picture can have a maximum width of 500px).
- Exclude .ca email addresses from all messages: this option was introduced due to the extremely restrictive Canadian anti-spam policy. Sending spam is strictly prohibited in Canada and may incur heavy fines. If you are not sure if your Canadian subscribers want to receive your messages (for instance, if the addresses were not acquired through double opt-in), you are free to choose to avoid risk by excluding all Canadian addresses.
Users
In this tab you can manage, add, and remove users who will use the platform within your company (usually marketing specialists). You can create any number of users with different permissions each.
How to create a new user?#
To create a new user:
- Click the Create new user button. You will be redirected to the Edit user: (new user) page.
- In the Common settings tab enter the email, password (you may also choose to automatically generate a password), and name of the user. Choose the interface language which will be most convenient for you and your team.
- Switch to the Roles tab.
- Decide on the rights which the user will have:
- This user has unrestricted access to all features (administrative rights): full unrestricted access, which may be given to e.g. a team leader
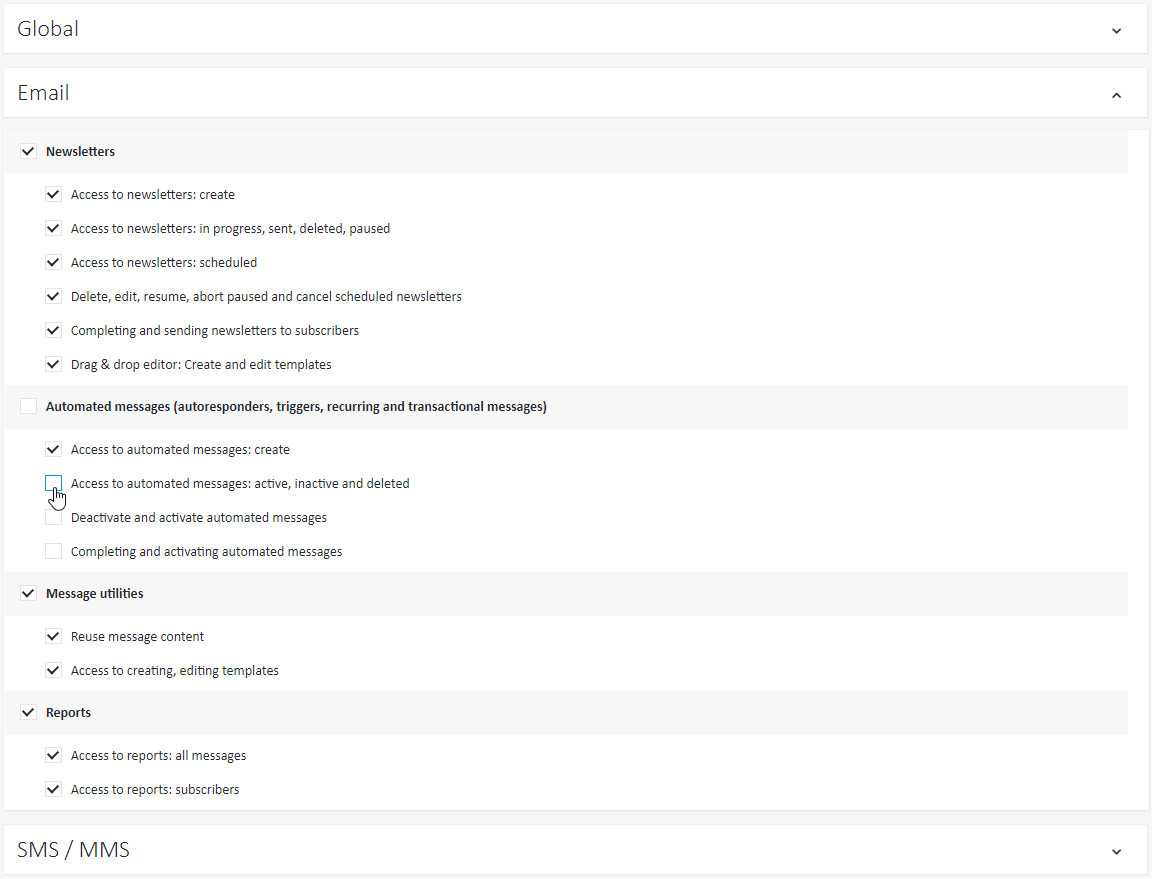
- This user has restricted access to features: you may grant only limited rights to a user. This is particularly useful if you have trainees or inexperienced marketers on your team. You may choose between three categories of permissions: Global, Email, and SMS / MMS. Put a tick next to each functionality the user should have access to:

- Click Save.
IP Blacklist
The IP blacklist lets you add IP addresses which should be excluded from open and click tracking in the reports. For instance, you may blacklist all of the IPs which are internal to your company in order for them not to distort the overall open and click statistics.
URL Integrations
URL integrations enable you to add custom information to the URLs in your message. For instance, you may include a personalization tag or any other variable, such as the subscriber’s current location. Later, you may use this information to carry out statistical analysis.
The URL integrations tab contains a table with all URL integrations you have configured:

The table contains the id of the integration, its name, status (active or inactive), and buttons for editing and deleting the integration.
To add a new URL integration, follow these steps:
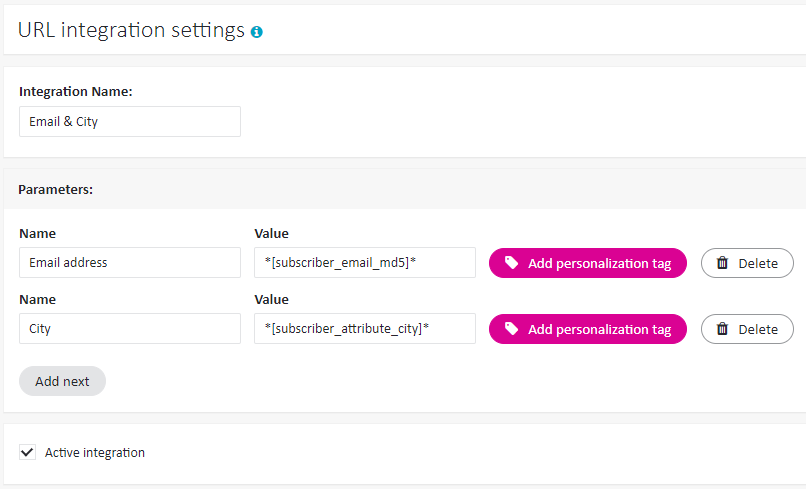
- Click Add new URL integration. This will open the following view:

- Add a name of the integration (which typically indicates what kind of information will be integrated).
- Under Parameters, enter the name and value of each parameter which you want to include in the URL. In the example above, two parameters are included:
- The subscriber’s email encoded as MD5 hash, which can be useful for tracking your subscriber’s website behavior after they follow the link.
- The subscriber’s city, as stored in a relevant custom field. This could be used for personalizing the content of the website. For instance, if a subscriber lives in London, the link sent to them will lead to a website with relevant offers from London.
- Check Active integration to be able to use the integration in your messaging.
- Click Save.
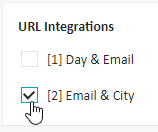
In order to use an URL integration in a message, you need to check the appropriate checkbox at the second step of the message wizard:

SMS/MMS
This section allows you to configure an SMS gateway which is crucial for the SMS channel. For more details on SMS channel configuration, consult the Setting up the SMS/MMS channel article.


