Managing lists
In order to be able to use ExpertSender even at the most basic level, you need to know how to manage lists.
Subscriber lists are a very important element of ExpertSender. They contain contact data (email addresses and/or cell phone numbers) and often also other information on your customers. You always need at least one subscriber list to start sending your messages.
Seed lists are designed to store either test email addresses or third-party seed email addresses. Test email addresses are usually used by our clients to test creatives (their deliverability and rendering) before the actual message is launched. The best practice is to test a creative by sending it first at least to your test email addresses at major ISPs such as Yahoo, Outlook.com, Gmail or AOL.
More on seed lists#
Third-party seed email addresses are usually used for estimating the percentage of inbox placement. Companies such as Return Path or Litmus provide services where you can obtain a list of, for example, 1000 seeds that you can mail your message to along with the real recipients. Then you can check the estimated deliverability ratio to Inbox vs Spam folder to each of the major ISPs based on the number of emails delivered to multiple seeds at a given ISP. Using seed lists is not an accurate way of estimating the inbox placement, though.
There is also one other significant distinction between subscriber lists and seed lists. In case of seed lists none of the email addresses can be removed due to receiving a couple of soft bounces or hard bounces (different than user unknowns) in a row or by clicking the unsubscribe link. This is to make sure these test or seed email addresses will not get removed from the seed list by mistake.
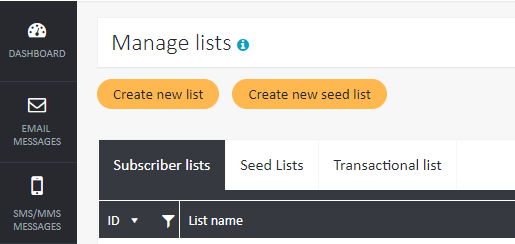
To begin managing your lists, select Subscribers > Lists.
Creating a subscriber list
To create a new subscriber list, follow these steps:
- Select Create new list.

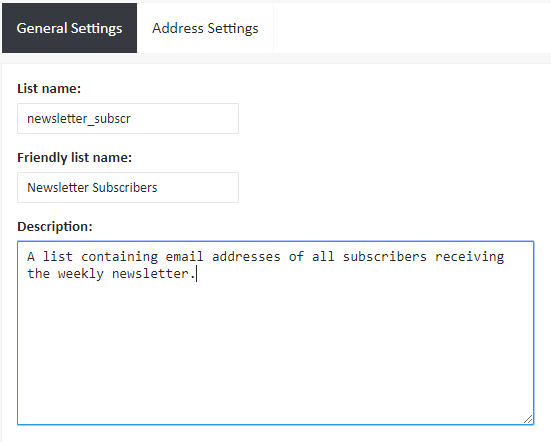
- In General Settings fill in the obligatory List name field. Name your list in an informative way, e.g. newsletter subscribers.
- Optionally, you may add a Friendly list name (which will be visible to your subscribers in their preference center) and a longer Description.

- Pick a language which will be used for system generated content, such as webform fields, email footers or thank you pages. Note that this option will be used only if automatic language detection by the browser is not supported.

- Choose the Opt-In mode. The selected Opt-In mode determines how new subscribers can be added to your list:
- Single Opt-In — new users are immediately added to the database after they subscribe
- Double Opt-In — when this option is enabled, each new subscriber receives an activation link, which they should follow in order to be added to the subscriber list. In case this option is selected, remember to create a confirmation email.
Lists with Double Opt-In have an additional option, which lets you view all unconfirmed subscribers:

- Confirm that you understand and accept that the list will contain only opt-in addresses. This is to make sure that no addressees receive your messages without a direct consent.
- In the Address Settings tab you may add contact data of your company. Later on, you may use these data in the body of your messages, for example in the footer.
- Once you are done, select Create List.
Creating a seed list#
To create a new seed list, follow these steps:
- Select Create new seed list.
- Fill in the obligatory List name field.
- Optionally, you add a Friendly list name and a longer Description.
- Pick a language which will be used for system generated content, such as webform fields, email footers or thank you pages. Note that this option will be used only if automatic language detection by the browser is not supported.
- Once you are done, select Create List.
Add subscriber data to the list
- After you create your list, you need to add the data of your subscribers to it. Under Manage lists find your list and choose either Add manually or Import.


Add manually#
If you add subscribers manually, fill in all of the fields and click Add subscriber at the bottom.
- For each subscriber, ExpertSender offers a number of default system fields: Email, Phone, Custom subscriber ID, Firstname, Lastname, Vendor, Tracking code and IP.
- The standard fields Email and Phone should guarantee unique identification of your subscribers, nevertheless you may choose to assign to them Custom subscriber IDs if you consider it useful.
- Vendor refers to the source from which you received your subscriber data, for instance, the website through which he or she subscribed to the newsletter.
- Tracking code is the code used for tracking the subscriber’s behavior
- IP should contain the IP number from which the subscriber subscribes to the mailing list.
- Except all of the system fields enumerated above and included in the first two boxes, you may also create your own custom fields containing more specific information about your subscribers, e.g. city, country, sex or age. To learn more on how to start using custom fields, read the Custom fields section.
Matching mode#
If you already have any other subscriber lists, it may be the case the subscriber you are adding is already a member of one of those lists. In such a case, all of the fields which were filled while adding the subscriber will be reused now and updated accordingly. Choose the Matching mode, i.e. the criterion which will be used for comparing subscribers across lists: Email, Phone or Custom subscriber ID. It is important that all three parameters are unique within the whole business unit. Updating one of them will update the other two.
Import from file#
You may also import your data from a CSV, TXT, XLS, XLSX or ZIP file:
- Select a file with email addresses from your computer. The file should fulfill the following criteria:
- extension: CSV, TXT, XLS, XLSX, or a ZIP archive with a file with one of the listed extensions
- encoding type: preferably UTF-8
- format: delimited (preferably with “,”)
- dates must be sent in the format YYYY-MM-DD [hh:mm:ss]
- file size should not exceed 30 MB (if it does, you may compress it in ZIP)
- values containing reserved characters (double quotation marks, comma, semicolon, new line) are surrounded with double quotation marks («). If quotation marks appear in the value, they are represented in the file as two quotes in a row.
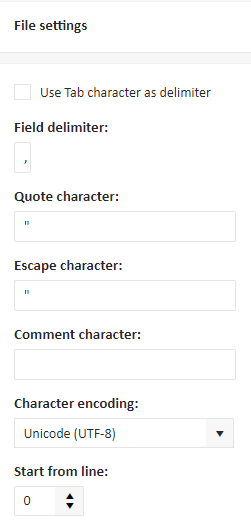
- For a CSV and TXT file, specify the delimiter (the character which separates fields in each row) which was used in the file. If the file contains quotes, escaped characters, or comments, you may also specify a quote, escape and comment character respectively. For an XLS and XLSX file, the division into fields follows the division into columns, so there is no need to specify it manually.
- Select the character encoding used in the file and the line from which data import should start.

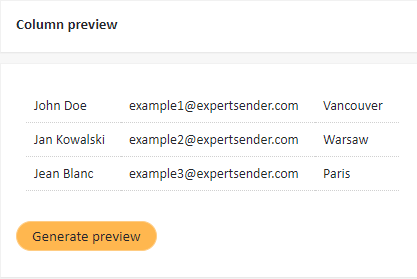
- Below you will see a column preview with the data extracted from the updated file. If the division into columns is correct, click Next.

- At the Import settings tab you will be able to specify what relation the imported data should have to the data already present on the list. When you are creating a brand new list, just leave the default options at the Import settings tab and click Next. Otherwise, you may decide if you want to add new subscribers to the list and/or update or replace the data of subscribers who are already list members. Furthermore, if the imported file contains the data of subscribers who unsubscribed from the list or who were manually removed for some reason, specify if you want to import them again.
- Next, map the columns from the file to the fields which will be stored in the database. For example, if the first column contains email addresses, import it as Email. If another column contains the subscriber’s first name, import the column as First name. You may choose not to import certain columns you deem unnecessary.

- Once you are done, click Finish. Be patient — if you try to import a big list, the process can take some time.
List settings#
You can access settings for each of your lists under List actions.

In the General Settings tab you can change all of the initial settings, which were set while creating a list.
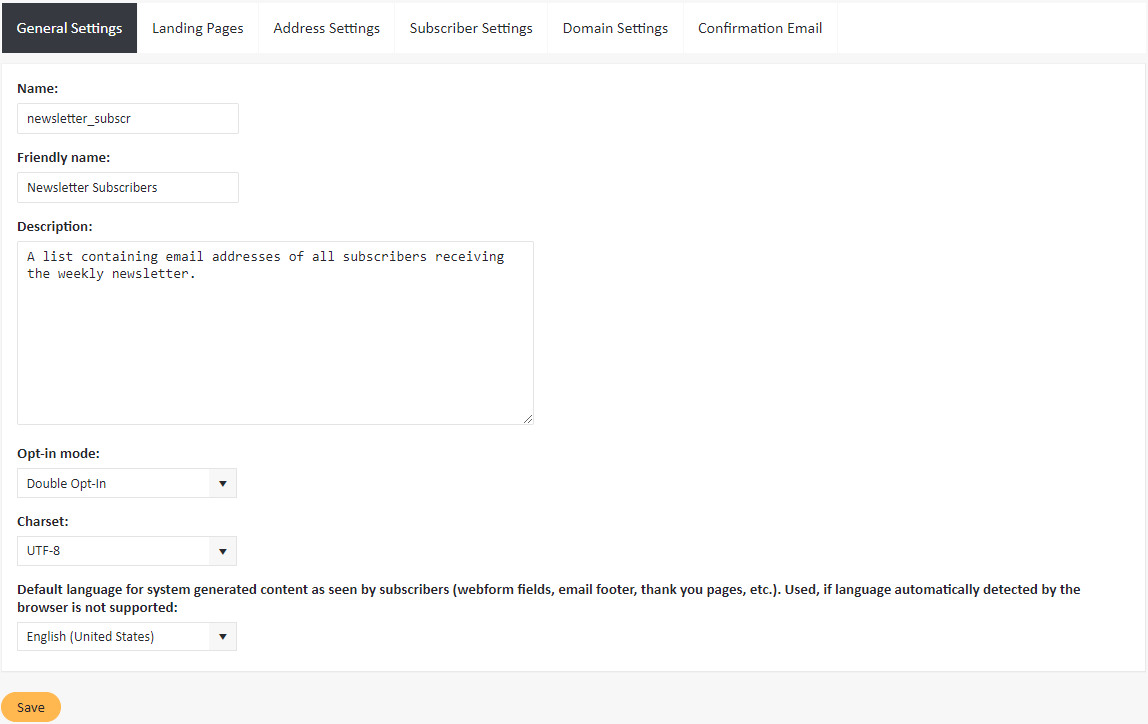
- The Name of the list (visible only in the system)
- The Friendly name of the list (visible to your subscribers in the preference center)
- The Description of the list
- The Opt-in mode for the list:
- Single Opt-In — new users are immediately added to the database after they subscribe
- Double Opt-In — when this option is enabled, each new subscriber receives an activation link, which they should follow in order to be added to the subscriber list.
- The Charset used in the list (it is strongly recommended to use UTF-8)
- The language which is used for system generated content, such as webform fields, email footers or thank you pages.
In the Landing Pages tab, you can specify: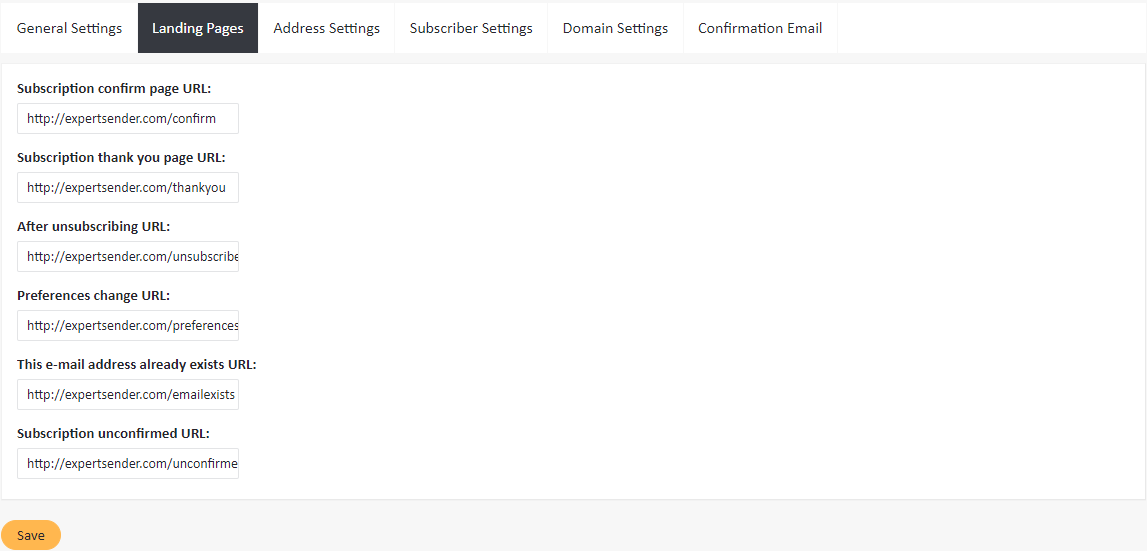
- Subscription confirm page URL: a link to the website which opens after the subscriber leaves his email on one of your webpages; If you do not specify, the default page will be displayed
- Subscription thank you page URL: a link to the website which will open after the subscriber confirms the subscription by clicking on the confirmation link in the message; if you do not specify, the default page will be displayed
- After unsubscribing URL is the page that the subscriber will see after (s)he unsubscribes from the mailing list; if you do not specify, the default page will be displayed
- Preferences change URL: a link to the website which will open after the subscriber changes information about him-/herself in the preference center;
- This e-mail address already exists URL: a link to the website which will open if the subscriber has previously subscribed to the newsletter and tries to do it again; If you do not specify, the default page will be displayed
- Subscription unconfirmed URL: a link to the website which will open if the subscriber has previously subscribed to the newsletter and has not yet followed the link to confirm the subscription; if you do not specify, the default page will be displayed
You can also use personalization tags to transfer subscriber data in parameters. For example, to track subscribers who have confirmed a subscription, you can specify the following address as a link to the thank you page:
https://www.domain.com/?email=*[subscriber_email]*
In the Address Settings tab you can specify the name and contact data of the company. The information which you enter here can be automatically added to the footer of your messages via personalization tags.
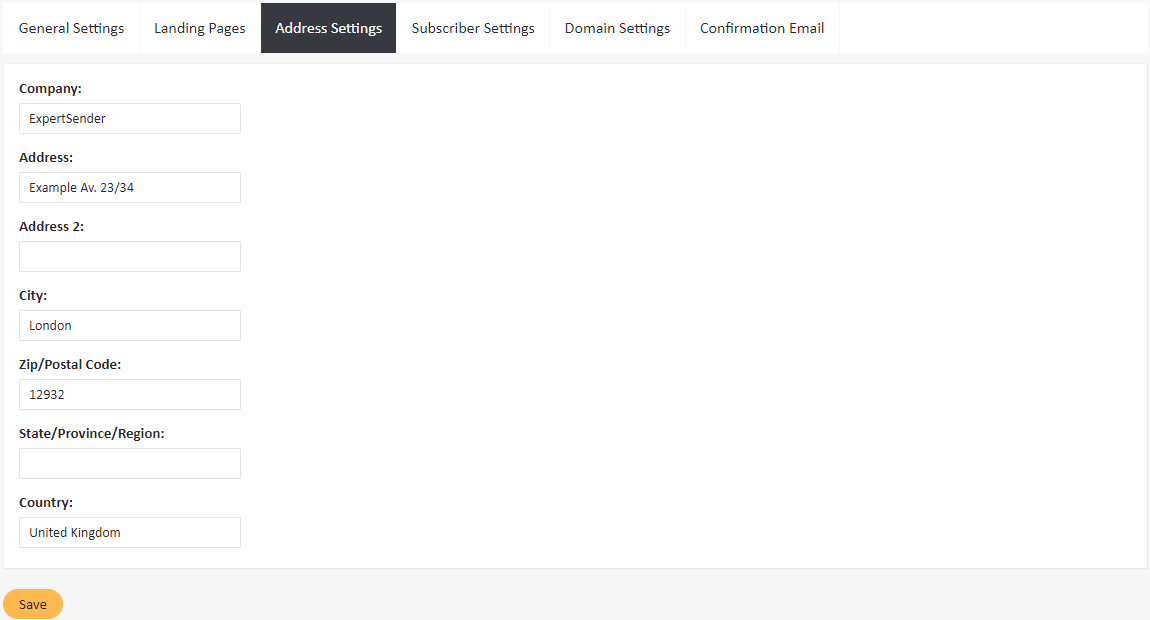
In the Subscriber Settings tab you can:
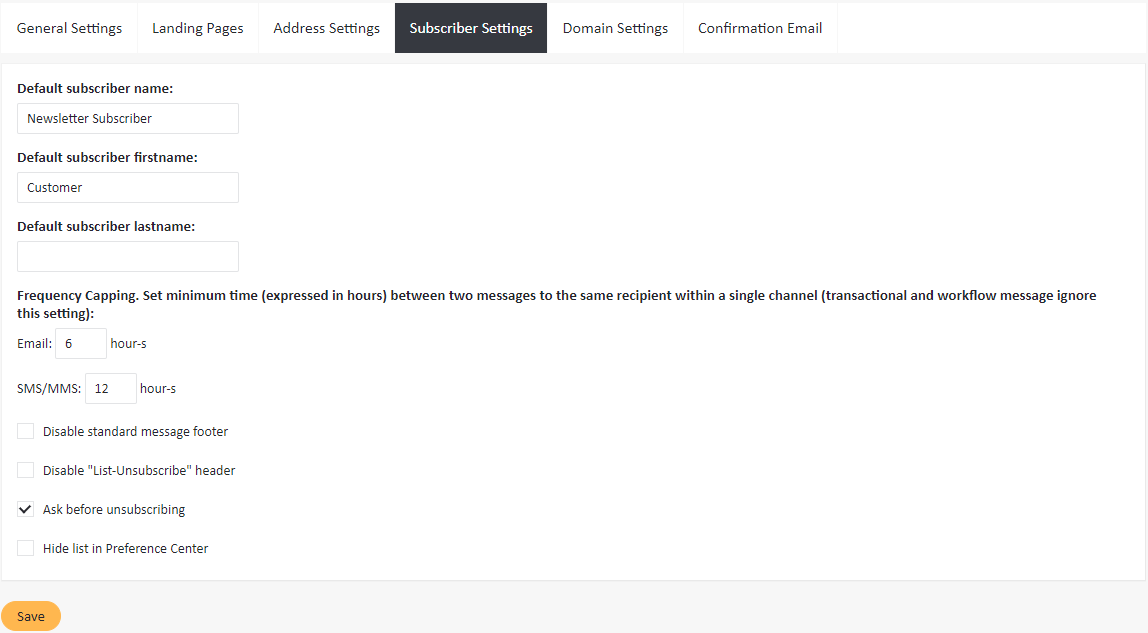
- Specify the Default subscriber name, which will be inserted into the value of the field *[subscriber_name]*, if the subscriber did not specify the first and last name
- Specify the Default subscriber firstname and Default subscriber lastname, which will be used as values of the fields *[subscriber_firstname]* and *[subscriber_lastname]* if the subscriber left them empty
- Set Frequency capping, i.e. the minimum time (in hours) between two messages to the same recipients within a single channel (this restriction does not apply to transactional and workflow messages)
- Disable standard message footer — if selected, subscribers on this list receive newsletters without the default footer (even when it was specified in the message wizard)
- Ask before unsubscribing — if this checkbox is selected, a subscriber is given several options after an attempt to unsubscribe: suspension of messaging, updating personal data, etc.
- Hide list in Preference Center, in case you do not want the subscribers to see the list and manage their subscriptions
In the Domain Settings tab you can enter the domain used for click tracking.
In the Confirmation Email tab you can create a confirmation email using a ready-made template or by uploading your own branded one.
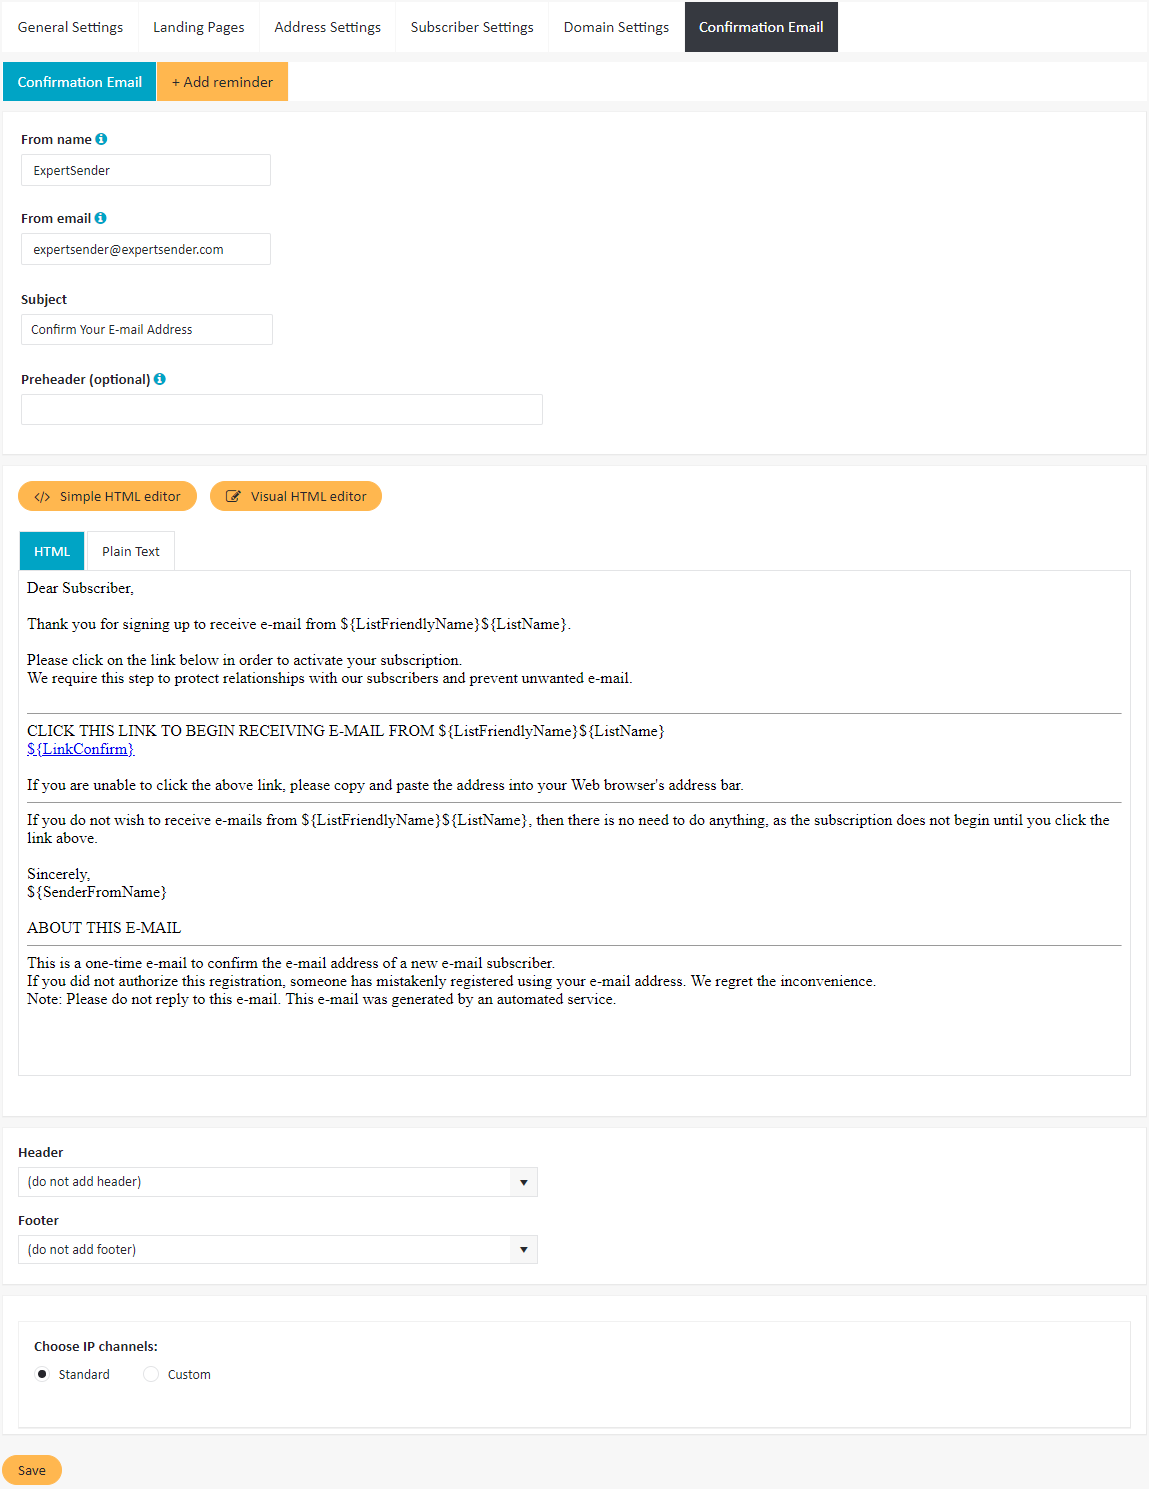
When downloading a template in a zip-archive format or editing it using an editor, make sure that the system confirmation link *[link_confirm]* is included in both the HTML and the plain text version of the message, otherwise the system may generate an error.
