Webforms
Webforms in ExpertSender allow you to add simple subscription forms to your website (without design and branding). They enable automatic collection of subscriber data while adding them to your database.
To access the list of your webforms, select Subscribers > Webforms from the left-hand navigation.
To create a new webform, follow these steps:
- Click Create new webform.
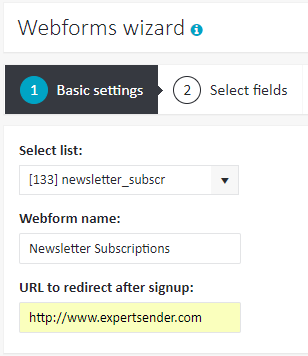
- Fill in the fields in the Basic Settings tab:
- Select list: you need to select one of your subscriber lists, to which subscribers will be added in real time when the form is submitted
- Webform name: enter a name which will be displayed in the list of webforms
- URL to redirect after signup: a link to a thank you page (optional). The field can remain empty.

- Once you are done, click Next.
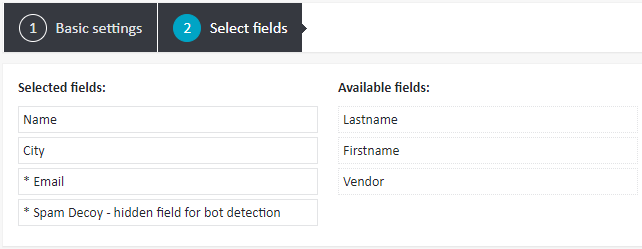
- In the Select fields tab you need to choose the fields that will be displayed on the subscription form. You need to drag the required fields from the right column to the left column. Two fields are mandatory: Email and Spam Decoy (an invisible field which will prevent spam bots from submitting your form). The remaining fields can be added optionally. Note that you will be able to add to the form only such custom fields, which were marked as visible when they were created.

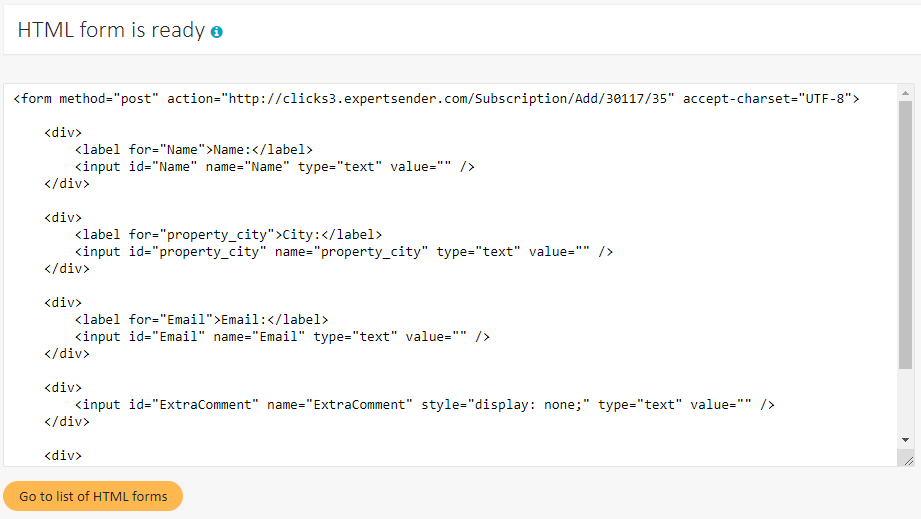
- After clicking the Finish button, the system will generate the HTML code of the form, which can be copied and added to the desired page of the site.

After a user completes the subscription form, their data will be saved in the system: a new subscriber will be added to the specified mailing list, and the information from the completed fields will be added to the appropriate subscriber fields.
The number of subscribers added via webforms can be viewed in Reports.


