Creating opt-in prompts to collect consent for web push notifications
Before you can send web push notifications to your customers, you need their permission first. These opt-in prompts show up in your customer’s browser and ask for their consent.
Let’s look at the two types of opt-in prompts you can create in ECDP and how they work.
Double opt-in prompt
Recipients are shown two browser notifications in the following sequence:
- Personalized pop-up prompt: this is your personalized message where you explain why they should accept notifications. You control what it says and when it appears.
- Browser system prompt: after they accept your custom pop-up, their browser shows the official permission request.
Your customer needs to say “yes” to both prompts to start receiving your notifications.
Here’s why the custom pop-up works well:
- You control when it appears – set it to show up on specific pages, after someone’s been browsing for a while, or after they’ve visited several pages.
- You write the message – explain what kind of notifications you’ll send and why they’re useful. This helps people understand what they’re signing up for.
- Better consent quality – when people understand what they’re agreeing to, they’re more likely to actually want your notifications. Plus, some browsers block notifications if users haven’t interacted with your site first.
How to create a double opt-in prompt
- Go to Settings > Web push > Opt-in prompts, then click Create opt-in prompt > Double opt-in.
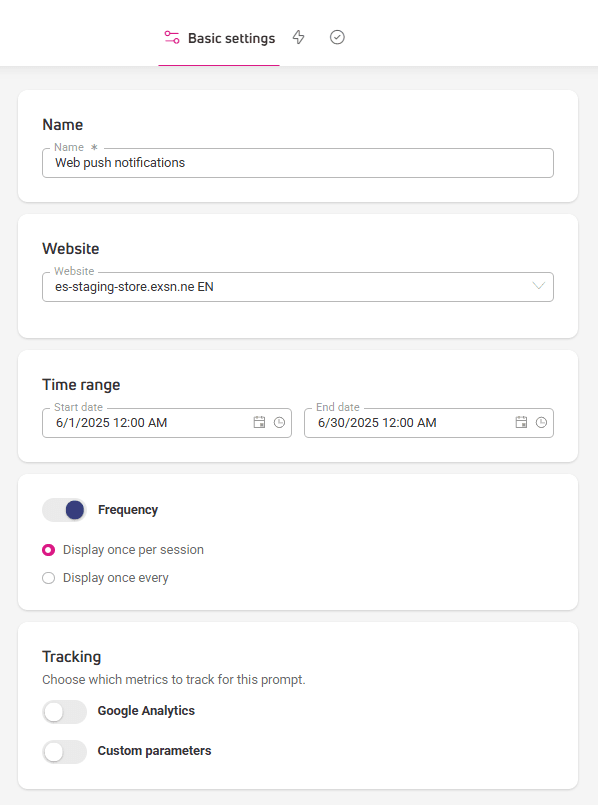
- Fill out the Basic settings:
- Give your prompt a name so you can find it later.
- Choose which website will show the prompt.
- Set the time range when it should be active.
- In Frequency, decide if it shows once per visit or at regular intervals.
- Optionally turn on tracking with custom parameters or Google Analytics.

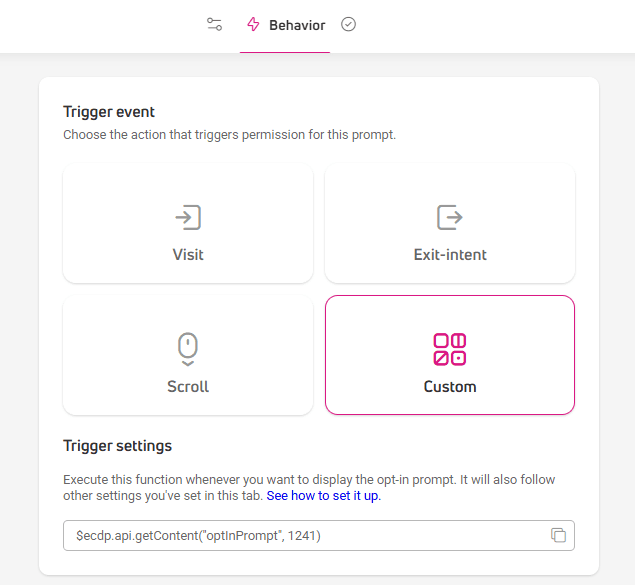
- Set up your Triggers (when the prompt appears):
- Visit – shows when someone lands on the page.
- Exit intent – shows when someone moves their cursor to leave.
- Scroll – shows when someone starts scrolling (you set how far down the page).
- Custom event – the prompt will appear when a user takes a specific action in your store, like clicking a button or link, instead of showing up right when they land on the page. It requires extra setup – see the How to set up a custom event section below.

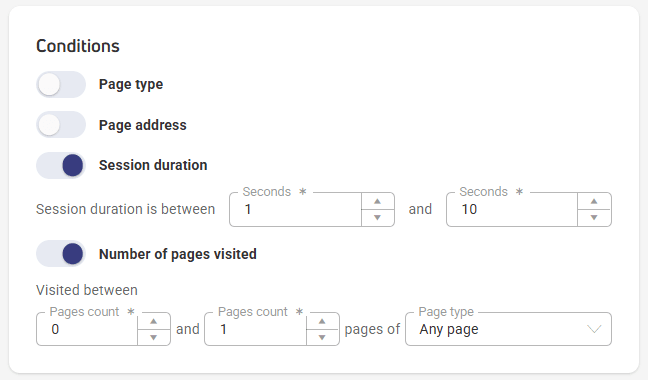
- Specify additional conditions, such as the page address, page type, or session duration, to control when the prompt is displayed.
- Decide who should see the prompt.
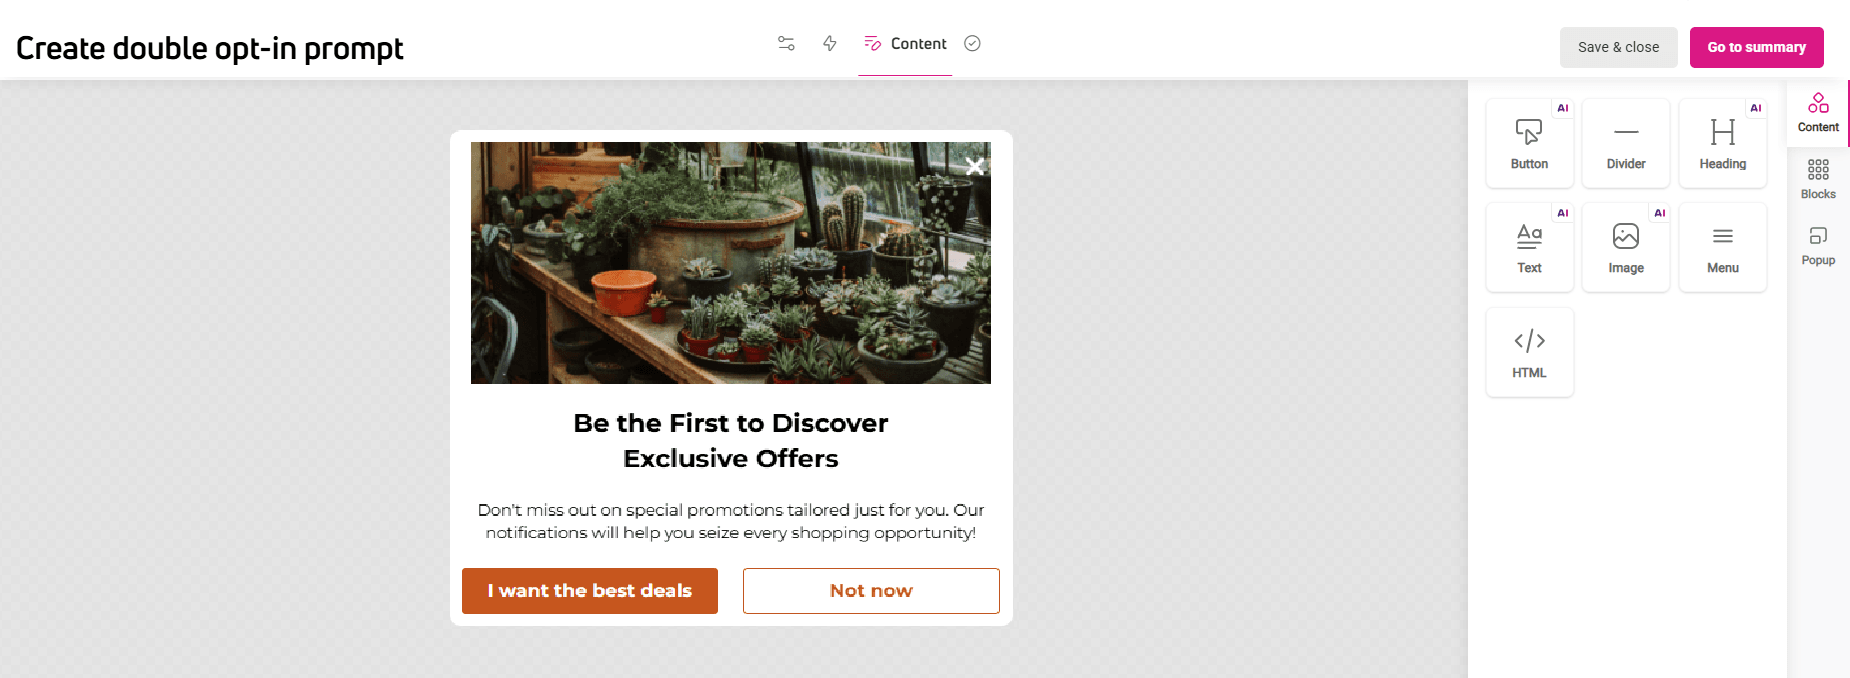
- Design your Content — this is where you create your custom pop-up. Make it match your brand and clearly explain what you’re offering.

- Review everything in the Summary section, then click Activate to start showing your prompt.
Single opt-in prompt
A single opt-in prompt skips your custom message and goes straight to the browser’s built-in permission request.
Here’s what you should know:
- High conversion rates – these prompts are very effective at getting consent
- No customization – you can’t change how they look or what they say
- Browser dependent – each browser handles these differently
How to create a single opt-in prompt
- Go to Settings > Web push > Opt-in prompts, and click Create opt-in prompt > Single opt-in.
- Fill out the Basic settings:
- Choose which website will show the prompt.
- Give your prompt a name so you can find it later
- Set the time range when it should be active.
- In Frequency, decide if it shows once per visit or at regular intervals
- Assign a name to the opt-in prompt to easily identify it among others.
- Choose the website where you want to display the prompt.
- Specify the time range during which the prompt should be displayed.
- In the Frequency section, determine whether the prompt should appear once per session or at a specified interval.
- Optionally, enable tracking by adding custom parameters or using Google Analytics.
- In the Behavior section:
- Configure your Triggers – choose when the prompt appears and any additional conditions:
- Visit –pop-up will appear when the user enters the page.
- Exit intent – pop-up will appear when the user moves the cursor outside the store window.
- Scroll – pop-up will appear when the user starts scrolling the page. Set a threshold (page scroll depth in %) that will trigger the pop-up.
- Custom event – your pop-up will appear when a user takes a specific action in your store, like clicking a button or link, instead of showing up right when they land on the page. To use custom events, you’ll need to complete a few extra steps. You’ll find the instructions in the How to set up a custom event section.
- Then select additional conditions for displaying the prompt, such as the address, page type or the duration of the session.

- Configure your Triggers – choose when the prompt appears and any additional conditions:
- Check the Summary and click Activate.
How to set up a custom event
A custom event takes the form of a function: $ecdp.api.getContent(type, id, maxWaitTime).
This function contains three parameters related to the content you want to display:
- type – required – specifies the content type. For opt-in prompts, this is optInPrompt.
- id – required – specifies the identifier of the specific content you want to display. You’ll find the ID in Settings > Web push > Opt-in prompts > ‘ID’ column.
- maxWaitTime – optional parameter (in milliseconds) – determines for how long the system will try to display the prompt after a user action. The time range is 0-10,000 milliseconds (defaults to 0 ms). You don’t need to include the maxWaitTime parameter.
For the custom event to work correctly and the opt-in prompt to display on the desired action, please wait for our tracking script to load.
You can check this using the function: $ecdp.helpers.websiteIsReady
Add a custom event to your page’s HTML code
You can attach the function to a specific element on your page, like a button or link. This way, your personalized opt-in prompt will appear automatically when someone clicks that element.
Here are two examples. Both use the getContent method, which triggers the prompt with the specified ID.
Example 1: Button
““<button id="myButton">Display the prompt</button>

<script>
document.getElementById("myButton").addEventListener("click", function() {
    $ecdp.api.getContent("optInPrompt", 586);
});
</script>
Example 2: Link
<a href="#" id="OptInPromptLink">Display the prompt</a>

<script>
document.getElementById("optInPromptLink").addEventListener("click", function(event) {
event.preventDefault(); // Prevents the link from navigating
    $ecdp.api.getContent("optInPrompt", 586);
});
</script>
In both cases, the function:
- «listens» for clicks.
- triggers the personalized opt-in prompt with ID 586 when clicked.
Make sure your chosen prompt has Active status, otherwise it won’t display.
Example 3: Checking if the script has been loaded before triggering the opt-in prompt
// Check if ECDP script is ready and trigger opt-in prompt
if ($ecdp.helpers.websiteIsReady) {
    // Website is ready, trigger the opt-in prompt
    $ecdp.api.getContent("optInPrompt", 586);
} else {
    // ECDP script not ready yet, wait and check periodically
    const checkReady = setInterval(() => {
        if ($ecdp.helpers.websiteIsReady) {
            $ecdp.api.getContent("optInPrompt", 586);
            clearInterval(checkReady);
        }
    }, 100);
}
Add a custom event in the drag & drop editor
If you prefer not to edit your page code directly, you can use the HTML content block in the drag & drop editor. This method requires JavaScript code.
In the drag & drop editor:
- Find and add the HTML content block.
- Insert the JavaScript code from the examples above.
- Adjust the element IDs and prompt parameters to fit your needs.
Important notes
- The opt-in prompt will only load after the function is called.
- It will display only once per page view, for the same combination of type and ID parameters.
- Custom events only work for opt-in prompts with Active status.
Add a custom event using Google Tag Manager
If you don’t want to manually edit your page code, you can use Google Tag Manager to add a custom event. This solution works well if you’re already using GTM and want to use custom events without developer help.
To use this method, you need a Google Tag Manager account connected to your store.
Create a tag with a custom event that triggers the opt-in prompt
- Go to Google Tag Manager.
- Navigate to the container connected to the page where you’ll place the code.
- Go to the Tags tab.
- Click New to create a new tag.
- Name your tag, for example ‘Custom event – link click’ then click Tag Configuration.
- Select Custom HTML.
- In the HTML section, insert the function with defined type and id parameters, for example: $ecdp.api.getContent(«optInPromp», 586); These parameters specify which content created in ECDP will be triggered by the link click.
Set when the tag should fire
- Go to the Triggers section, where you configure the rule that will trigger the tag.
- Select Click – All Elements from the list.
- In This trigger fires on section, select Some Clicks.
- In the Fire this trigger when an Event occurs and all these conditions are true section:
- in the first field, select Click Text.
- in the second field, set the condition to equals.
- In the last field, enter the text that should trigger the opt-in prompt when clicked, for example «Allow notifications and receive a discount code».
- Save your changes.
If you don’t see Click Text variable in the dropdown menu, make sure it’s active:
- Go to the Variables tab.
- Click Configure.
- In the Clicks section, check Click Text.
Test if the tag works
- Test if the code was added correctly – click Preview in the upper right corner of the screen.
- Then go to your page and click the text that triggers the opt-in prompt function.
- Return to the preview window and check if the created tag was triggered.
- Close the preview window and click Publish.
How to live test an opt-in prompt triggered by a custom event
The function must be called in the browser when you want to test the prompt with a custom event using the “Live test” option:
- Go to your store page and open the Inspect tool:
- using your keyboard by pressing F12,
- or right-clicking and selecting it from the context menu.
- Select the Console tab.
- Type or paste the copied function with the prompt parameters.
- Press Enter to run the script.
- This will trigger the prompt directly from the console, which is necessary to activate the custom event.