Creating a workflow
To create a new workflow, select Workflows > Workflows from the left-hand navigation. Click Create new workflow.
There are two approaches to building new workflows: loading a workflow template and building it from scratch.
Load a template#
You can choose from a list of predefined templates by clicking the Load template button at the top of the screen in the Create/edit workflow section and selecting one of the available options:
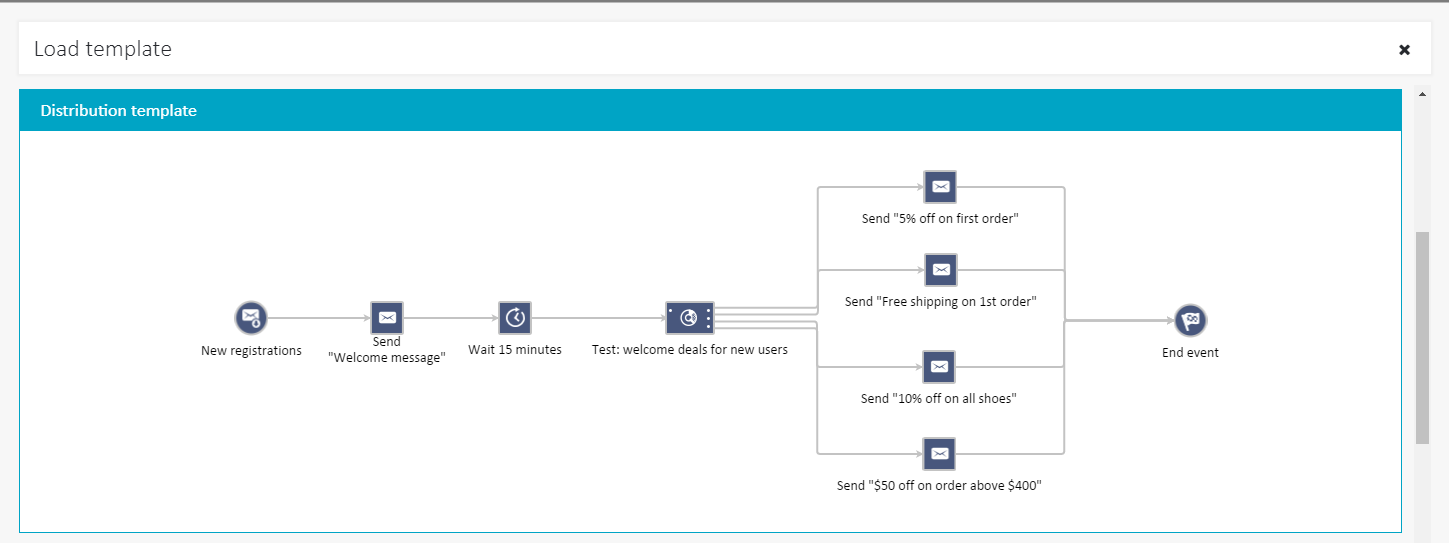
After the template loads into the canvas, all you need to do is make sure the required settings are set according to your needs.
Build a workflow from scratch#
When building a workflow from scratch, use the drag & drop elements:

Please remember that each workflow needs to have at least one Start event and one End event placed on the canvas.

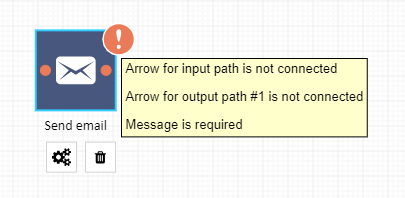
In order for the workflow to be activated, all visible errors must be fixed. Elements that are marked with an exclamation mark need attention to be resolved. Placing the mouse over the exclamation mark will display a list of issues:
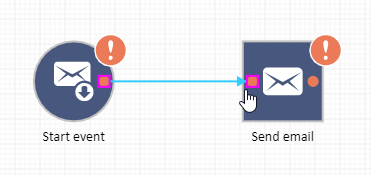
All objects on the workflow canvas must be interconnected with arrows that indicate the sequence of events within the workflow. In order to connect objects with an arrow, click on the node on the right side of the originating element and drag the arrow to the node on the left side of the target element:
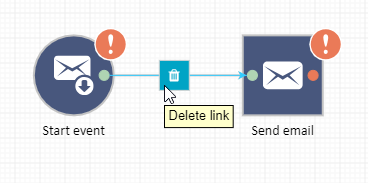
 If you would like to remove an arrow, then click on it and a trashcan icon will allow you to remove the relationship between two elements:
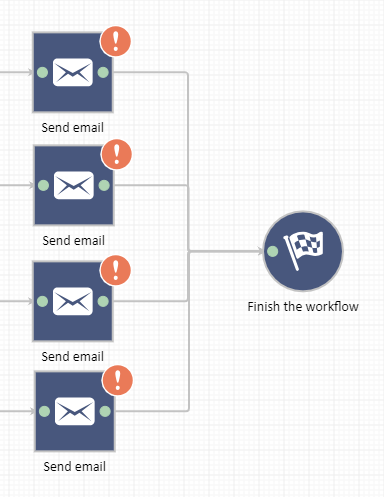
It is possible to connect two or more arrows to one element. For example:
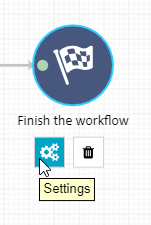
When an object on the workflow canvas is clicked, it is possible to edit its settings or remove it:
The workflow also needs to have a name that you can set above the toolbar with workflow elements:

It is only possible to save and activate a workflow, when all the flagged issues are fixed. Only then the Save and activate workflow button becomes active:

However, it is possible to save the workflow as a draft at any time with the Save as draft button.