Triggers
Trigger messages have a fairly wide range of applications. A trigger message is always associated with a specific event or date and triggered by it. For instance, a trigger message can be sent as a payment reminder a week before your subscriber’s payment deadline, or as a reaction to a subscriber’s click on a specific link. Trigger messages are typically less personalized than transactional messages, as they are destined for a wider audience.
To create a trigger message, follow these steps:
Preparation#
- From the left-hand navigation, select Email Messages > Triggers.
- Click Create trigger.
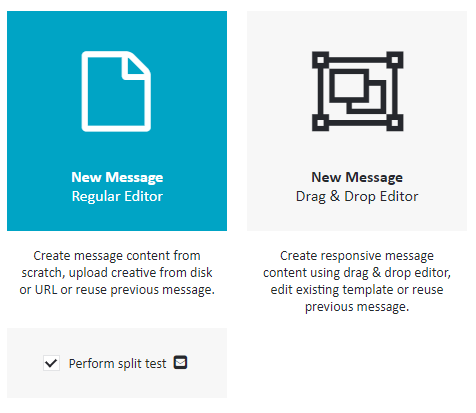
- There are two types of editors in which you can compose your message, the Regular Editor and the Drag & Drop Editor. Select the one you prefer.

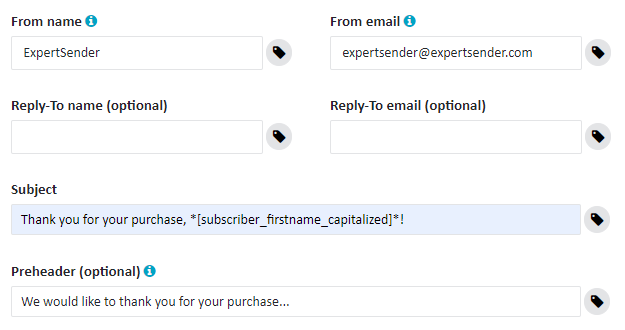
- Complete the From name field with the name which you want to appear in your subscriber’s From column. In the From email column enter the email address from which you intend to send your message. You may also add another name and another email address for your subscribers’ reply emails – in this case, complete the Reply-To name and Reply-To email fields.
What sender name should you choose?#
The sender name entered in the From name field is typically the name of your company. We recommend using the same name and address in all your emails, as consistency helps with brand recognition. Furthermore, email messages from known addresses are more likely to be placed in the inbox folder, and any pictures included in them are more likely to be displayed.
- Enter the Subject of your message.
- Optionally, you may add a Preheader – a short description which follows the subject in the list of messages in the inbox. Preheaders are an effective tool for drawing your subscriber’s attention to your email and improving open rates.

- Please note that you can also use a personalization tag in any of these fields. To insert a personalization tag, click on the
 icon next to the relevant field and select the appropriate item.
Composing your message#
Drag & Drop Editor#
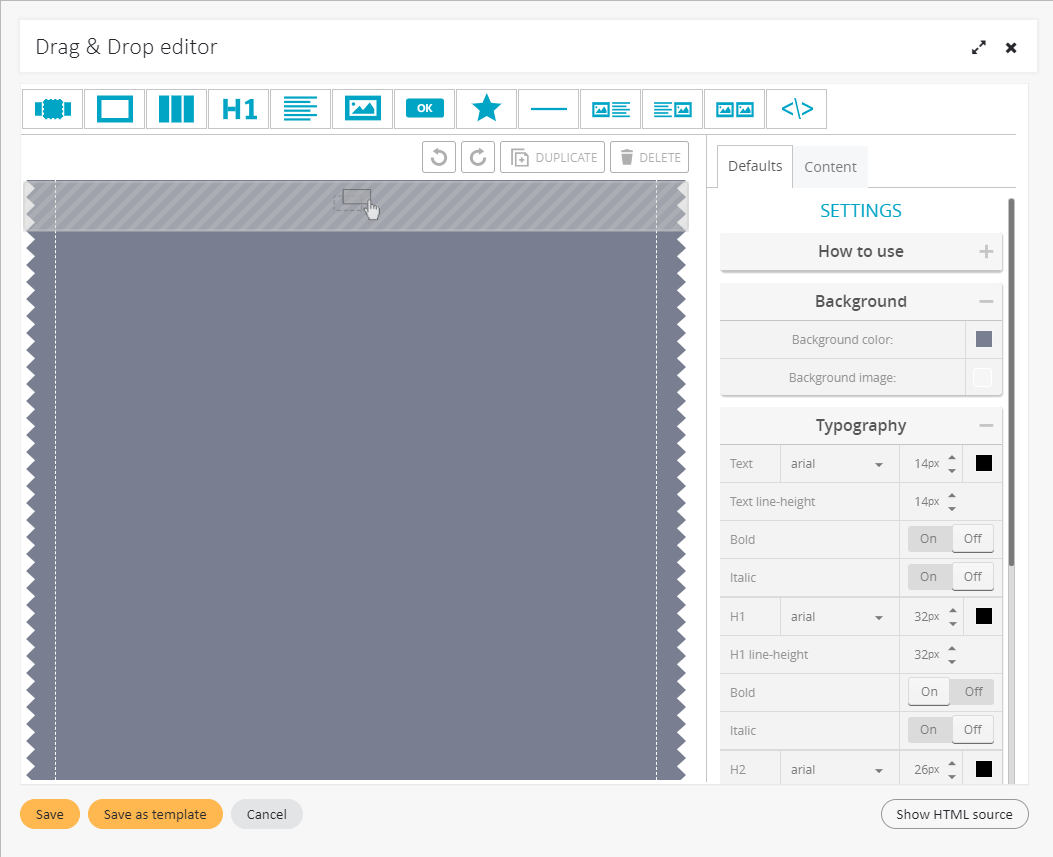
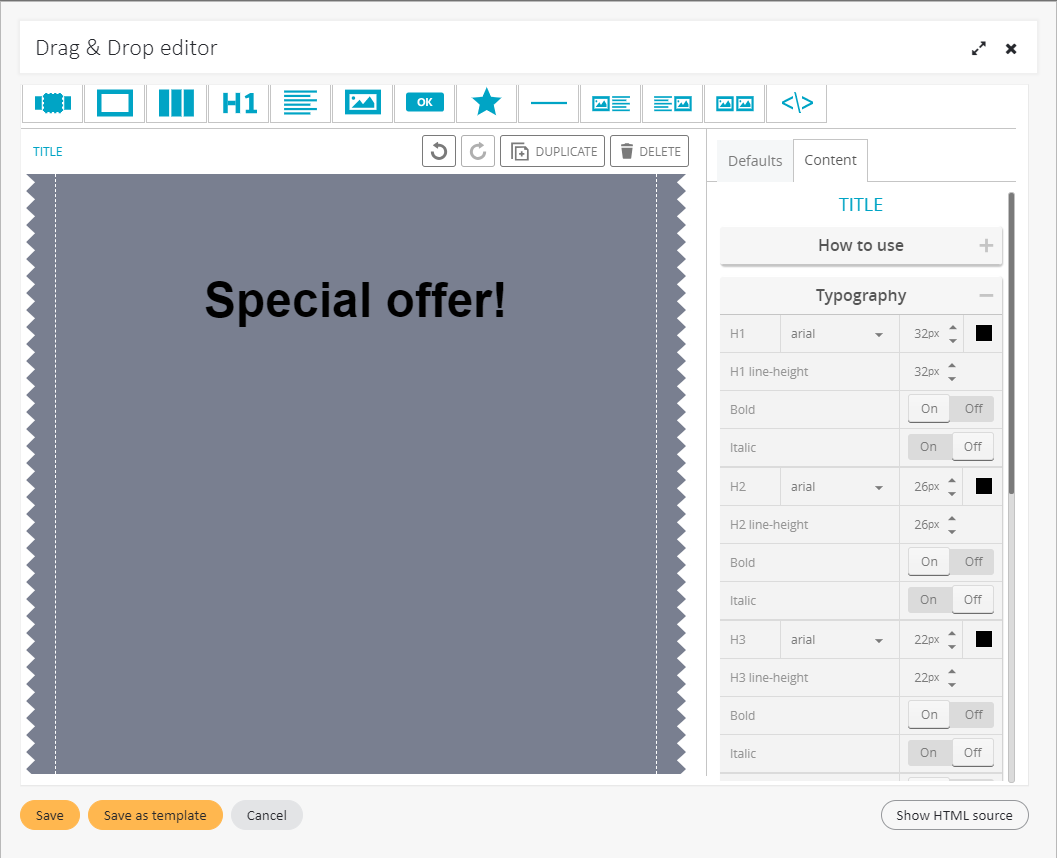
- If you choose the Drag & Drop Editor, you may compose your message by selecting the desired elements from a visual pane, dragging them into your working area and dropping them there.
- First, in the tab Defaults you may choose a background for your message and specify styles for elements such as the main text or headings.

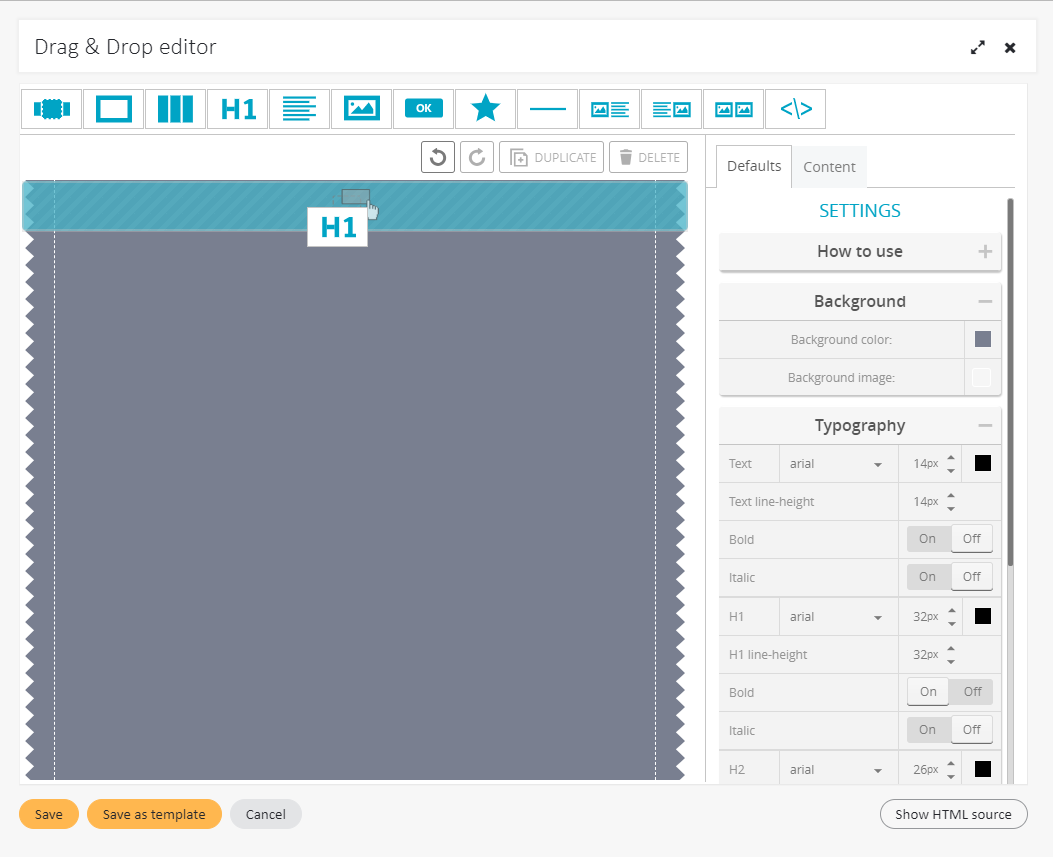
- Next, choose the desired element from the bar on the top. For example, you may choose to start your message with a title heading. Select H1/title from the bar on the top and drag it with your left button into the working area.
- At any time you may double click the inserted element to edit it. The Content tab on the right contains detailed information on the usage of each element – just click the How to use section.
- The Content tab also allows you to select the appropriate settings for each element.

- Remember that you can undo and redo each action using the buttons on top of the working area. You may also duplicate or delete any of your inserted elements.
- After your message is ready, click Save.
Regular Editor#
- It’s time to compose your message. If you already have the content of your email, you may upload it from your computer or URL. You may also reuse any older messages, introducing modifications if necessary.
- The default option is to compose your message in HTML.
- If you feel comfortable with HTML, you may select the Simple HTML editor. Then you need to type your code (like <p>…</p> and <strong>…</strong>) on your own.
- You may also select the Visual HTML editor. Type the content of your message. Add the appropriate structure and style using the editor toolbar.
- Subscribers may try to read your message on a simple device which cannot display HTML correctly. To cater for this, you can also create a plain text version of your message. Switch to the Plain Text tab and choose Text editor or if you already have some HTML content, you may Convert HTML to Plain Text.
- ExpertSender also allows you to leverage the cutting-edge email technology: AMP for email. If AMP is enabled for your account, you will also see the AMP HTML tab. Switch to this tab and click Simple AMP HTML editor to enter your AMP HTML code.
- After your message is ready, click Update.
#
Polish, test and preview:#
- You should see the content of your message in the content window. At this point, there is a number of additional options which you can explore:
Headers and footers#
You may add a header or a footer to your message. Usually this contains a company logo, contact data or similar content. In order to insert a header or footer with this option, you need to prepare it earlier as a template. Go to Templates to learn how to prepare header and footer templates. Once you save it under a specific name, you will be able to access it here under that name.

However, remember that you can also use the editor in the message wizard to create a header and a footer for each message individually.
Google Analytics#
If you use Google Analytics, you may integrate it with your ExpertSender messages in order to gain access to the insights offered by this tool. Simply check Enable Google Analytics and fill in the fields. To learn more about Google Analytics integration, read Use Google Analytics with ExpertSender.
URL integrations#
URL integrations enable you to add custom information to the URLs in your message. For instance, you may include a personalization tag or any other variable. Later, you may use this information to carry out statistical analysis. To learn more about URL integrations, click URL integrations.
Add an attachment#
You may add attachments to your message. Click Manage attachments and select the files from your hard drive. The size of all attachments cannot exceed 400kB.
Blacklist check#
When you select Blacklist check, our system scans the entire HTML code, derives all domains from URLs, but also from all redirected URLs and checks each domain against major blacklists, such as SpamHaus, SURBL and URIBL. We strongly discourage sending any creatives containing blacklisted domains or URLs that redirect to any blacklisted domains.
Send to seed list#
Seed lists are designed to store either test email addresses or 3rd party seed email addresses. Test email addresses are usually used by our clients to test creatives (their deliverability and rendering) before the actual message is launched. Best practice is to first test a creative by sending it first to your test email addresses at major ISPs like Yahoo, Outlook.com, Gmail or AOL. 3rd party seed email addresses are usually used for estimating the percentage of inbox placement. To learn more about seed lists, read Managing lists.
Email test#
Email tests are a useful tool to verify how your message will be displayed in various clients. Our email test utility offers previews for all of the most popular desktop, web-based and mobile clients.
Live preview#
With the Live preview utility you may verify how your message will be displayed for a specific email address. Live preview is particularly useful if you want to test your Dynamic Content. For example, you may check if a subscriber will receive a message with their name displayed properly.
- If you are not satisfied with the result, continue editing your message. Otherwise, click Next.

#
Recipients
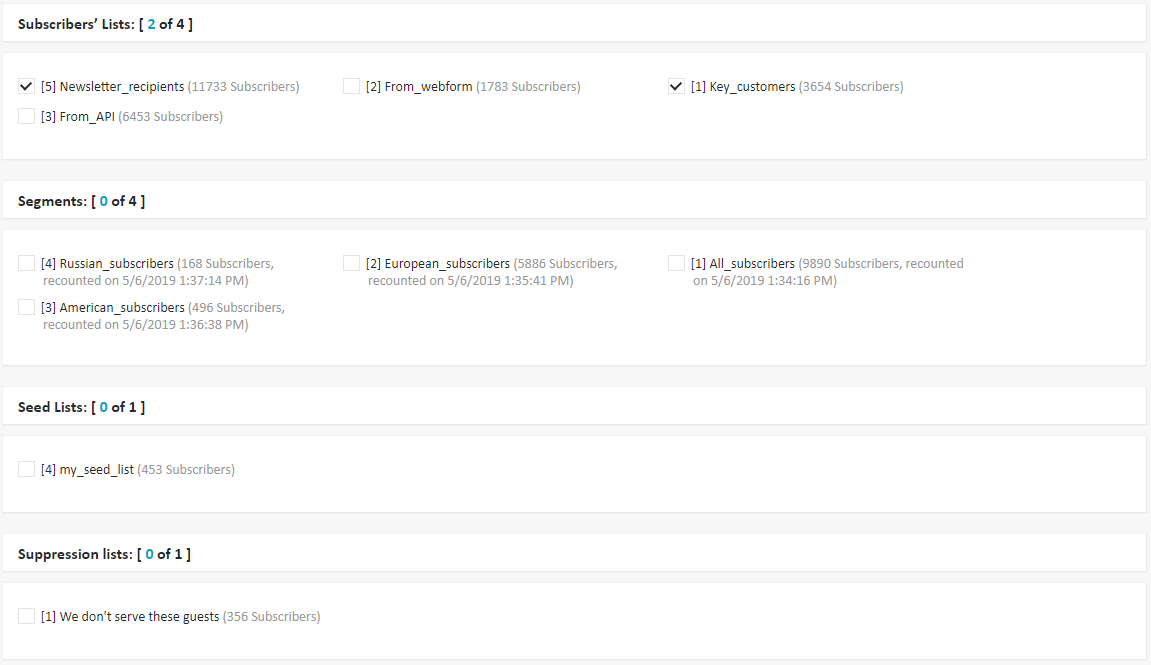
- Select the subscriber lists and/or segments you want to send your message to (you may also include seed lists or suppression lists).

- Click Next to proceed.
#
Choose delivery settings#
- The option Override delivery cap refers to the limit on the number of messages which may be sent to one subscriber within a given period of time. Delivery capping by default prevents your subscribers from being flooded with too many messages and it is advisable to set a sensible cap for each list (see Managing lists for more information). However, if you need to send more than one message to a subscriber within a short period of time, allow the cap to be overridden so that your message will not be blocked even if the limit is reached.
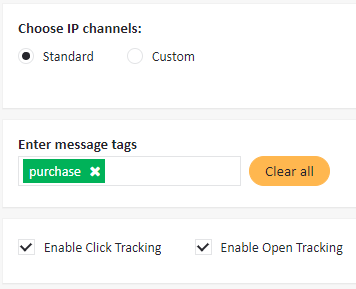
- Select the IP channel configuration which will be used for sending the message. If you select Standard, your message will use the default configuration. To adjust IP number usage to your needs, select Custom and determine the email load associated with each IP.
- You may also add some tags to your message, such as “purchase” or “special offer”. Later on, you may use a tag to find a specific message more easily, or to create a segment of subscribers who, for example, have already received a “special offer” email.

- Specify what will activate the trigger message:
Time condition#
 You may choose to send a trigger message at a specific time before or after a given event, the date of which is stored in a custom field. Possible use cases include the following scenarios:
- If a subscriber does not log in for a long time (e.g. a month), you may send them a reminder with a “We miss you!” message (see above).
- One week before your customer’s insurance expires, it is worth reminding them about a need to extend it.
- A week after the last order, you can ask your customer to leave feedback on the quality of delivery.
You may think of many other uses for the time condition, which are dependent on the type of business you run and your specific needs.
API call#
A trigger message can also be activated by an API request. To be able to use this option, examine the ExpertSender API documentation.
Custom field’s value change#

You may choose to send a trigger message when a specific custom field changes to a given value. Possible use cases include the following scenarios:- A subscriber’s status changed from normal to VIP. You can congratulate them on becoming a VIP member.
- A subscriber has already placed 20 orders. You may thank them for their involvement with your online store!
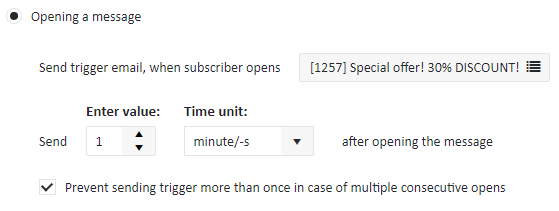
Opening a message#

A trigger message may be sent after a subscriber opens a specific message. For instance, if they open a message which contains a discount, you may assume that they are interested in offers of this type and send them another discount email. You may also choose if you want the email to be resent if the subscriber opens the same message more than once.Clicking a link in message#
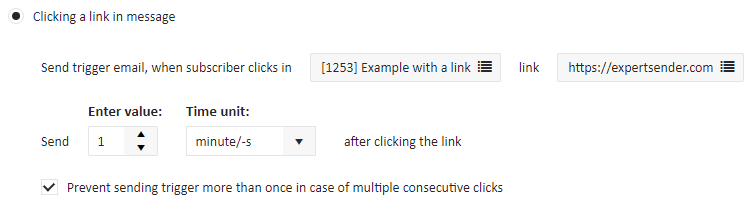
 You may also schedule to send a trigger message after a subscriber clicks on a link in a message. For instance, if a subscriber clicks on the link to your company’s website, you may assume they are interested in your company and you could consider sending them some more information.
Clicking a tagged link#
 It is also possible to send a trigger message to a subscriber who clicks on a link with a specific tag. For instance, if a subscriber clicks on links containing words “woman” and “women”, you may assume that they are interested in products for women and you may want to send them some other women’s product offers.
Anniversary / monthly recurring date of the event#
 A trigger message can be scheduled to be sent every month or every year before or after a given anniversary. For instance, you may want to mail your subscriber one day before their birthday and offer them a special birthday discount.
Reaching a goal#
 With this criterion enabled, a trigger message will be sent whenever a subscriber reaches a predefined goal (e.g. visits a specific page, abandons their cart, or spends a specified amount of money).
 You may choose to send a trigger message at a specific time before or after a given event, the date of which is stored in a
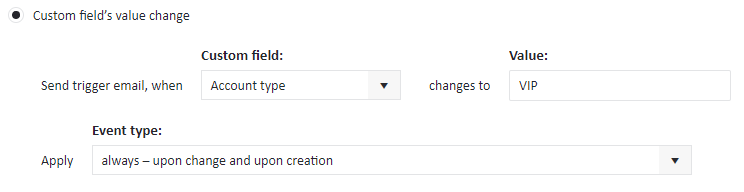
 You may also schedule to send a trigger message after a subscriber clicks on a link in a message. For instance, if a subscriber clicks on the link to your company’s website, you may assume they are interested in your company and you could consider sending them some more information.
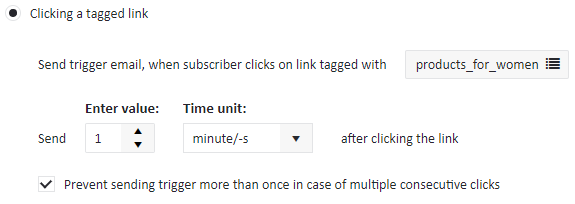 It is also possible to send a trigger message to a subscriber who clicks on a link with a specific tag. For instance, if a subscriber clicks on links containing words “woman” and “women”, you may assume that they are interested in products for women and you may want to send them some other women’s product offers.
 A trigger message can be scheduled to be sent every month or every year before or after a given anniversary. For instance, you may want to mail your subscriber one day before their birthday and offer them a special birthday discount.
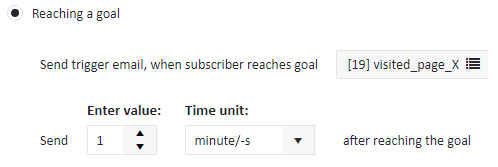 With this criterion enabled, a trigger message will be sent whenever a subscriber reaches a predefined goal (e.g. visits a specific page, abandons their cart, or spends a specified amount of money).
You’re almost there!#
- Carefully analyze the summary. If you would like to make any changes to the message content or delivery settings, feel free to return to any of the previous steps.
- If you are ready, click Finish.
Your trigger message is ready#
Congratulations! You have successfully created and activated a trigger message. From now on, it will be sent automatically to any subscriber who fulfills the criteria you have specified.
To deactivate a trigger message, find it in the list of trigger messages (Email Messages > Triggers > Active) and select the Deactivate icon in the Actions tab.
To edit a trigger message, make sure that it’s inactive (or deactivate it). Then, go to the Email Messages > Triggers > Inactive tab and click the Edit icon.