Subscriber base hygiene
A well-knit email campaign can bring you considerable profit. The key factor leading to a successful campaign is not only the size of your subscriber base, but also its quality. It the quality that the number of responses to messages and subsequent conversion into orders depend on. Hence, one of the most important tasks of a marketer is to constantly keep the subscriber base up-to-date.
Regular base hygiene will increase your rating in the spam filtering algorithms of mail services, since the behavioral patterns of recipients will not arouse suspicion. You will not be familiar with the problem of spam traps (email addresses used to identify spammers and unscrupulous companies that buy user databases). Finally, you will save a decent amount of money which you could spend on sending ineffective messages.
We recommend the following subscriber database hygiene practices:
- Double opt-in
- Removing problematic email addresses
- Mass subscriber removal
- Suppression lists
- Snoozing subscribers
- Reactivation campaigns
#
1) Double opt-in
A confirmation subscription (double opt-in) is a standard practice of the majority of senders who are limited by strict anti-spam legislation. This method assumes that a potential subscriber can be included in the list of recipients only after they are sent a confirmation email and they confirm by clicking on a confirmation link that they agree to be included in the list. Not all countries impose legal double opt-in requirements on senders, but double opt-in is still strongly recommended by postal providers.
What are the main benefits of the confirmation subscription? This method allows you to have full control of the main sources of email addresses which enter your database. With double opt-in enabled, you update your database only with real-life emails of users interested in your offers. This entails that the response rate to the message will be higher, and the percentage of bounces will be minimized.
In ExpertSender, you can easily change the opt-in mode for any subscriber list. To do this, select Subscribers > Lists from the left-hand navigation, find the subscriber list you want to customize and click the Settings icon to the right. Then, go to the General Settings tab and modify the Opt-in mode field (Single Opt-in or Double Opt-in).
Afterwards, you may compose a confirmation email by either using a ready-made template or by creating it from scratch. After downloading a template in the ZIP format or creating it using an editor, make sure that the confirmation link *[link_confirm]* is included in both HTML and the plain text version of the message.
#
2) Removing problematic email addresses
In accordance with the rules on mass emails established by mail providers, if more than 5% of your messages are sent to invalid addresses, it may result in emails sent from your domain being placed in the Spam folder or even completely blocked. Emails that have returned a hard bounce (a nonexistent mailbox) should be excluded from the subscriber database, and this is what ExpertSender does by default.
According to the same rules, the maximum permissible percentage of complaints about your messaging should not exceed 0.4%. Technically, a complaint is an event of a subscriber clicking on a This is spam button in any email interface. Since the complaint is an unequivocal manifestation of the subscriber’s dissatisfaction with the newsletter, it would be a mistake to continue sending messages. Therefore, the system automatically deletes the addresses of the complainants from the mailing lists, as well as the addresses of the unsubscribers who expressed their willingness to stop receiving emails by clicking on the link of the formal reply containing the *[link_unsubscribe]* system tag.
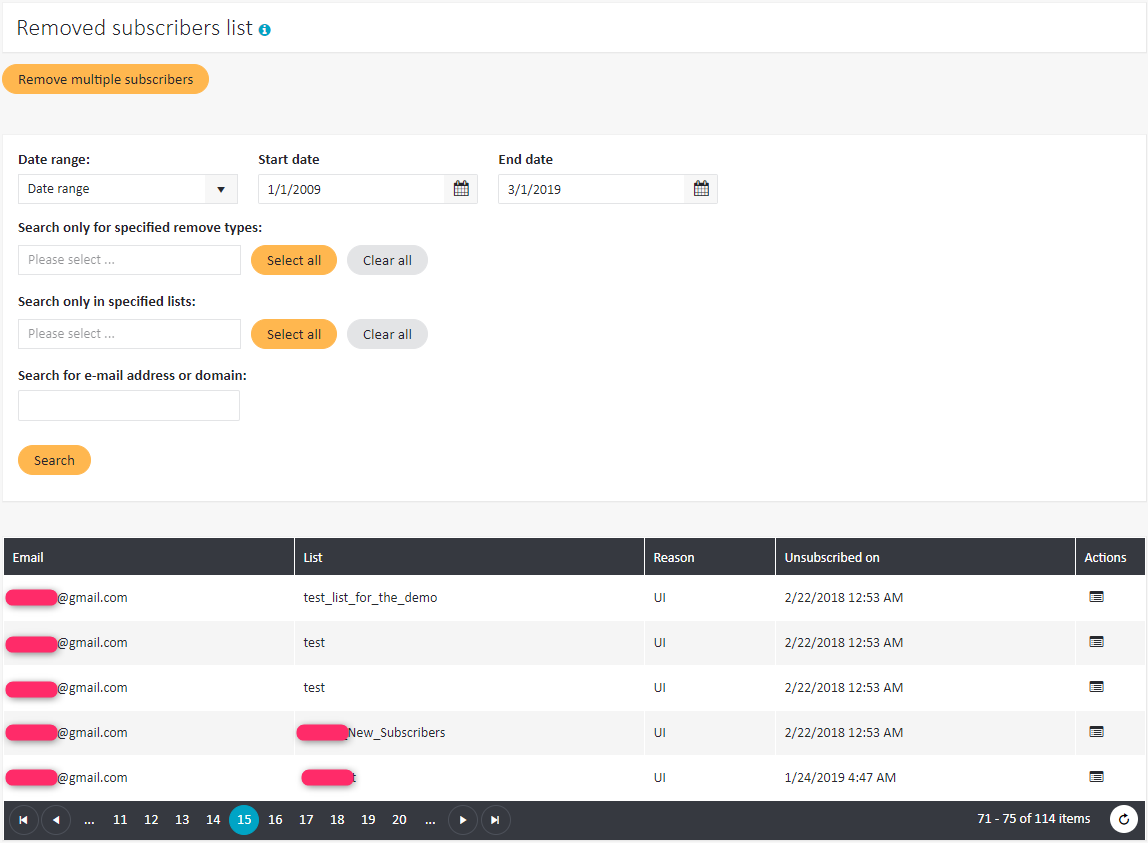
This is how ExpertSender keeps your database up to date, if only you send messages regularly. All problematic addresses (nonexistent mailboxes, addresses of complainers and unsubscribers) are removed from subscriber lists. You can still access such emails by selecting Subscribers > Removed from the left-hand navigation. You may also filter them by list or by the time and reason of deletion.
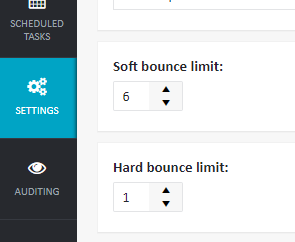
Occasionally, when you attempt to send an email, it returns a soft bounce (for instance, when the recipient’s mailbox is full or the server is temporarily off). As a rule, this is a short-term problem, and communication with the subscriber is soon restored. However, if the address returns an error systematically, then it will also be deleted by the system after several attempts. The default soft bounce limit is 6, although you can adjust it in Settings > Business Unit > General tab:
In addition to deletion, email addresses of subscribers clicking the Spam button are placed on the blacklist. This insures you against the likelihood of re-adding such an address to the list in the future and increasing dissatisfaction of a subscriber who explicitly expressed the undesirability of receiving your messages. A blacklisted email address is rejected when you are trying to import it.
To access your local blacklist, select Subscribers > Blacklist from the left-hand navigation. You can add blacklisted addresses or domains on your own, either manually or by importing a file up to 30 MB in size. You can also remove subscribers from the local blacklist and return them to the newsletter. To do this, click on the Delete button next to the desired email.
Subscribers who complained about your emails are additionally marked on the platform as “Complainant”. To return such subscribers to the newsletter, you must uncheck this box. To do this, in the “Deleted” list, opposite the desired email, click on the button “Remove the mark of the complainant”.
#
3) Mass subscriber removal
Mass remove is a tool for cleaning your database. It allows you to remove subscribers from individual or multiple lists.
To use mass remove:
- Select Subscribers > Removed from the left-hand navigation.
- Click the Remove multiple subscribers button. You will be redirected to the Mass remove site.
- Select the matching mode by which the subscribers will be matched (Email or Custom subscriber ID)
- Select the lists from which subscribers should be removed
- Add subscriber data in one of the following ways:
- Manually
- Enter relevant entries (emails/domains/MD5) line by line
- Click Submit.
- The mass removal process will start. When it is ready, you will receive a notification in the Tasks bar.
- Import from a file
- Choose a file which fulfills the following conditions:
- in a delimited format (preferably “,”)
- type: CSV, TXT, XLS, XLSX, or ZIP containing one of the listed files (the TSV format is not supported!)
- encoding: preferably UTF-8
- file size: no more than 30 MB (if the file exceeds this limit, you can archive it in ZIP)
- A confirmation dialog should appear. Click Confirm.
- The mass removal process will start. When it is ready, you will receive a notification in the Tasks bar.
- Choose a file which fulfills the following conditions:
- Manually
4) Suppression lists
Suppression lists are a tool which lets you exclude certain email addresses from any send. To use a suppression list, you need to select it while creating a message at the Recipients stage of the message wizard. If a given email address is included both in a list or a segment selected for a given message and in a suppression list, the subscriber will not receive the message.
To access your suppression lists, select Subscribers > Suppressions from the left-hand navigation. The table displays all suppression lists with information on their size, the disk space they occupy, the date and time of last use and last update.
To create a new suppression list:
- Click Create new suppression list in the Suppression lists section. You will redirected to the Create new suppression list site.
- Specify the name of the suppression list.
- Select the preferred type of import:
- Allow importing only email addresses
- Allow importing email addresses and whole domains (for example, this is useful if you want to exclude all addresses belonging to your company)
- Click Save.
In the Actions column of each list, you can perform the following activities:
- Browse: view all addresses, domains, and signatures included in the list, with a possibility to delete selected data and export the list as a CSV file
- Add new entries: enter relevant entries (emails/domains/MD5) line by line
- Import new entries: import subscriber data from a file which fulfills the following conditions:
- in a delimited format (preferably “,”)
- type: CSV, TXT, XLS, XLSX, or ZIP containing one of the listed files (the TSV format is not supported!)
- encoding: preferably UTF-8
- file size: no more than 4 MB (if the file exceeds this limit, you can archive it in ZIP)
- Mass remove entries: you may remove any number of subscriber from your suppression list. To do this, add subscriber data in one of the following ways:
- Manually
- Enter relevant entries (emails/domains/MD5) line by line
- Click Submit.
- The mass removal process will start. When it is ready, you will receive a notification in the Tasks bar.
- Import from a file
- Choose a file which fulfills the following conditions:
- in a delimited format (preferably “,”)
- type: CSV, TXT, XLS, XLSX, or ZIP containing one of the listed files (the TSV format is not supported!)
- encoding: preferably UTF-8
- file size: no more than 30 MB (if the file exceeds this limit, you can archive it in ZIP)
- A confirmation dialog should appear. Click Confirm.
- The mass removal process will start. When it is ready, you will receive a notification in the Tasks bar
- Choose a file which fulfills the following conditions:
- Manually
- Settings: change the name or the suppression list or the import settings
- Delete: delete the list
5) Snoozing subscribers
The Snoozed section includes subscribers who have independently indicated the time limit for receiving emails on the system unsubscribe page, which offers an alternative to a full stop of messaging:
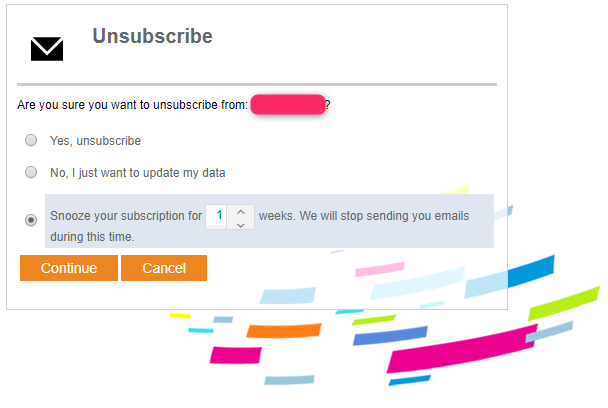
Under Snoozed you can find the statistics of such users and the period of suspension of messaging for them. After the specified period, the distribution will automatically resume. You can do it manually on the request from the subscriber by clicking on the corresponding button in the Actions tab.
#
6) Reactivation campaigns
According to internal ExpertSender performance research done on the Russian market in 2014, about 25% of email addresses become irrelevant annually. If you do not clean your subscriber database and do not fill it with new users, your email campaigns will reach fewer and fewer subscribers. It is highly advisable to try to work with an active audience and consider a reactivation strategy for those who have lost interest in your messages.
For example, it is common practice to use segmentation to target inactive subscribers and send them a reactivation campaign. Such a campaign is a tool which helps you determine who still wants be on the subscriber list and who would rather be unsubscribed (note that from the point of view of email marketing, it is less harmful for the sender to unsubscribe a subscriber than to let him or her hit the Spam button). A reactivation campaign should be carefully orchestrated, since sending to inactive users can increase the percentage of spam complaints and hard bounces. We recommend sending such messages in small chunks (the size of the segment depends on the size of your base), carefully monitoring the main indicators with each subsequent send.
We are confident that the capabilities of our platform will help you keep your email database up-to-date and your subscribers interested in your messaging and involved in communication. After all, a loyal subscriber will sooner or later turn into a buyer or client.