Creating and running campaigns
Web Module campaigns are a tool which allows you to react to a potential customer’s visit on your website. With a Web Module campaign enabled, you can target visitors who abandoned a shopping cart with some products in it and send them a reminder, or send your subscribers an automatic price drop notification.
Please note:
- Each campaign can handle a single event type, generated by a single visitor type within a single website. Only one campaign with the same website, event type and visitor type can be active at the same time.
- Before you run a campaign, you have to create a newsletter which will be sent to a potential client when a specified event takes place.
To create a new campaign, follow these steps:
- Select Campaigns > All campaigns from the left-hand navigation.
- Click Create a new campaign.
- Enter the name of the campaign, using the [event type] – [website name] format, for example: Abandoned cart – expertsender-store.com.
- Choose the website on which the campaign will be active.
- Select the event type which this campaign will handle:
- Abandoned cart – a visitor placed some products in the cart and left without completing the transaction
- Abandoned website browsing – a visitor was browsing your website and left
- Sale – a visitor completed a purchase in your online store (a similar functionality is offered in ExpertSender via conversion goal tracking, but here it is handled by the WebModule code solely)
- Price drop – the price of a product drops
- Segment – a visitor belongs to a specified segment
- More event types coming soon!
- Select the visitor type this campaign will handle:
- Brand subscribers – the campaign will be activated for brand subscribers only, i.e. for subscribers who belong to the advertiser’s subscriber lists
- Retargeting potential – the campaign will be activated only for subscribers who were identified, but are absent from the advertiser’s subscriber lists
- Depending on the choice in point (5), follow the steps for the selected visitor type:
Brand subscribers#
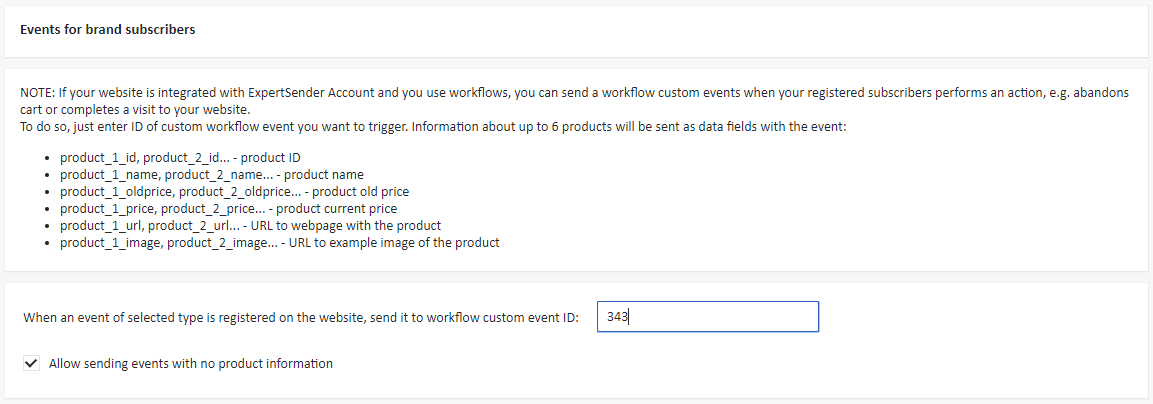
All of the custom information which will be registered at the time of the event is listed under Events for brand subscribers. For most event types, it will include up to 6 products involved in the event (e.g. products from the abandoned cart) and they will be sent as data fields in the following form:
- product_1_id, product_2_id… – product ID
- product_1_name, product_2_name… – product name
- product_1_oldprice, product_2_oldprice… – product old price
- product_1_price, product_2_price… – product current price
- product_1_url, product_2_url… – URL to the product webpage
- product_1_image, product_2_image… – URL to an example image of the product
You have to create a workflow custom event for each event type which you will use. Please note that that this has to be done in ExpertSender rather then in the Web Module! So, for the time being, switch to the ExpertSender interface and follow these steps:
Steps in the ExpertSender panel#
Creating a new custom event#
- Go to Workflows > Custom Events section and click the Create new custom event button.
- Complete the following fields:
- Name – use the following format: [event type] – Web Module, e.g. Abandoned Cart – Web Module
- Description (optional)
- Select the Enable event logging checkbox
- Click the Save changes button.
URL integration#
To enable the Web Module to track related transactions, we need to add a UTM parameter to all links in the messages based on the information provided by the Web Module. This is true for all workflow messages that are connected to various event types (e.g. Abandoned Cart). For this purpose, we use the URL Integrations feature in ExpertSender.
- Go to Settings > Business unit > URL Integrations section and click the Create new custom event button.
- Complete the following fields:
- Integration Name: Web Module Tracking
- Parameters section:
- Name: wm_campaign
- Value: *[wf_cid]*
- Active integration checkbox: please leave unchecked
- Click the Save button.
Workflows and messages#
A workflow template for the Abandoned Cart event is already present in the ExpertSender panel, however it contains multiple messages, which may result in delays with activating that workflow.
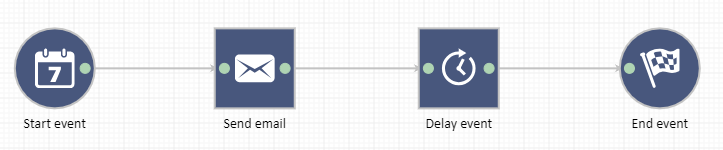
To avoid those delays, you may also create a simplified workflow, like the one below:

Use the following settings for respective elements:
- Start event:
- Type of start event: Custom event
- Custom event name: select the workflow custom event, which the workflow should use
- Segment (optional): additional entrance restrictions can be applied through a selected segment
- Handling duplicate subscribers: Ignore
- Send email: select the message which the workflow should use
- Delay event:
- Delay event type: Time-lapse
- Interval & Time Unit: according to your needs and guidelines, but 3-5 days are usually a safe option to start with
- End event
Frequency capping – the combination of the Handling duplicate subscribers setting in the Start Event and the Delay Event gives us an easy way to control how often the same subscribers can enter a workflow. Please remember to add all the necessary data fields to each workflow!
Now, return to the Web Module interface and enter the ID number of the custom event which you’ve just created.
Optionally, check Allow sending events with no product information.

Retargeting potential (reachable non-subscribers)#
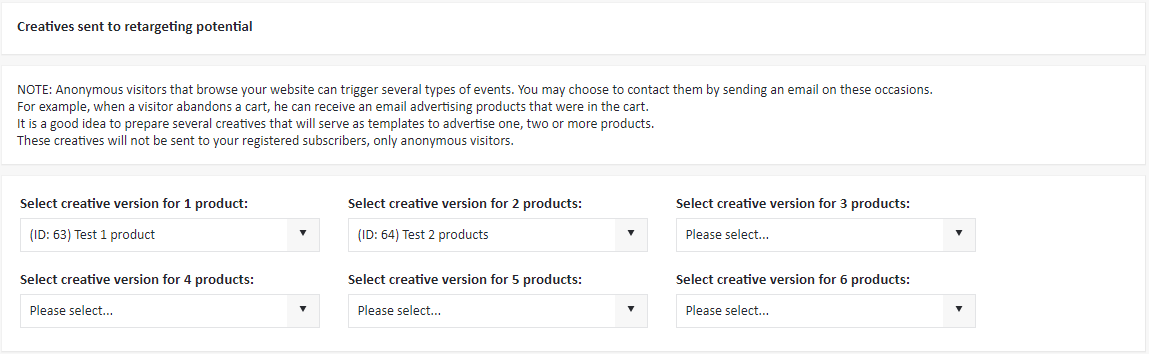
Anonymous visitors that browse your website can trigger several types of events. You may choose to contact them by sending an email on these occasions. For example, when a visitor abandons a cart, they can receive an email advertising products that were in the cart.
In the Creatives sent to retargeting potential field, choose the creatives which you have prepared and intend to send to the reachable non-subscribers:

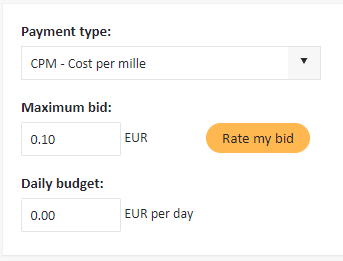
However, please note that sending emails to anonymous visitors requires using the services of publishers. These services are paid.
Under Budget, specify the maximum amount you may pay for your emails and the daily budget for your campaign that should not be exceeded. This way, ExpertSender will be able to connect advertisers with the right publishers.

- Save the message as draft or save and activate it.
That’s it! At this point, ExpertSender may need some time to configure some settings on our side, but your campaign will be up and running in no time!