Confirmation emails
Confirmation emails are a special type of email messages. They are sent to each new subscriber whose email address is added to a double opt-in list in order to verify whether the subscriber really wants to receive your messages. Each confirmation email contains a confirmation link, which the subscriber is expected to click. Only if they do, they will be effectively added to the subscriber list.
To learn more about subscriber lists and opt-in options, consult Managing lists.
Confirmation emails are created individually for each double opt-in list. To create a confirmation email:
- Select Subscribers > Lists from the left-hand navigation.
- Select a double opt-in list from your subscriber list and click the Settings icon in the List actions tab.
- Go to the Confirmation Email tab.

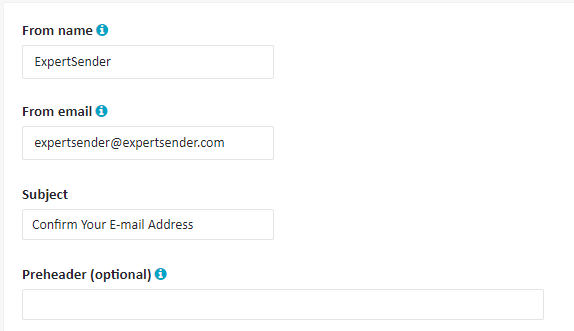
- Fill out the email settings box:
- Fill in the From name field with the name which you want to appear in your subscriber’s From column. In the From email column enter the email address from which you intend to send your message.
What sender name should you choose?#
The sender name entered in the From name field is typically the name of your company. We recommend using the same name and address in all your emails, as consistency helps with brand recognition. Furthermore, email messages from known addresses are more likely to be placed in the inbox folder, and any pictures included in them are more likely to be displayed.
- Enter the Subject of your message.
- Optionally, you may add a Preheader – a short description which follows the subject on the list of messages in the inbox. Preheaders are an effective tool for drawing your subscriber’s attention to your email and improving open rates.

- Fill in the From name field with the name which you want to appear in your subscriber’s From column. In the From email column enter the email address from which you intend to send your message.
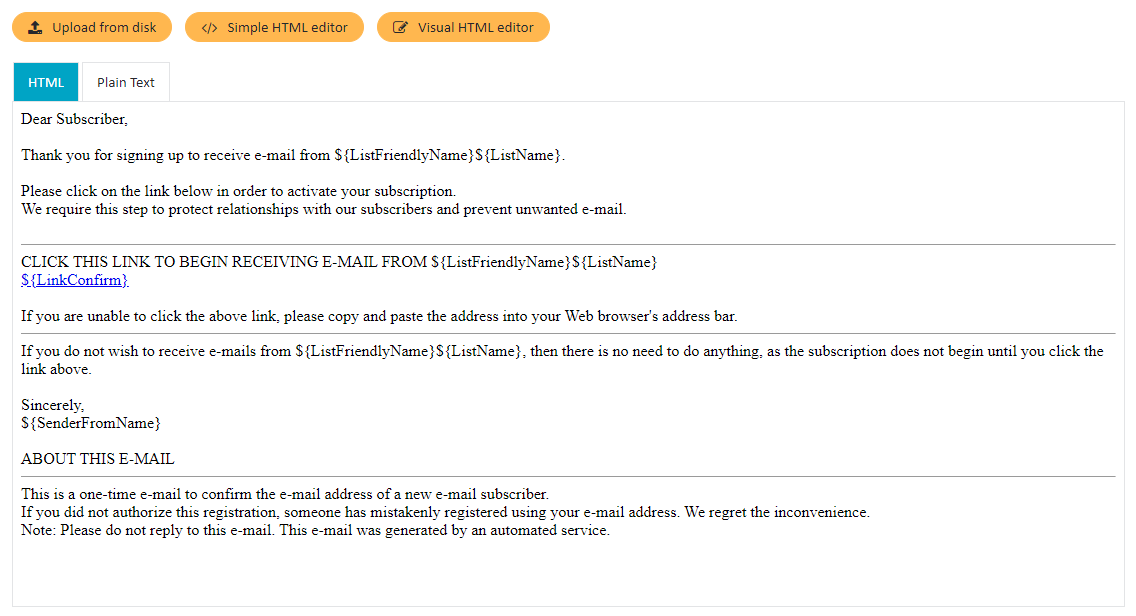
- Create your message:
- It’s time to compose your message. You may also reuse any older message, introducing modifications if necessary.

- The default option is to compose your message in HTML.
- It is possible to upload a complete HTML email template from your hard drive.
- If you feel comfortable with HTML, you may select the Simple HTML editor. Then you need to type your code (like <p>…</p> and <strong>…</strong>) on your own.
- You may also select the Visual HTML editor. Type the content of your message. Add the appropriate structure and style using the editor toolbar.
- Subscribers may try to read your message on a simple device which cannot display HTML structure correctly. To cater for this, you can also create a plain text version of a message. Switch to the Plain Text tab and choose Text editor, or, if you already have some HTML content, you may Convert HTML to Plain Text.
- ExpertSender also allows you to leverage the cutting-edge email technology: AMP for email. If AMP is enabled for your account, you will also see the AMP HTML tab. Switch to this tab and click Simple AMP HTML editor to enter your AMP HTML code.
- Make sure that the system confirmation link *[link_confirm]* is included in both the HTML and the plain text version of the message, otherwise the system may generate an error.
- After your message is ready, click Update.
- It’s time to compose your message. You may also reuse any older message, introducing modifications if necessary.
- Final touches:
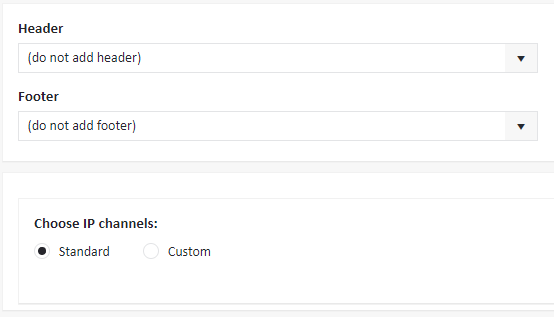
- You may add a header or a footer to your message. It usually contains a company logo, contact data or similar content. In order to insert a header or footer with this option, you need to prepare it earlier as a template. Go to Templates to learn how to prepare header and footer templates. Once you save it under a specific name, you will be able to access it from this level.
- Select the IP channel configuration which will be used for sending the message. If you select Standard, your message will use the default configuration. To adjust IP number usage to your needs, select Custom and determine the email load associated with each IP.

- Click Save.

That’s it! Your confirmation email is ready.
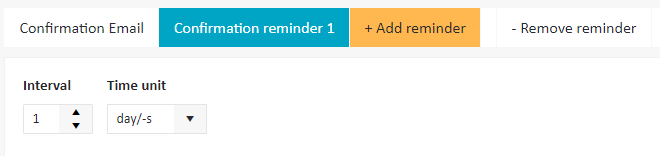
Of course, sometimes a new subscriber may choose not to click the confirmation link, or forget to do so. If you want to try to retain the subscriber, you may set a reminder message (or even two) to be sent to them after specified time. To set a reminder:
- Click on the +Add reminder tab
- Specify the period of time (in hours or days) that will elapse before a new subscriber receives the reminder.
- Create the reminder message in the same way you’ve created your confirmation email.