Getting started
Welcome!#
If you are new to ExpertSender, this is the best place to start. Here you will learn about the basic concepts and features of ExpertSender.
About ExpertSender#
ExpertSender is a tool which helps contextualize and personalize customer communications in every business layer, from acquisition, through the sales process, to re-engagement and retention. ExpertSender allows you to reach your customers through many channels including: email, SMS, web and more. This article focuses on email campaigns only – for more information on the other two channels, please consult the SMS Channel and Web Channel sections.
#
Set up your first email marketing campaign#
To send your very first email campaign, you need to complete the following steps:
- Create a new list of subscribers
- Add subscriber data to the list
- Create a seed list
- Create and design your newsletter
- Select your recipients
- Choose appropriate settings for your newsletter
- Send your message!
- Monitor your customers' behavior
Create a list of subscribers
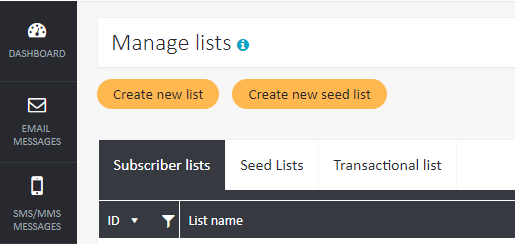
- From the left-hand navigation choose Subscribers, and then select Lists.
- Click Create new list.

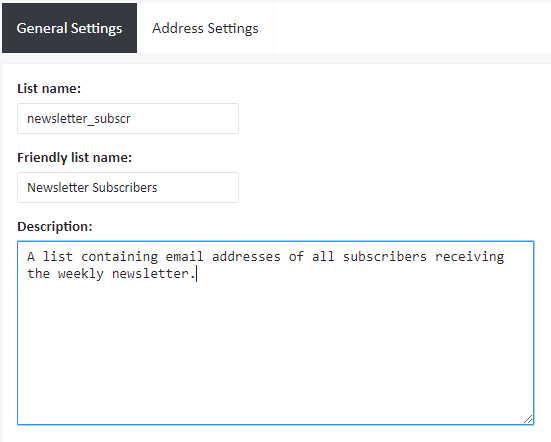
- Name your list of subscribers in an appropriate way. For example, Key customers is a useful list name if you know that the list will contain only these types of customers. Optionally, you can add a friendly name (which will be visible to your customers) and a description of the list. Recommended friendly names are neutral and informative, for example Newsletter subscribers.

- Pick the default language in which all of the automatically generated content (e.g. confirmation emails or thank you pages) will be displayed. This field will only be used if it is not possible to identify the language used by the browser.
- Choose the Opt-In mode. In Single Opt-In new users are immediately added to the database. With Double Opt-In enabled, each new subscriber added via a webform or API receives an activation link, which they should follow in order to be added to the subscriber list.
- Confirm that you understand and accept that the list can contain only opt-in addresses and click Create list.

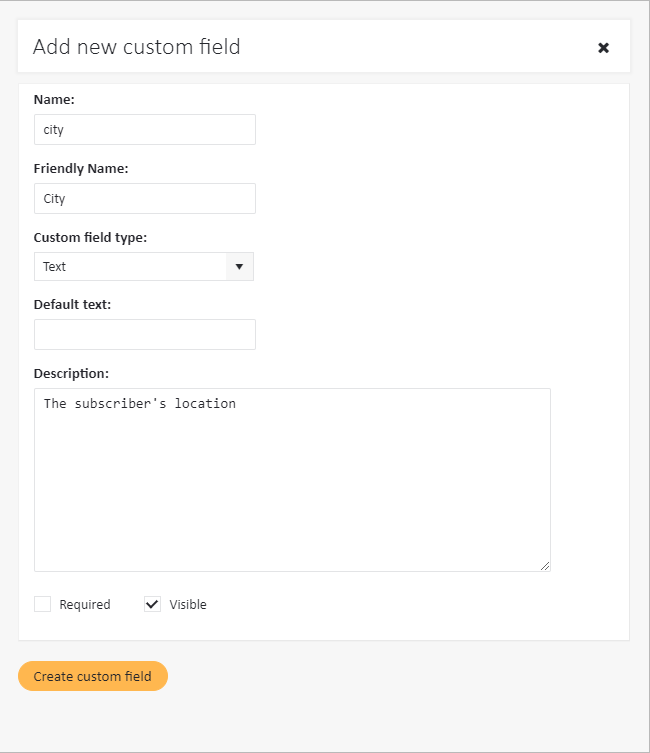
- If you need to store some specific custom information about your subscribers (such as their city, age, or gender), consider creating a custom field for each variable of this kind. To create a custom field:
- Select Subscribers > Custom fields from the left-hand navigation.
- Click Add new custom field.
- Enter the Name of the custom field (e.g. "City" or "Gender") and its Friendly name (visible to subscribers).
- Select the appropriate custom field type. For instance, an appropriate field type for storing information on a subscriber's city is Text, and his or her age is best represented by a Number.
- If the field is marked as Required, it is obligatory to fill it in before the email address can be added.
- Click Create custom field.

#
Add subscriber data to the list#
- After you create your list, you need to add the your subscriber data to it. Go to Subscribers > Lists and under Manage lists find your list and choose either Add manually or Import.


- If you add subscribers manually, fill in all of the fields and click Add subscriber.
- You may also import your data from a CSV, TXT, XLS, XLSX or ZIP file:
- Select a file with email addresses from your computer. The file size cannot exceed 31 MB.
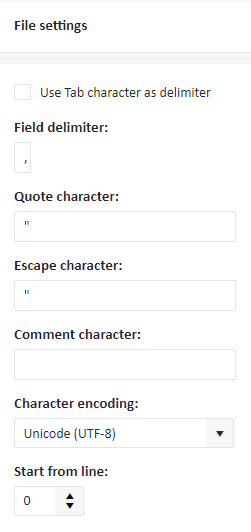
- For a CSV or TXT file, choose the field delimiter (the character which separates fields in each row). For instance, imagine that each row in your file contains lines such as
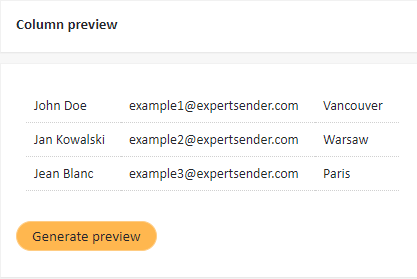
John Doe,johndoe@expertsender.com,Vancouver
. Then the comma
,
is the field delimiter which separates the subscriber's name, email address and city. If you're using an XLS or XLSX file, the uploaded file should already contain the right division into columns, so there is no need to set it up manually.

- Below you will see a column preview with the data extracted from the updated file. If the division into columns is correct, click Next.

- Since you are creating a brand new list, leave the default options at the Import settings tab and click Next.
- Map the columns from the file to the fields which will be stored in the database. For example, if the first column contains names, import it as Name. If another column contains the subscriber's email address, import the column as Email. You may choose not to import certain columns you deem unnecessary. Remember that in order for the system to be able to properly import custom fields, they need to be created first!

- Once you are done, click Finish. Be patient – if you try to import a big file, the process can take some time. After the import is ready, you will receive a notification in the Tasks bar at the top of the screen.
Create a seed list
- A seed list is a list containing test email addresses and can be used to test your creatives before the actual message is launched. In order to create a seed list, select Subscribers > Lists and click Create new seed list.
- The remaining steps of the process of seed list creation are the same as for a standard subscriber list. Fill in all the necessary data, add custom fields and add your test email addresses. Your seed list is ready to use! To learn more about seed lists, read the Managing lists section.
Create your newsletter
- From the left-hand navigation select Email Messages > Newsletters.
- Click Create newsletter.
- There are two types of editors in which you can compose your message, the Regular Editor and the Drag & Drop Editor. For the purposes of this tutorial, select the Drag & Drop editor.
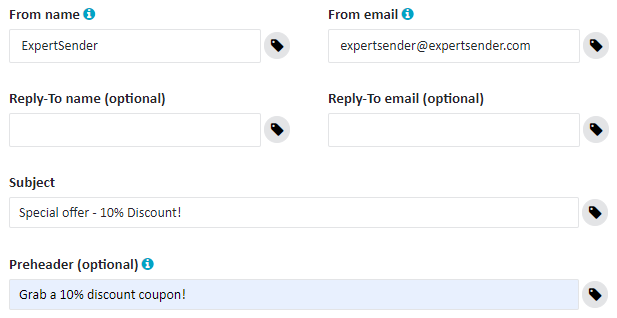
- Fill in the From name and From email fields. Enter the Subject of your first message.

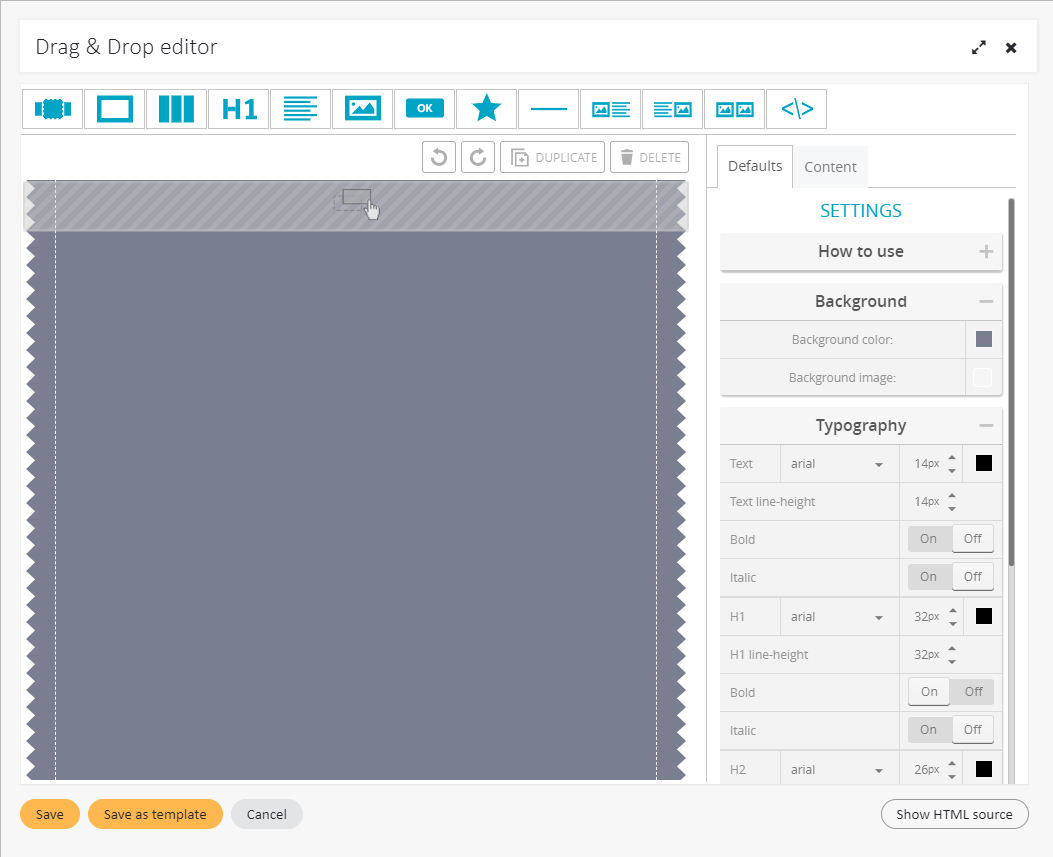
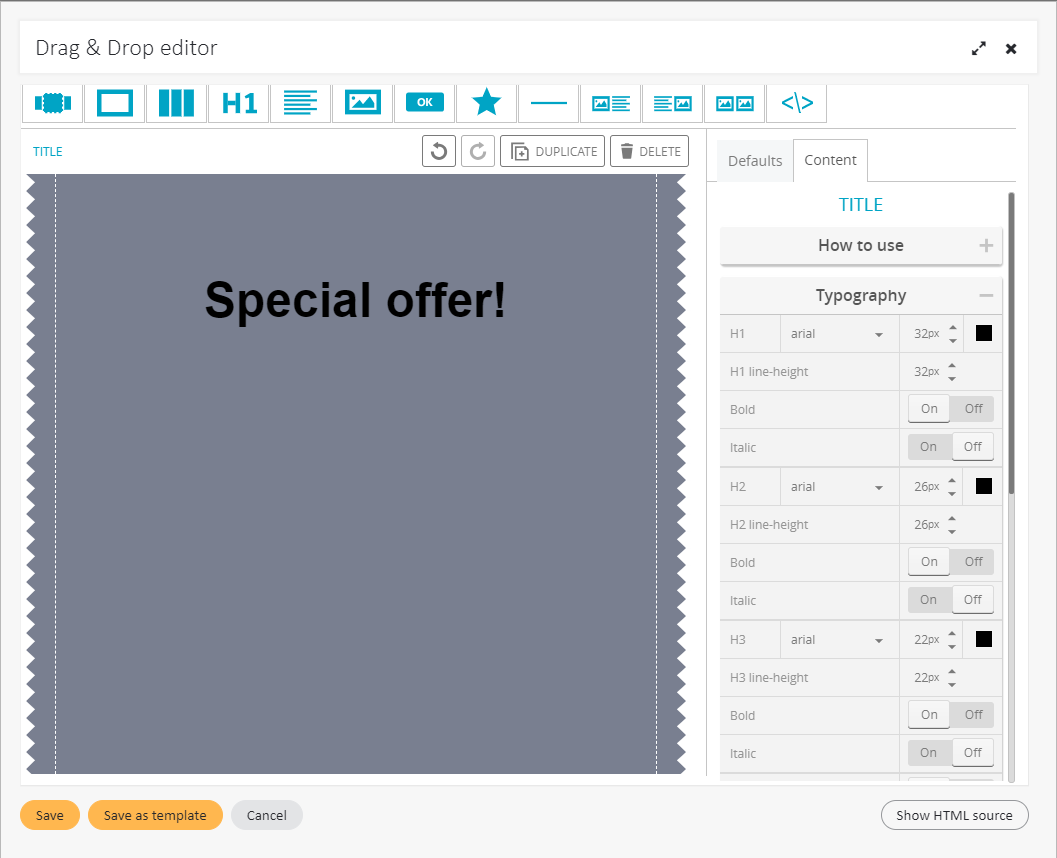
- Using the Drag & Drop Editor, compose your message by selecting the desired elements from a visual pane, dragging them into your working area and dropping them into your desired position:
- First, in the tab Defaults you may choose a background for your message and specify styles for elements such as the main text or headings.

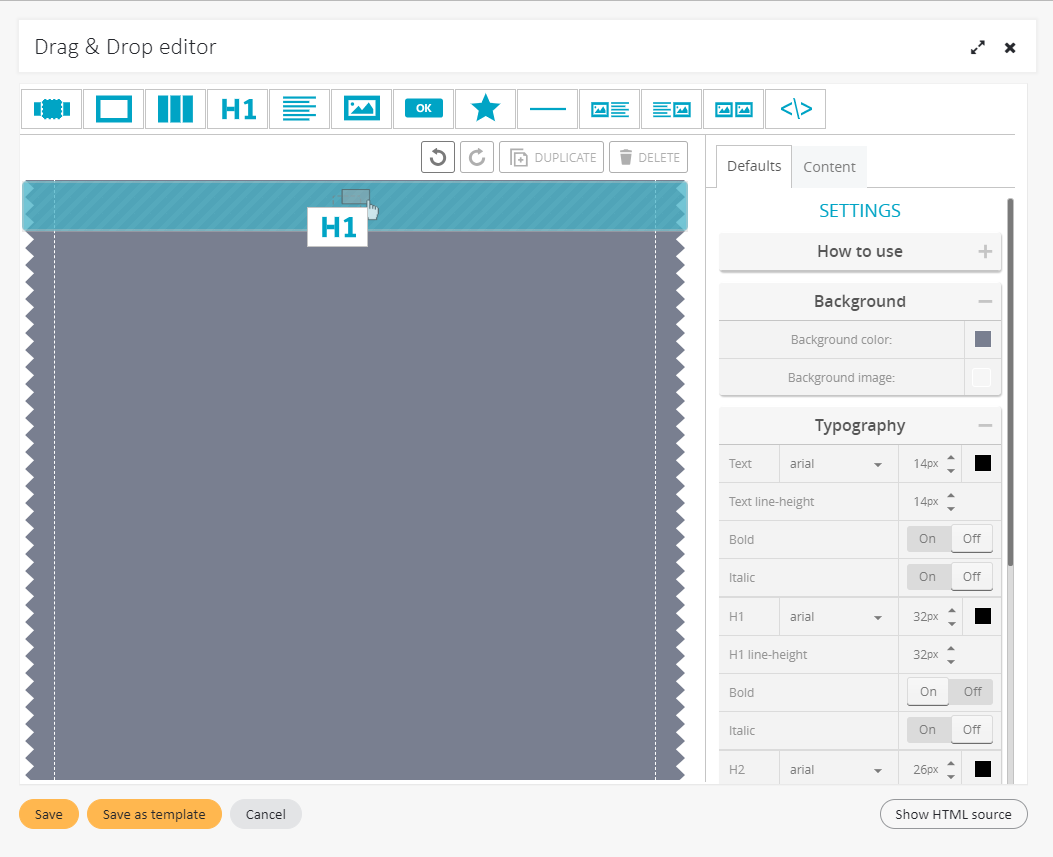
- Then, choose the desired element from the bar at the top of the page. For example, you may choose to start your message with a title heading. Select H1/title from the bar and drag it with your left button to the working area.

- You may then double click the inserted element to edit it. The Content tab on the right contains detailed information on the usage of each element – just click the How to use section.
- The Content tab also allows you to select appropriate settings for each element.

- After your message is ready, click Save.
- First, in the tab Defaults you may choose a background for your message and specify styles for elements such as the main text or headings.
- You should see the content of your message in the content window. In order to test how the message will be displayed, click Live preview below.
- If you are not satisfied with the result, continue editing your message. Otherwise, click Next.
Add recipients
- Select the subscriber list you want to send your message to. Remember that you can divide your list into segments according to any criteria. To learn more about segments in ExpertSender, consult the Segmentation section. It is also highly recommended to test how your message is delivered and displayed by sending it to a seed list first.
- In order to double-check how many recipients will receive your message, select Recount recipients on the bottom of the page.
- Click Next to proceed.
Choose settings
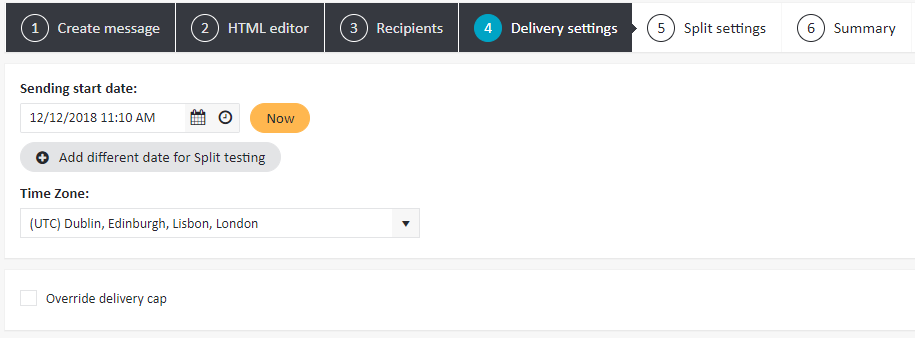
- Choose the date and time at which sending will start. Select the appropriate time zone.

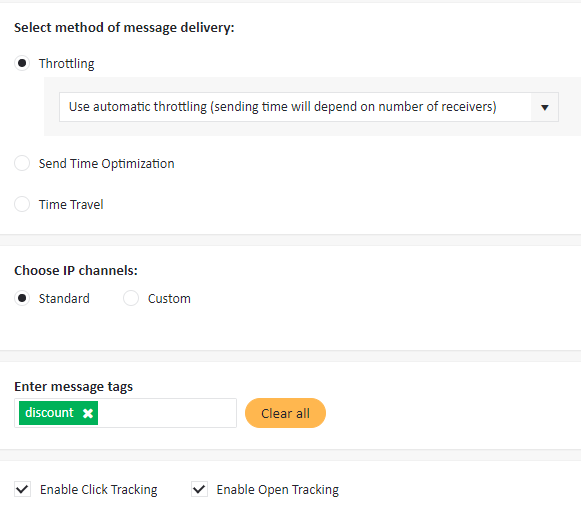
- Select the appropriate method of message delivery:
- Throttling – throttling allows you to adjust sending time to the number of receivers in order to prevent your message from being blocked or classified as spam.
- Send Time Optimization – ExpertSender calculates the optimal sending time for your message on the basis of the subscriber's past email engagement.
- Time Travel – The message will be sent at each recipient’s local time according to their timezone.
- You may also add some tags to your message, such as "discount" or "special offer". Later on, you may use a tag to find a specific message more easily, or to create a segment of subscribers who, for example, have already received a "special offer" email.

You're almost there!
- Carefully analyze the summary. If you would like to make any changes to the message content, selection of recipients or delivery settings, feel free to return to any of the preceding steps.
- If you are ready, click Finish! Your message will be sent shortly.
That's it! You have sent your first newsletter with ExpertSender! If you used a seed list and you are sure that the email was delivered and displayed properly, you may now send the newsletter to your actual subscribers!
Now you can start learning about more advanced features. Browse the topic-based user guide or use the search engine to look for the information you need!
