Newsletters
Newsletters are the most basic type of email message available in ExpertSender. Newsletter are sent once to a given group of recipients.
Before you start, make sure you have at least one list of subscribers you can send your message to. If you don’t have a list of subscribers, follow the instructions in the Subscribers and lists section to create a new list and fill it with subscriber data.
In order to send a newsletter, follow these steps:
Preparation
- From the left-hand navigation, select Email Messages > Newsletters.
- Click Create newsletter.
- There are two types of editors in which you can compose your message, the Regular Editor and the Drag & Drop Editor. Select the one you prefer.
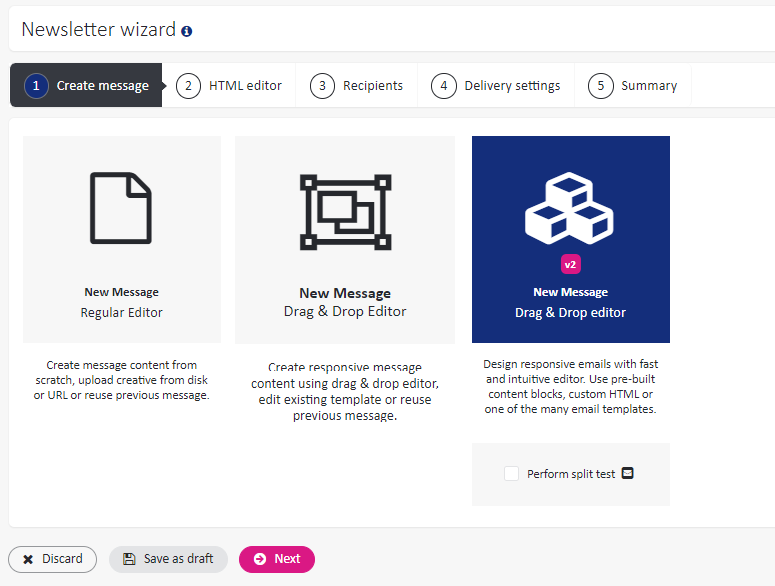
- At this point, you may also select the Perform split test checkbox. Decide if you need a split test and click Next. You will proceed to the next step of the message wizard.
What is a split test?#
Split tests are a useful tool to choose the most effective version of a message.
You may compose multiple versions of a message in order to determine which one performs better. Usually, you test the original version of your message against a different version, in which you change one element (e.g. the subject line or background color). All participants of the split test will be divided into subgroups, with each subgroup receiving a different version. On the basis of the behavior of each subgroup you can determine which version performs better in terms of open rates, click rates or any other criteria.
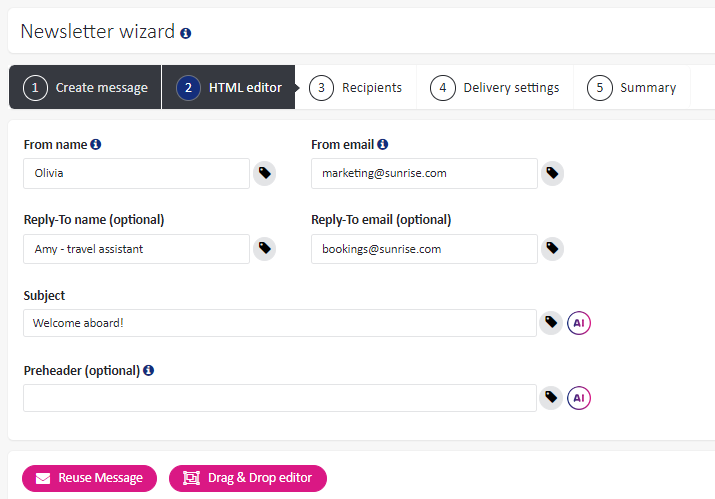
- Fill in the From name field with the name which you want to appear in your subscriber’s From column. In the From email column enter the email address from which you intend to send your message. You may also add another name and another email address for your subscribers’ reply emails – in this case, fill in the Reply-To name and Reply-To email fields.
What sender name should you choose?#
The sender name entered in the From name field is typically the name of your company. We recommend using the same name and address in all your emails, as consistency helps with brand recognition. Furthermore, email messages from known addresses are more likely to be placed in the inbox folder, and any pictures included in them will more likely be displayed.
- Enter the Subject of your message.
- Optionally, you may add a Preheader – a short description which follows the subject on the list of messages in the inbox. Preheaders are an effective tool for drawing your subscriber’s attention to your email and improving open rates.

- Please note that you can also use a personalization tag in any of these fields. To insert a personalization tag, click on the
 icon next to the relevant field and select the appropriate item.
Composing your message
Drag & Drop Editor v2#
Designing the newsletter is easy with the new Drag&Drop email editor. Simply follow these steps:
Start by defining the general settings for your newsletter:
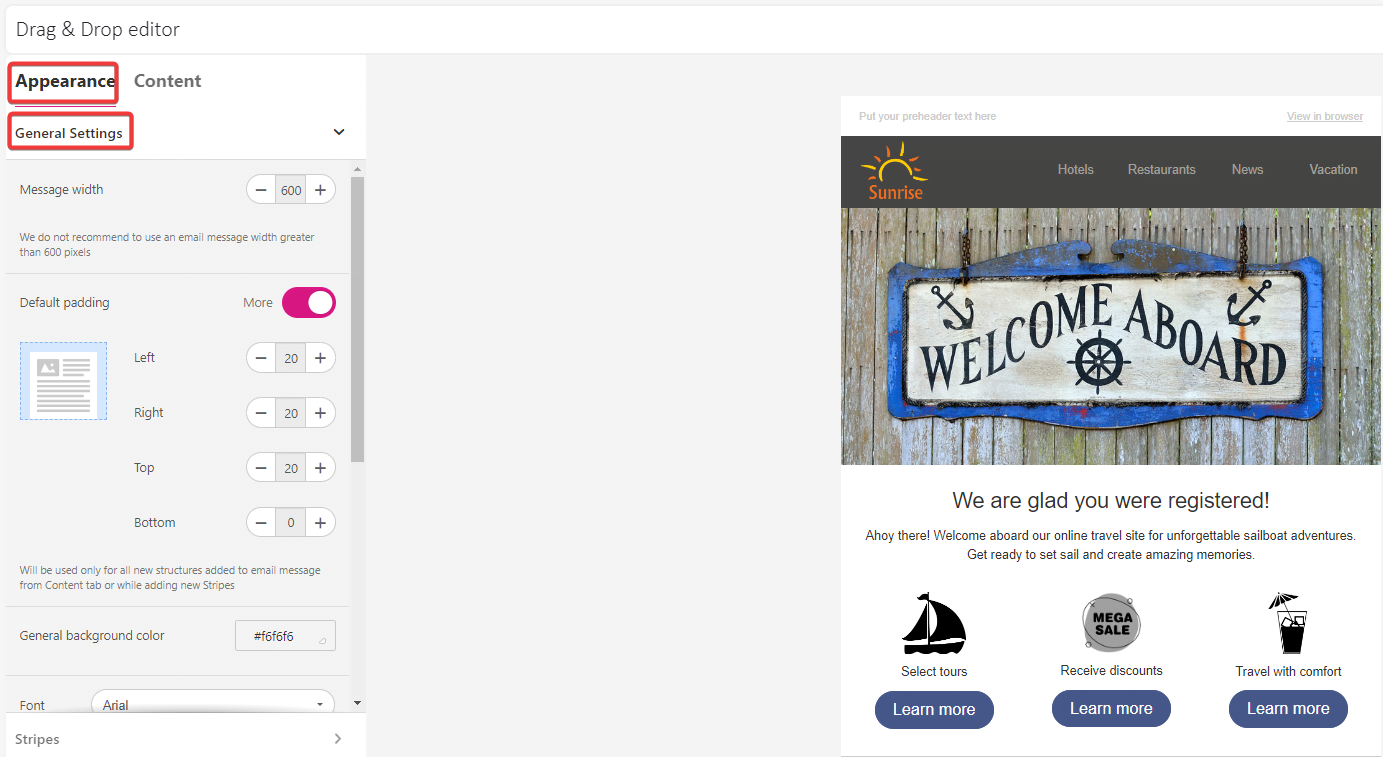
- In the setting panel select the Appearance menu.
- In the General settings section choose the message width, padding, and font type for the entire newsletter.

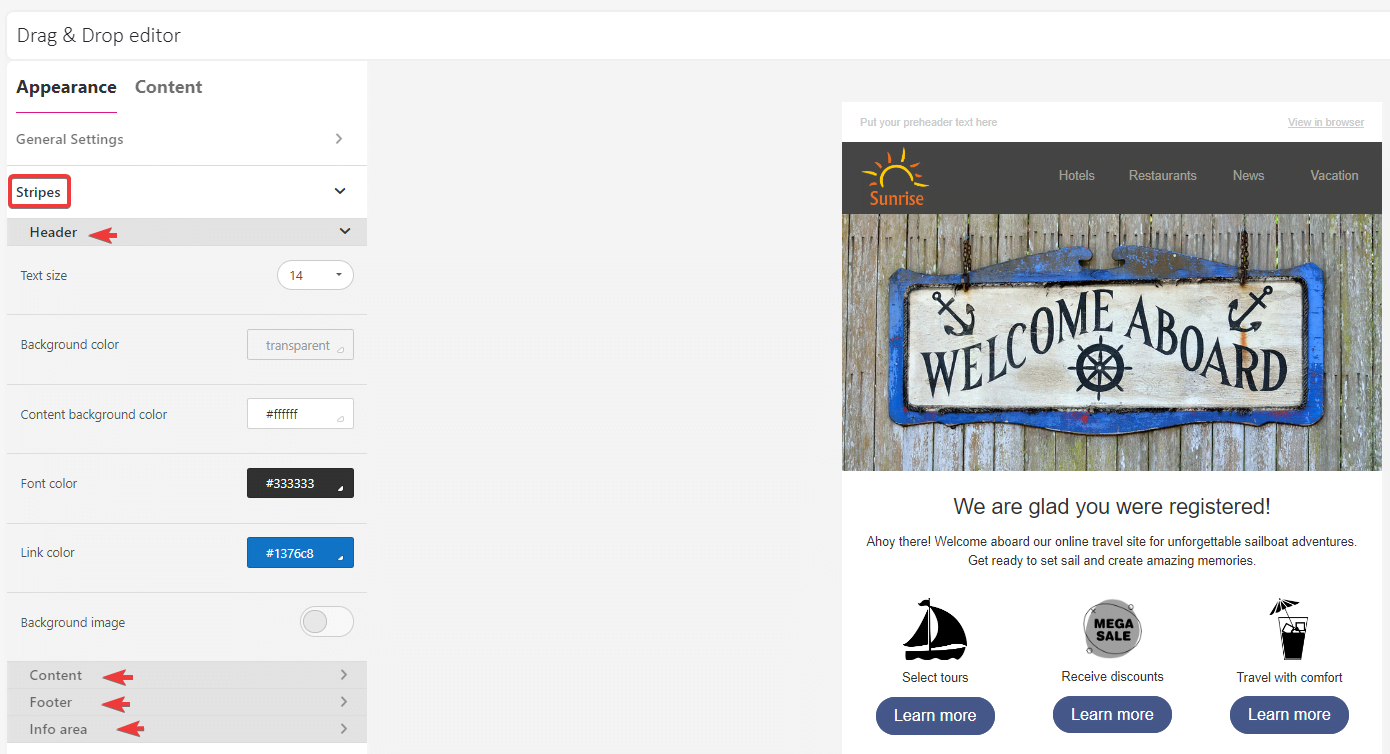
- Go to the Stripes section and select the type of stripe you want to use in your newsletter, such as a header, content, footer, or info area.
- Set the text size, font, link and background color for each stripe type.
- These setting will apply to all the structures you put in each stripe. Repeat this step for each stripe types in your email.

- If you need to modify these settings for a specific structure or stripe, click the chosen content area and make changes in the edit menu on the left.

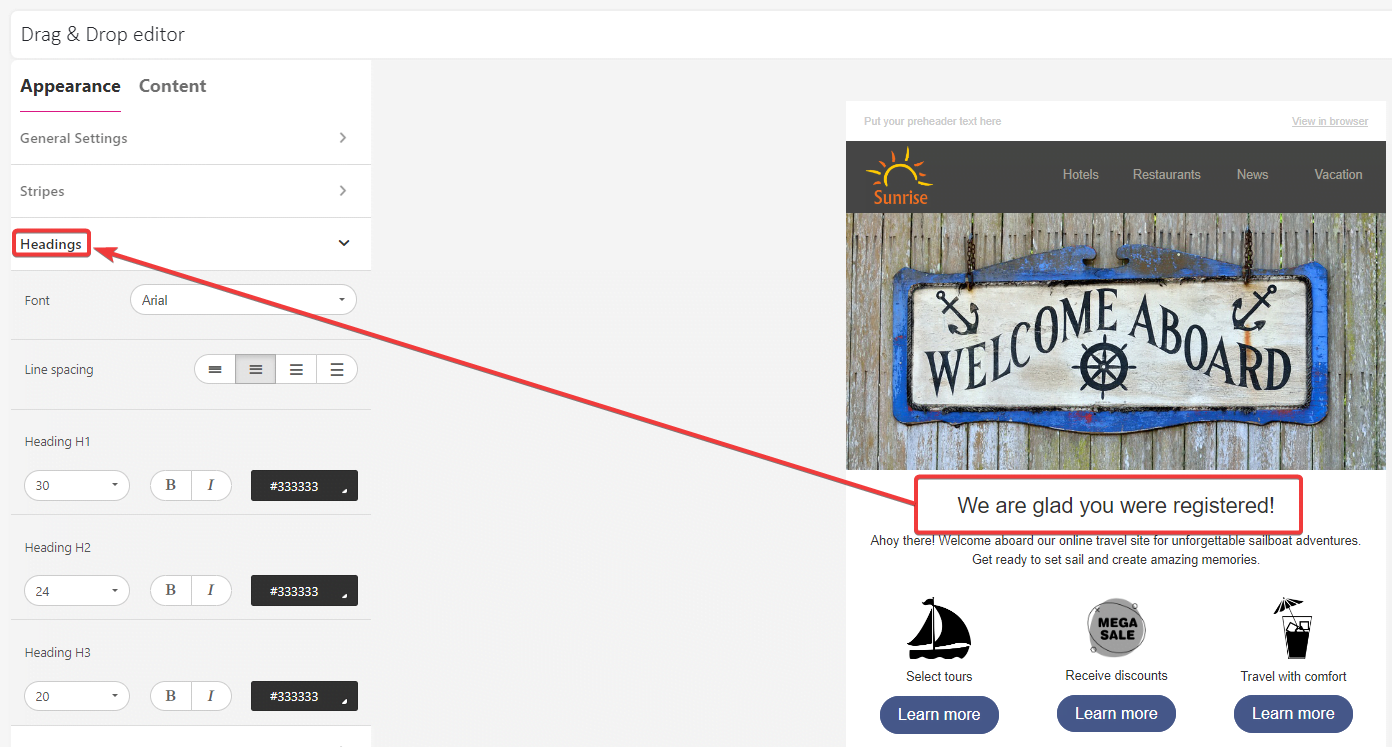
- In the Headings section, you can define the appearance for emphasized content, like a quote or buzzword.

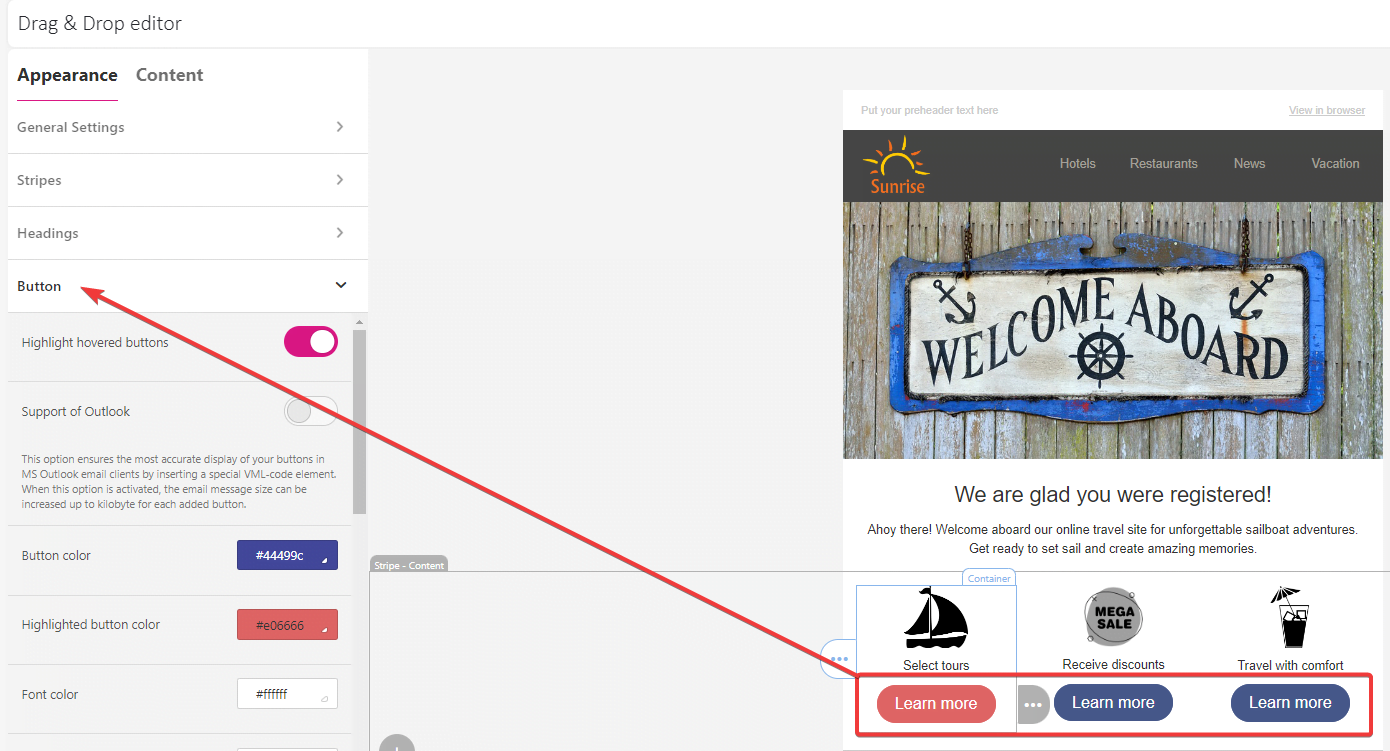
- Set the settings for all the buttons used in your email in the Button section.

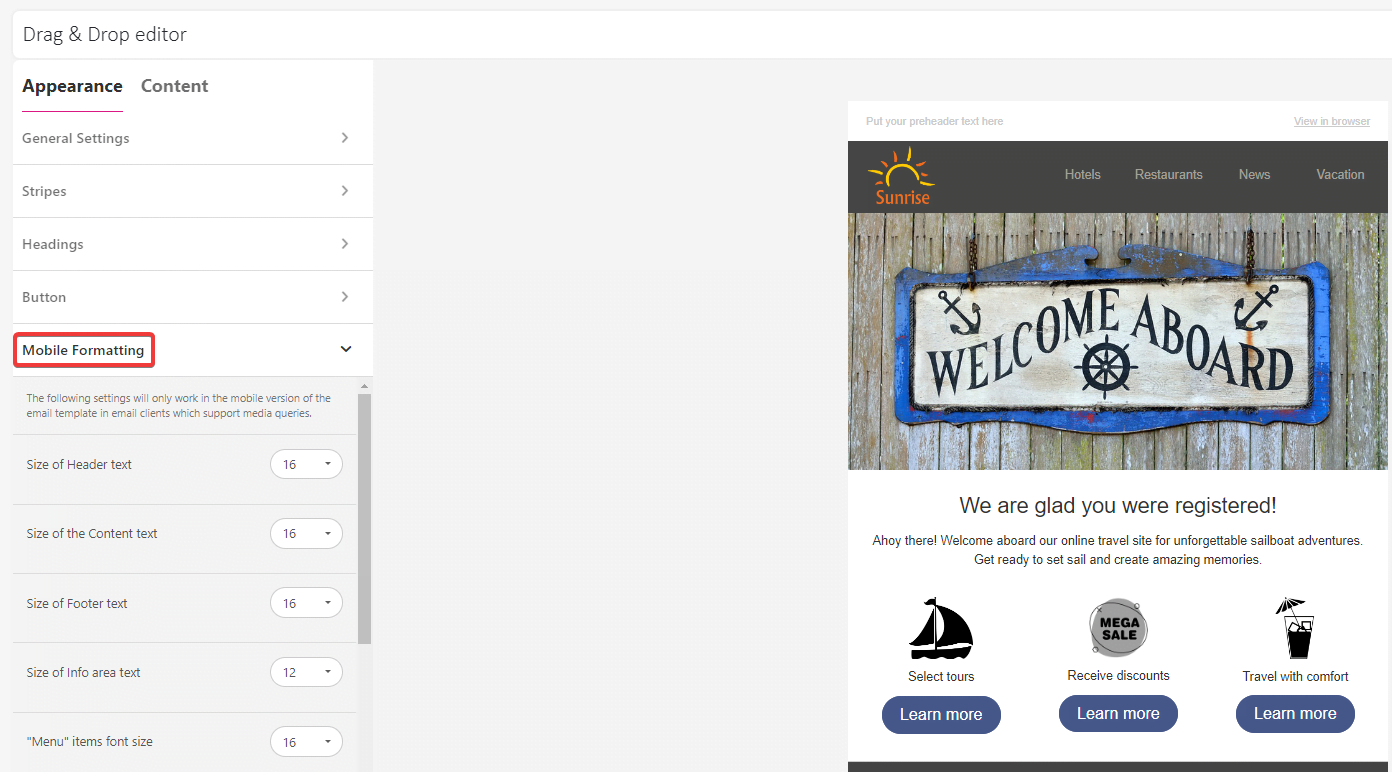
- Decide how your email will appear on smartphones and tablets in the Mobile formatting section. Adjust padding, margins and font size correct display.

Next, let’s add and style the newsletter content:
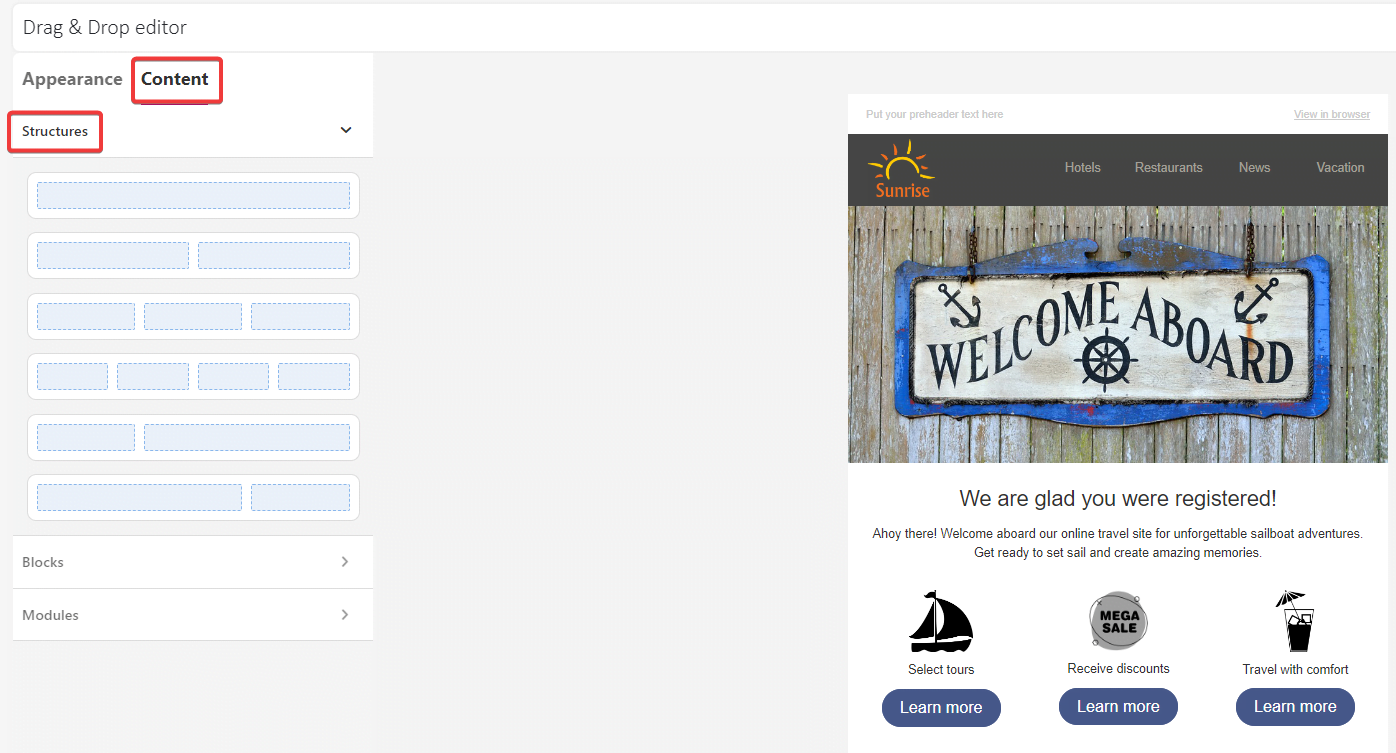
- In the setting panel, select the Content menu.
-
In the Structures section, choose a structure with the desired numbers of containers. Each structure can hold up to 8 containers. One container fits one content block.

- Drag and drop the structure onto the working space.
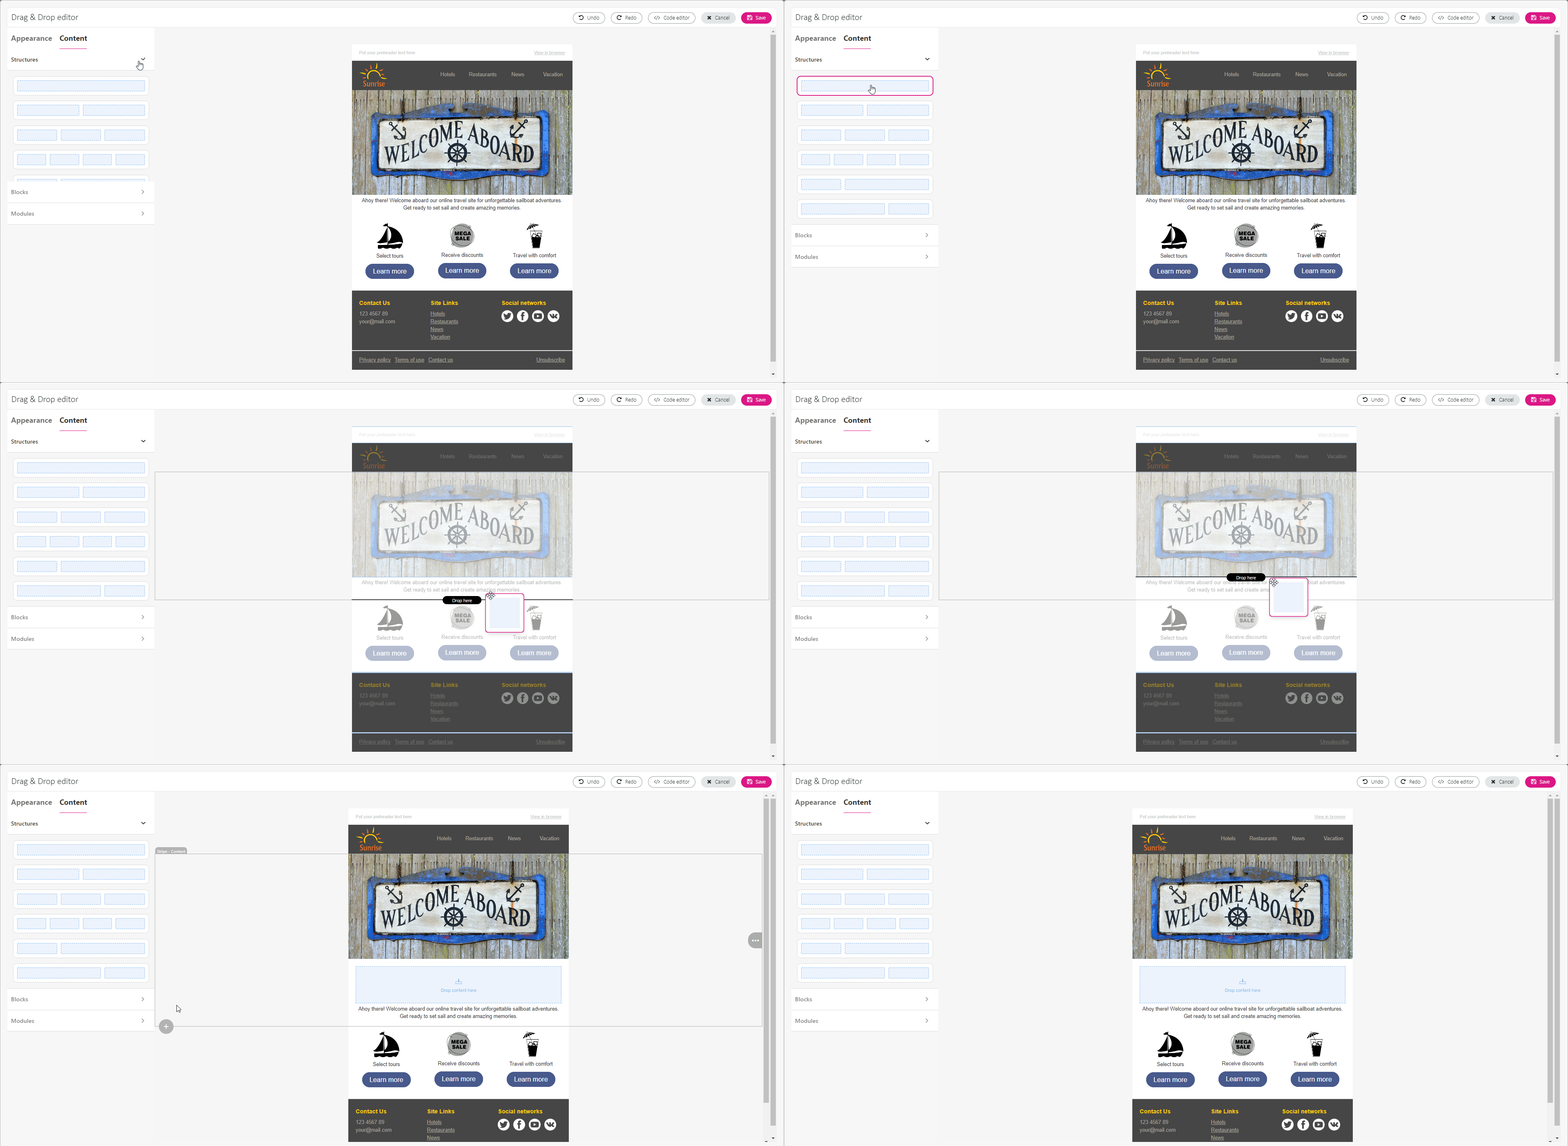
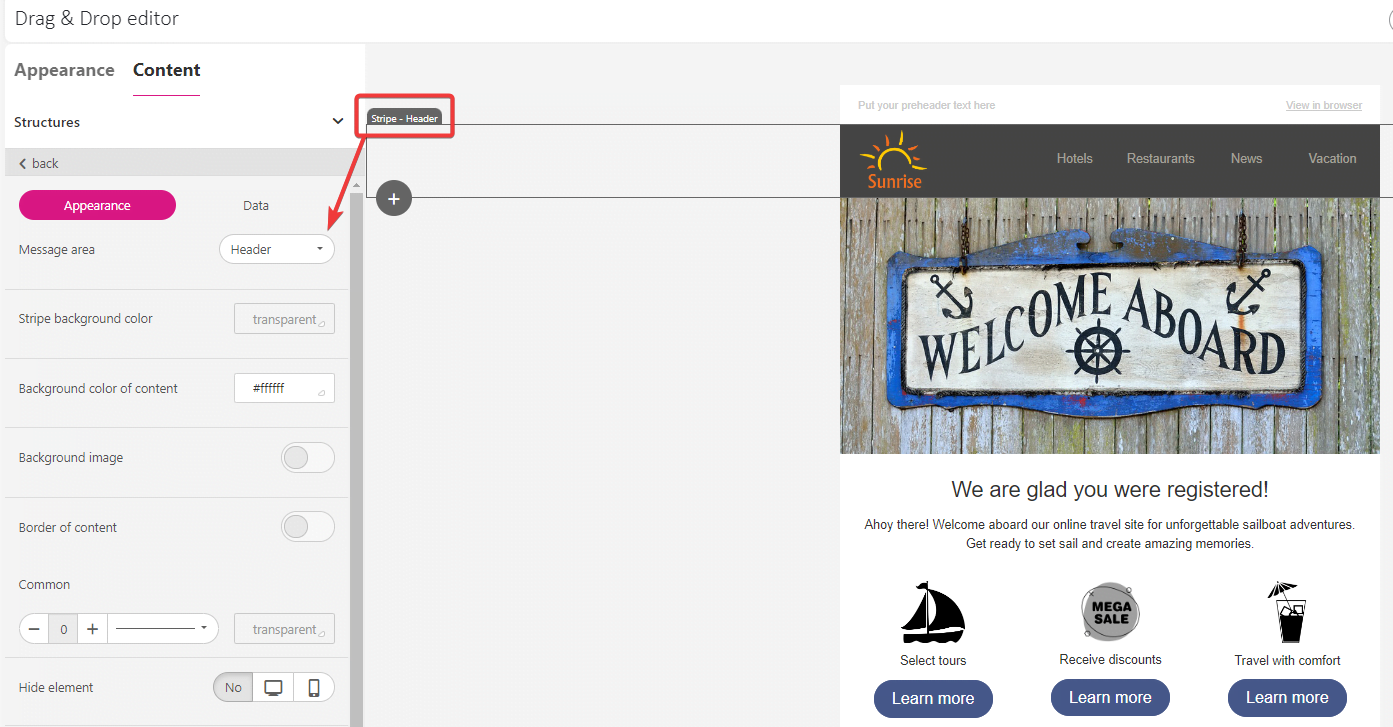
- Join structures to create Stripes, which are sections with defined functions and styles (e.g., header, footer, info area). You can have an unlimited number of structures within a stripe.
- Click on a stripe area and adjust its settings in the edit menu on the left.
- Go to the Block section and select the type of the content you want to add to your email, such as text, image, or button.
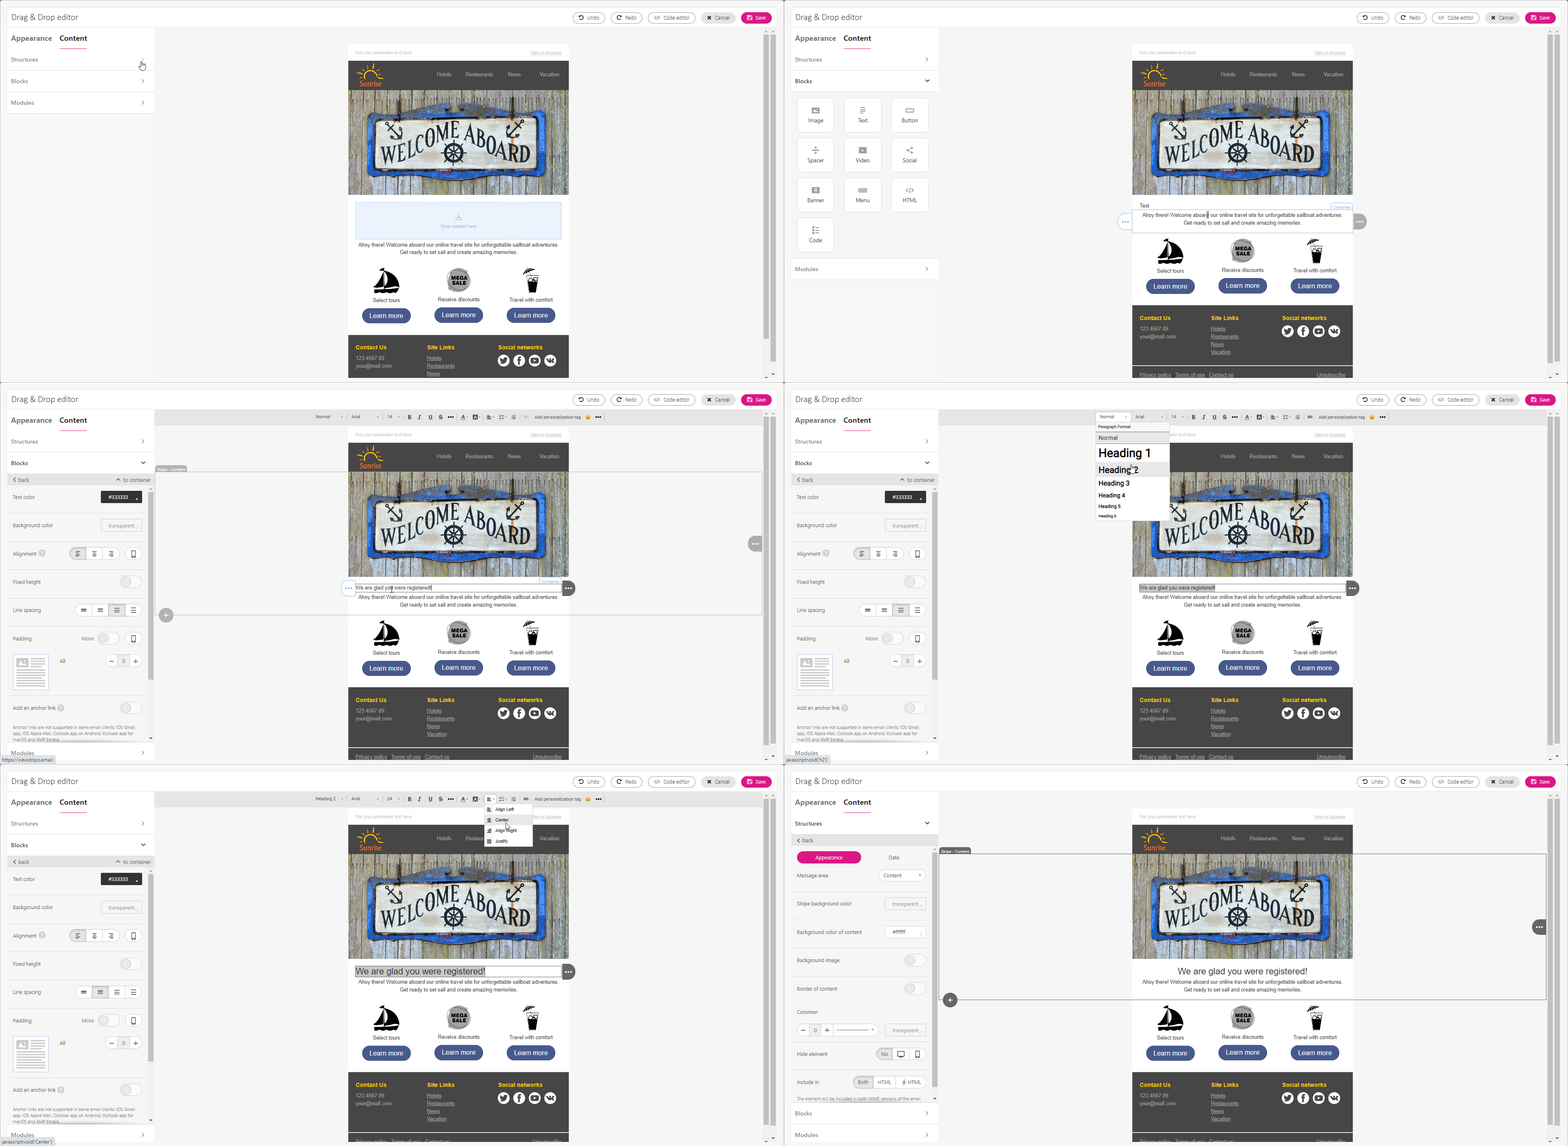
- Place the block in the container and click it to open the edit menu on the left.
- Add your content and style the block accordingly.
- If you want to reuse your styled structure or stripe in future messages, you can save it as a Module. Simply hover over the three-dot menu at the edge of the structure or stripe and click the Save as module icon.
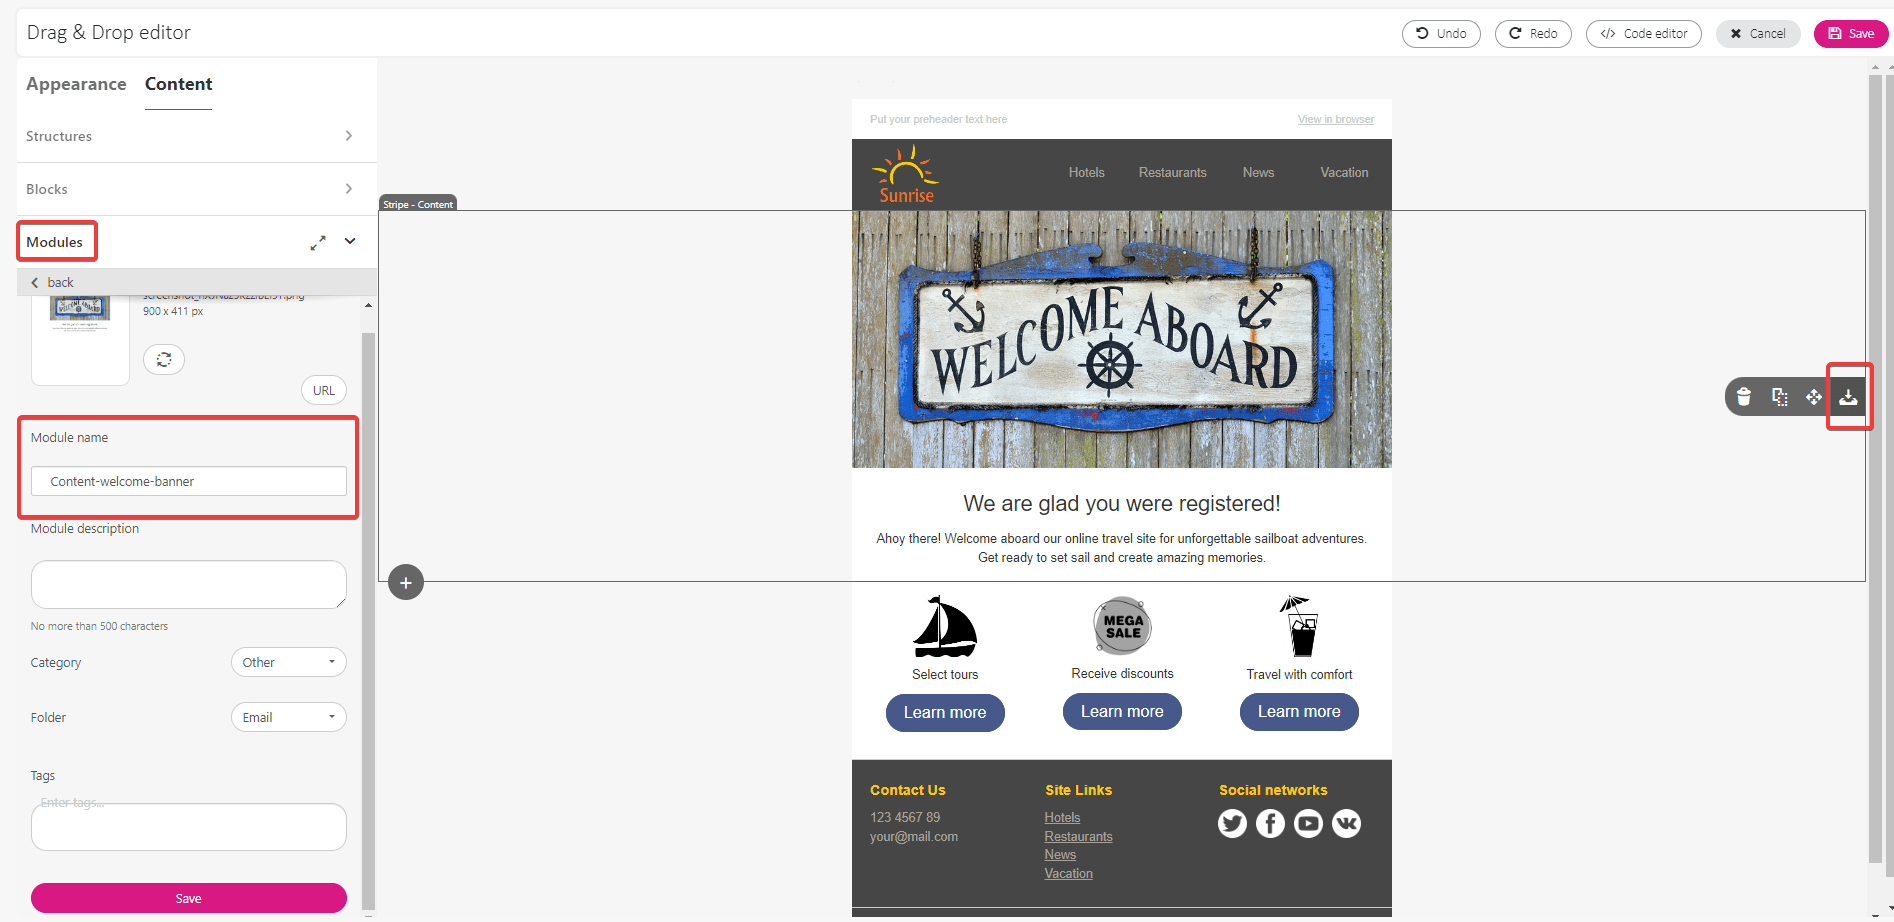
- Enter a name for the module and, if desired, provide additional details like a description or tags in the edit menu on the left.
- Save your changes.
For more information about the content and appearance menu, refer to the section How does the editor work?
Drag & Drop Editor#
- If you choose the Drag & Drop Editor, you may compose your message by selecting the desired elements from a visual pane, dragging them into your working area and dropping them there.
- First, in the tab Defaults you may choose a background for your message and specify styles for elements such as the main text or headings.

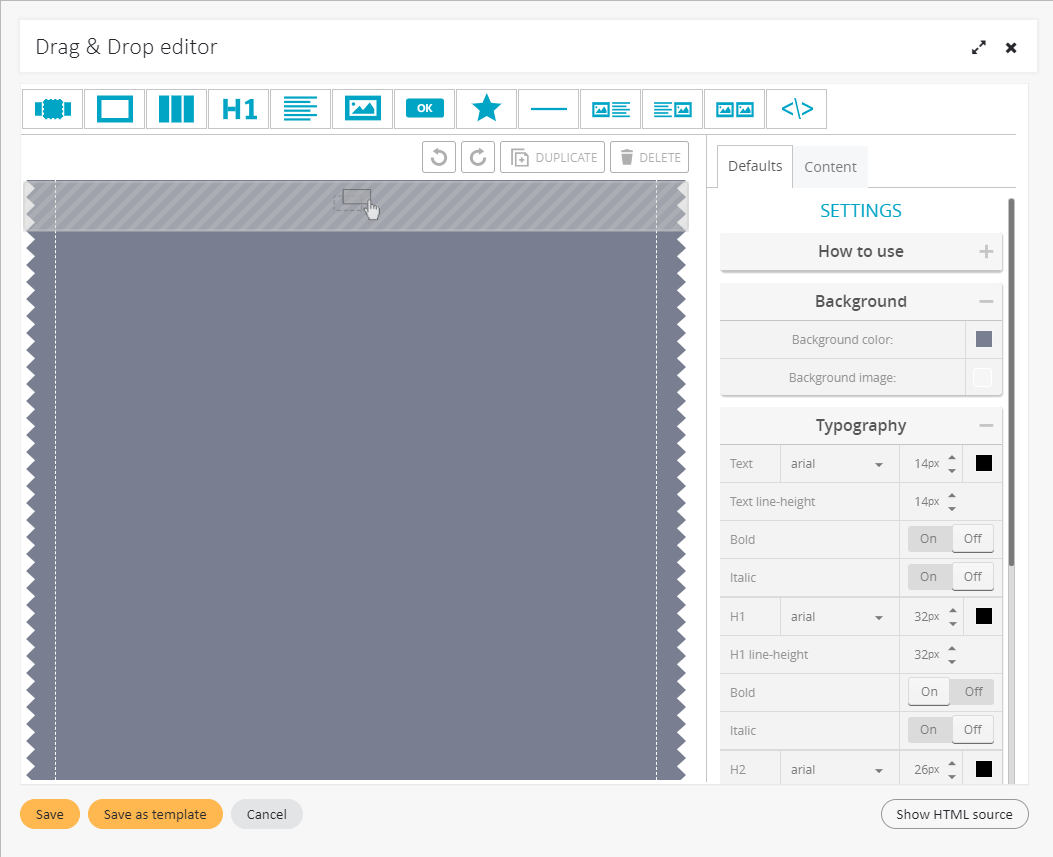
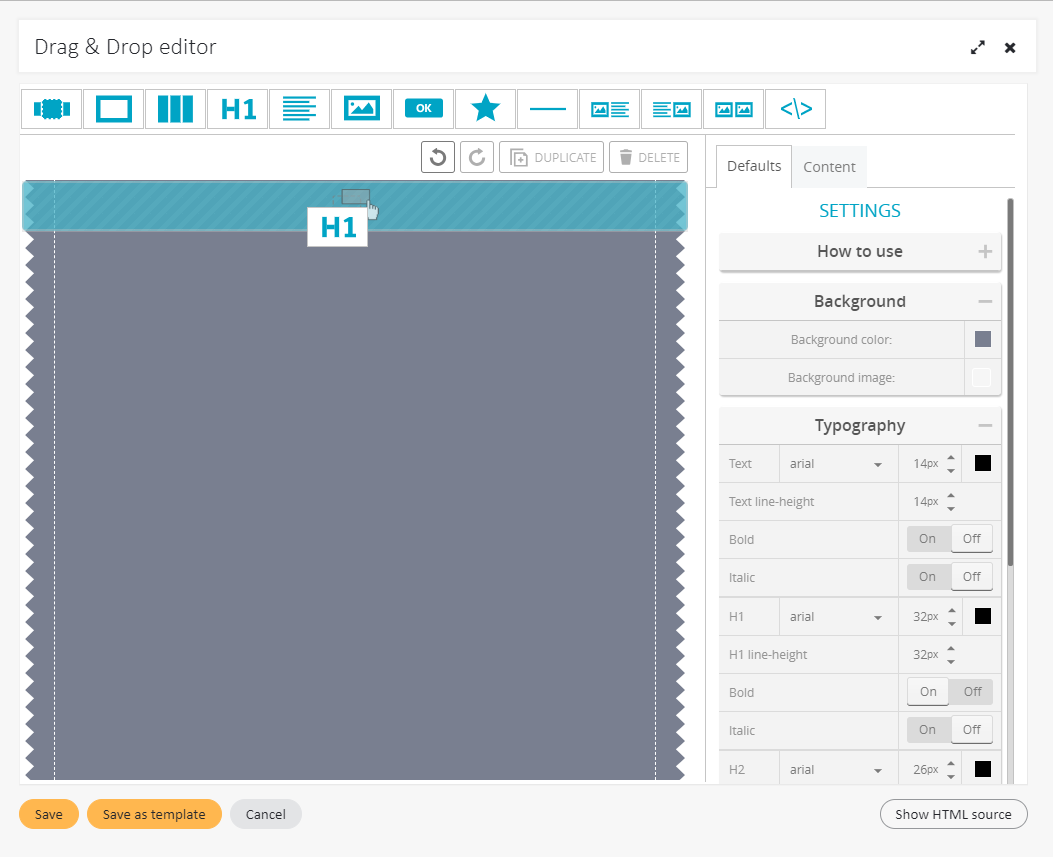
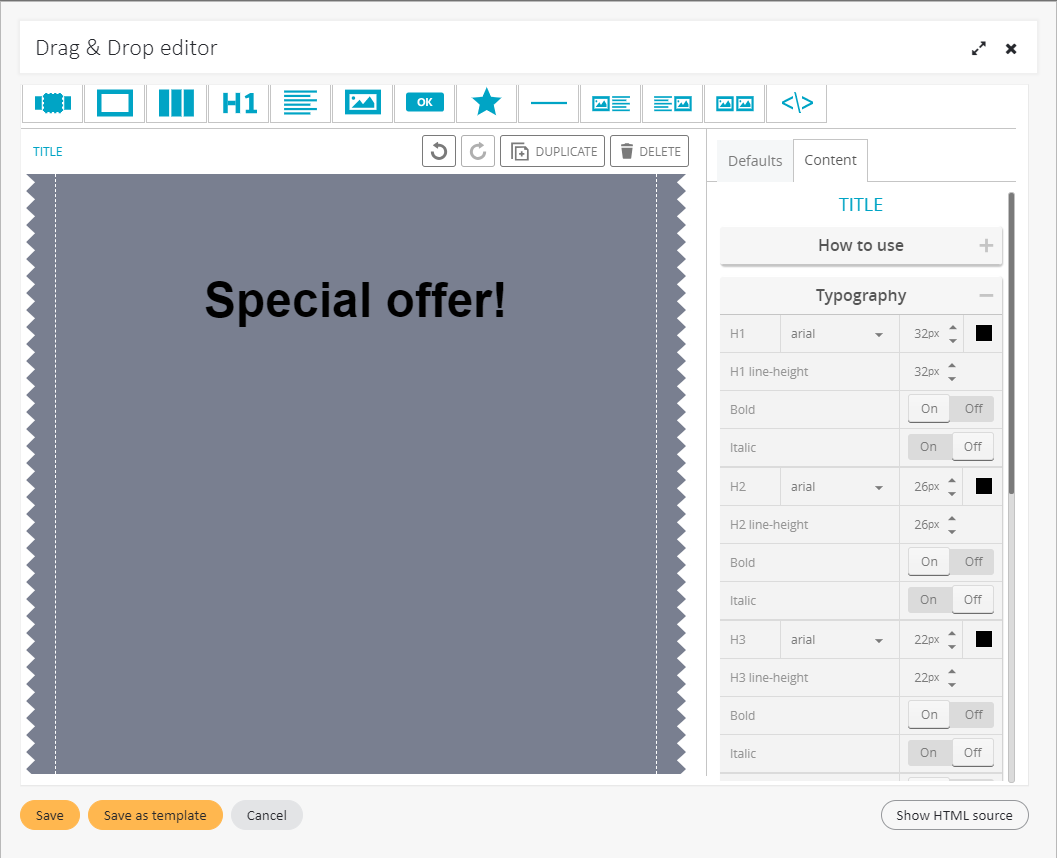
- Next, choose the desired element from the bar on top. For example, you may choose to start your message with a title heading. Select H1/title from the bar on the top and drag it with your left button to the working area.

- At any time you may double click the inserted element to edit it. The Content tab on the right contains detailed information on the usage of each element – just click the How to use section.
- The Content tab also allows you to select the appropriate settings for each element.

- Remember that you can undo and redo each step using the buttons on top of the working area. You may also duplicate or delete any inserted element.
- After your message is ready, click Save.
Regular Editor#
- It’s time to compose your message. If you already have the content of your email, you may upload it from your computer or URL. You may also reuse any older message, introducing modifications if necessary.
- The default option is to compose your message in HTML.
- If you feel comfortable with HTML, you may select the Simple HTML editor. Then you need to type your code (like <p>…</p> and <strong>…</strong>) on your own.
- You may also select the Visual HTML editor. Type the content of your message. Add the appropriate structure and style using the editor toolbar.
- Subscribers may try to read your message on a simple device which cannot display HTML structure correctly. To cater for this, you can also create a plain text version of a message. Switch to the Plain Text tab and choose Text editor, or, if you already have some HTML content, you may Convert HTML to Plain Text.
- ExpertSender also allows you to leverage the cutting-edge email technology: AMP for email. If AMP is enabled for your account, you will also see the AMP HTML tab. Switch to this tab and click Simple AMP HTML editor to enter your AMP HTML code.
- After your message is ready, click Update.
If you are performing a split test…
- If you chose to perform a split test in the first step, you will have an opportunity to add another version of your message now. Click the Add split test tab. The content you have just created will be copied to a new tab and you will be able to make any modifications you want, creating a slightly different version. You may also continue adding more message variants.

Polish, test and preview
- You should see the content of your message in the content window. At this point, there is a number of additional options which you can explore:
Headers and footers#
You may add a header or a footer to your message. Usually this contains a company logo, contact data or similar content. In order to insert a header or footer with this option, you need to prepare it earlier as a template. Go to Templates to learn how to prepare header and footer templates. Once you save it under a specific name, you will be able to access it here under that name.

However, remember that you can also use the editor in the message wizard to create a header and a footer for each message individually.
Google Analytics#
If you use Google Analytics, you may integrate it with your ExpertSender messages in order to gain access to the insights offered by this tool. Simply check Enable Google Analytics and fill in the fields. To learn more about Google Analytics integration, read Use Google Analytics with ExpertSender.
URL integrations#
URL integrations enable you to add custom information to the URLs in your message. For instance, you may include a personalization tag or any other variable. Later, you may use this information to carry out statistical analysis. To learn more about URL integrations, click URL integrations.
Add an attachment#
You may add attachments to your message. Click Manage attachments and select the files from your hard drive. The size of all attachments cannot exceed 400kB.
Blacklist check#
When you select Blacklist check, our system scans the entire HTML code, derives all domains from URLs, but also from all redirected URLs and checks each domain against major blacklists, such as SpamHaus, SURBL and URIBL. We strongly discourage sending any creatives containing blacklisted domains or URLs that redirect to any blacklisted domains.
Send to seed list#
Seed lists are designed to store either test email addresses or 3rd party seed email addresses. Test email addresses are usually used by our clients to test creatives (their deliverability and rendering) before the actual message is launched. Best practice is to first test a creative by sending it first to your test email addresses at major ISPs like Yahoo, Outlook.com, Gmail or AOL. 3rd party seed email addresses are usually used for estimating the percentage of inbox placement. To learn more about seed lists, read Managing lists.
Email test#
Email tests are a useful tool to verify how your message will be displayed in various clients. Our email test utility offers previews for all of the most popular desktop, web-based and mobile clients.
Live preview#
With the Live preview utility you may verify how your message will be displayed for a specific email address. Live preview is particularly useful if you want to test your Dynamic Content. For example, you may check if a subscriber will receive a message with their name displayed properly.
- If you are not satisfied with the result, continue editing your message. Otherwise, click Next.
Add recipients
- Select the subscriber lists and/or segments you want to send your message to (you may also include seed lists or suppression lists).

- In order to double-check how many recipients will receive your message, select Recount recipients at the bottom of the page.

- Click Next to proceed.
Choose delivery settings
- Select the Sending start date for your message and the Time Zone.
- The option Override delivery cap refers to the limit on the number of messages which may be sent to one subscriber within a given period of time. Delivery capping by default prevents your subscribers from being flooded with too many messages and it is advisable to set a sensible cap for each list (see Managing lists for more information). However, if you need to send more than one message to a subscriber within a short period of time, allow the cap to be overridden so that your message will not be blocked even in case it reaches the limit.
- Select the appropriate method of message delivery:
- Throttling – Throttling slows down the delivery of your email and allows you to adjust sending time to the number of receivers. Since ISPs have certain limits on messages they accept per hour from each IP, by sending too many emails simultaneously you may easily reach the limit and get your message blocked. By choosing throttling you may deliver all of your messages, albeit some of them with a small delay.
- Send Time Optimization – ExpertSender calculates the optimal sending time for each subscriber on the basis of their past email engagement. It has two options: 24h and 7 days. In the former case the algorithm selects the time of a day at which your subscriber is most likely to be active and open your message. With the latter option the algorithm identifies the weekday on which your subscriber will be active.
-
Time Travel – The message will be sent at each recipient’s local time according to their timezone.
Useful hint
Note that if you are performing a split test based on sending time, you will not be able to use Send Time Optimization or Time Travel. ExpertSender will generate an error if you try to proceed further with more than one sending date coupled with one of these two options.
- Select the IP channel configuration which will be used for sending the message. If you select Standard, your message will use the default configuration. To adjust IP number usage to your needs, select Custom and determine the email load associated with each IP.
- You may also add some tags to your message, such as “discount” or “special offer”. Later on, you may use a tag to find a specific message more easily, or to create a segment of subscribers who, for example, have already received a “special offer” email.

Split settings
You will only see this tab if you are performing a split test.
- To split the list of your recipients, drag the slider which sets the size of the experimental group. Subsequently, the experimental group will be evenly divided into subgroups which will each be sent one message variant (in a content-based split test) or be sent the message at different times (in a time-based split test). If you want all subscribers in the list to take part in the test, set the size of the test group to 100%.

- If you want the split test to determine which message variant is more successful in order to send it to the remaining recipients, set the size of the test group to any value below 100% and select the conditions which will be used to determine which variant wins. You may choose between the following criteria:
- Open rate (the group with the most opened emails)
- Click rate (the group with the highest click rate on a link included in the message)
- Goal rate (the group with the greatest number of subscribers achieving a predefined goal)
- Goal value summed amount (the group where the total goal value is largest)
- Manually
- Unless you choose the last option, the variant of the message picked by the split test as the winner will be automatically sent to the remaining recipients. You may specify the time after which the message is sent:

ExpertSender requires at least one hour to collect statistics, but it is recommended to set the interval to at least several hours, since only a small percentage of messages are opened within one hour.Useful hint
When you chose to determine the winner manually, remember to send the winning message. To do this, select Reports > Split Tests from the left-hand navigation, select your message and choose the version to send. Note that this is the only option when you are performing a time-based split test: you cannot determine the winner in any other way than manually!
You’re almost there!
- Carefully analyze the summary. If you would like to make any changes to the message content, selection of recipients or delivery settings, feel free to return to any of the previous steps.
- If you are ready, click Finish! Your message will be sent or scheduled shortly.
