Banners
Want to increase order values in your store and encourage customers to make larger purchases? Banners are a tool that will help you achieve this goal.
How do banners work?#
The ECDP platform allows you to create standard, static banners and dynamic banners that display:
- Shopping cart contents: products that the customer has already selected.
- Product recommendations: personalized suggestions based on customer behavior and product data.
Both types of banners work in real-time, adapting content to the customer’s current actions on the site.
What can you achieve with banners?
By adding a banner to your site, you’ll increase order value and improve the shopping experience for customers by offering them an easy preview of products they intend to buy.
You can also reach your customers with a broader offer and thereby increase order values.
These banners are versatile tools for increasing conversion in your store. Customers appreciate the personalized approach and intuitive shopping suggestions.
You can place them on any pages of your store, such as:
- product page,
- cart page,
- wishlist page,
- payment confirmation page for promotions and marketing campaigns.
With a simple editor, you can customize the appearance and content of banners to perfectly match your store’s style.
Requirements
Both types of banners operate based on data collected from your store’s website. To ensure they display correctly, make sure that the Web Tracking channel is properly configured.
Banners – statuses and marketing metrics
Information about the statuses of all created banners and their effectiveness can be found in the table available in the Automation > Banners section. Use it to monitor the effectiveness of each banner and optimize your sales strategy.
The banners you create are grouped by status:
- All – here you’ll find a collection of all created banners.
- Active – displays banners that are in use. You have options to preview active banners, pause their display, or delete them. You cannot edit them.
- Inactive – this list contains all banners that are no longer displayed. From here, you can preview, edit, activate, and delete them.
- Drafts – displays banners in creation. You can preview, edit, or delete their drafts.
- Deleted – every deleted banner ends up here. You only have the preview option available.
Marketing metrics available in the table include:
- Views – shows how many times a given banner was displayed.
- Clicked – shows how many times a customer clicked the banner.
Detailed settings for each banner can be found in the preview [gif — click on action in grid]
Creating banners
Click the Create new banner button on the right side above the table.
At the top, you’ll find a progress bar with consecutive banner creation stages. There are five of them. The stage you’re currently working on is underlined with a colored line. You can freely move between stages by clicking on them. This won’t cause any loss of entered data.
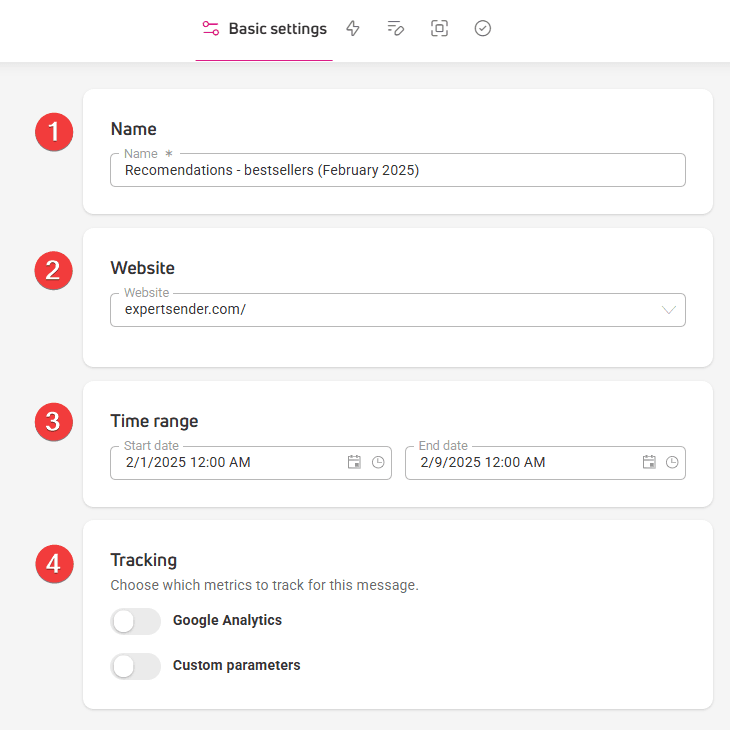
Step 1: Basic settings
Here you will:
- Enter the banner name, which will be visible in the statistics table available in the panel.
- From the dropdown list, select the website address where the banner will be displayed.
- Optionally set a time range – date and time – during which the banner should be displayed.
- In the Tracking section, you will enable tracking of custom and Google parameters.
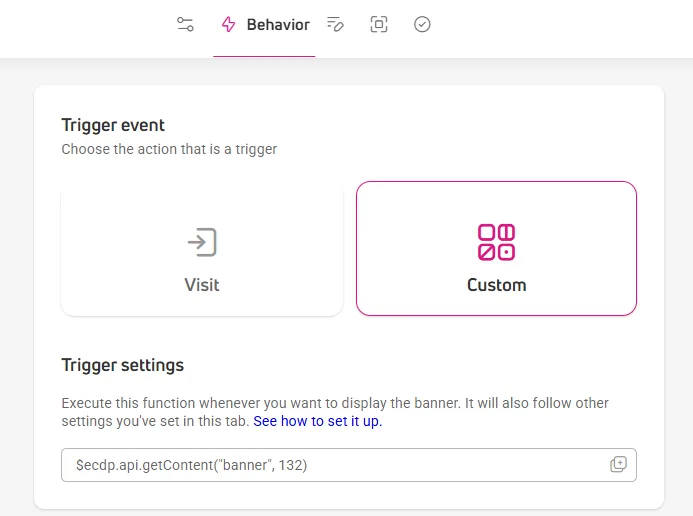
Step 2: Behavior
Here you’ll decide in what situation the banner will display.
In the Trigger event field, choose one or more of five actions:
- Visit – your banner will appear when the user enters the page.
- Custom event — your banner will appear when a user takes a specific action in your store, like clicking a button or link, instead of showing up right when they land on the page. To use custom events, you’ll need to complete a few extra steps. You’ll find the instructions in the How to set up a custom event section.

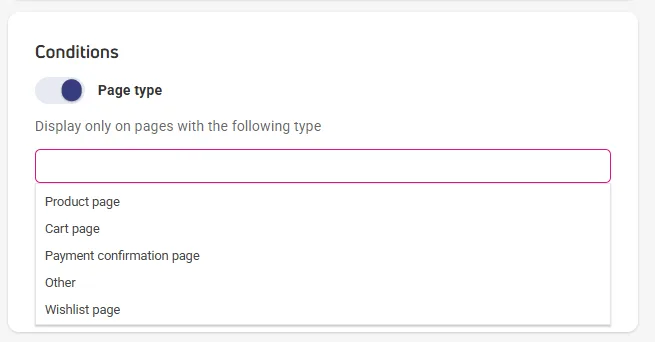
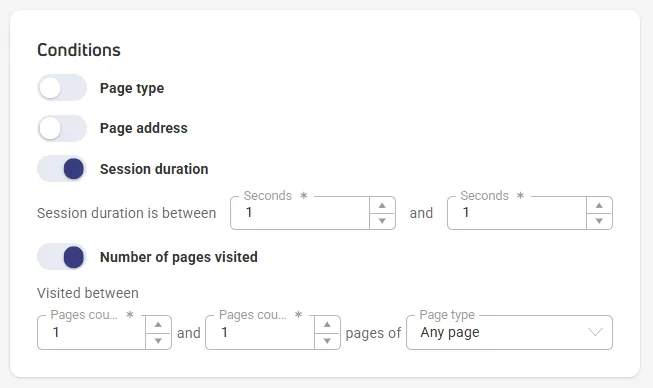
In the Conditions section, you’ll set:
- Page type – narrow down the banner display possibility to a selected page type, e.g. a product page, a cart page, a payment confirmation page or other pages.

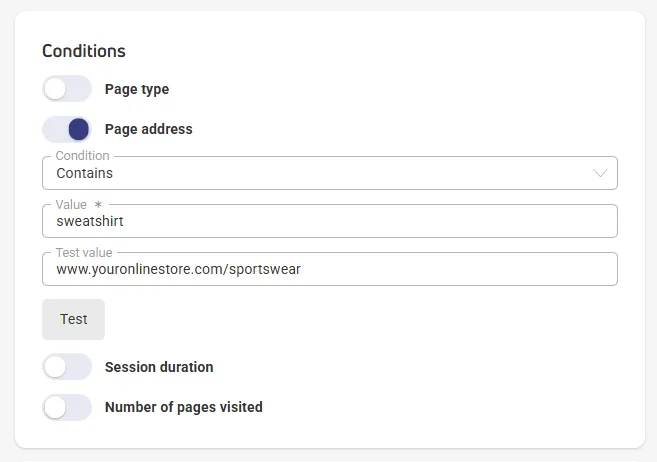
- Page address – specify what keywords, phrases, or domain name elements must be present in the page URL for the banner to display. You can choose from:
- Condition – this option opens a window for entering up to 10 regular expressions.
- Value – field where you place the keyword or URL.
- Test value – enter the address of the page or subpage where you want to test the banner. After entering, click Test and check if the banner displays on the page.

- Session duration – set the time interval after which the banner will display when a user enters the page, e.g., between 10 and 20 seconds.
- Number of visited pages – set the number of pages after which the banner should display. Also indicate the type of pages the user must have visited for the banner to be displayed: any page, product page, cart page, payment confirmation page.
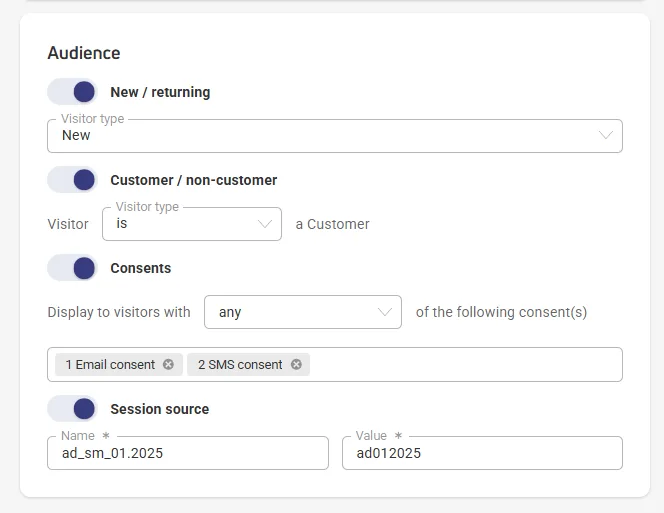
In the Recipients section, you’ll decide which customers will see the banner:
- New / returning — select the user type from the dropdown list.
- Customer / non-customer — choose whether the banner should display to current customers of your store or only to people who aren’t yet your customers.
- Consents — decide how many and what types of consents recipients must give to be shown the banner.
- Session source — indicate where customers who will see the banner should come from, e.g., a specific social media channel, search engine, article linking to the banner page. You can also provide a utm tag for a specific marketing campaign.
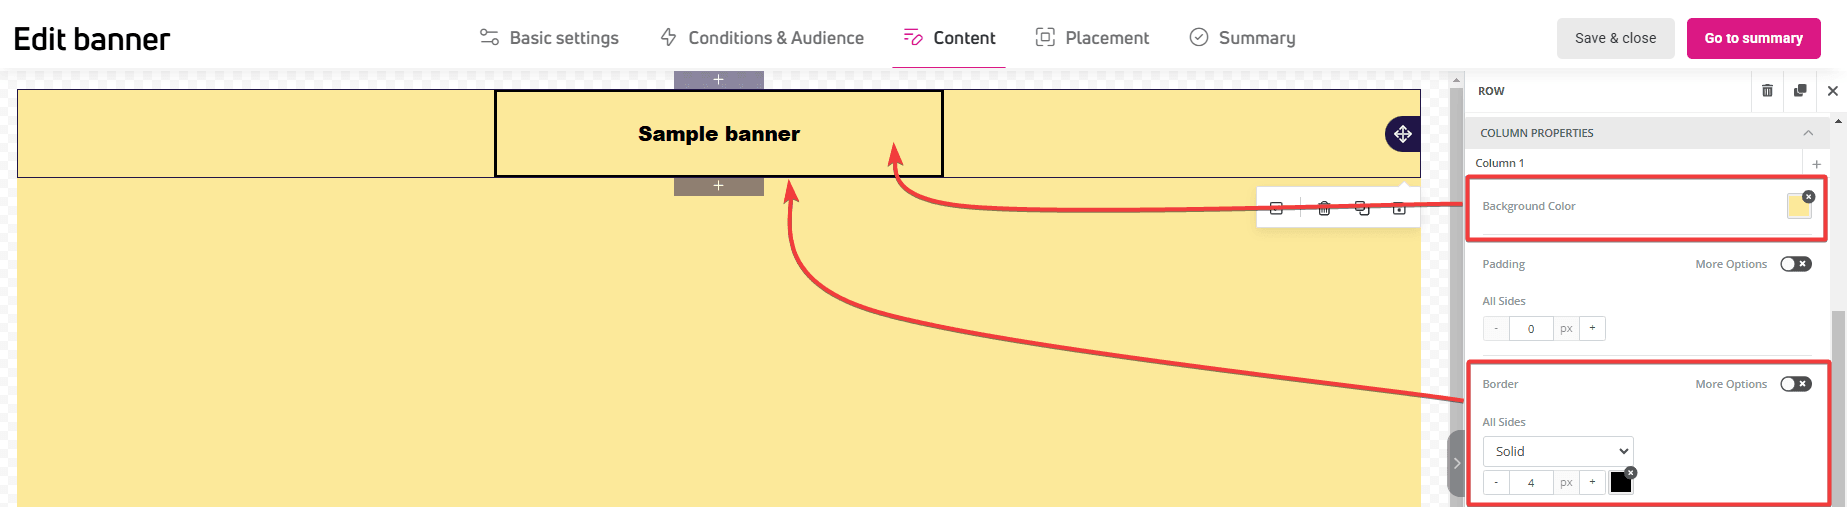
Step 3: Content
The editor is used for designing banners. You use the same editor in ECDP to create emails, forms, and pop-ups.
If this is your first encounter with the editor in the ExpertSender platform, you’ll find a detailed description of its functions and content blocks in the article: How does the content editor work?
Frequently displayed content in banners includes the customer’s cart contents and personalized product recommendations. In this article, you’ll find instructions on how to create such content in the editor: Cart and recommendations in different content types – step-by-step configuration
If you want to test thow the banners display on your site, create a test banner using the Text block, and basic styling.
Step 4: Placement#
Here, you’ll choose the place in your e-store where the banner will display. CSS selectors are used for this — you’ll find a brief explanation of what they are in the What is a CSS selector section.
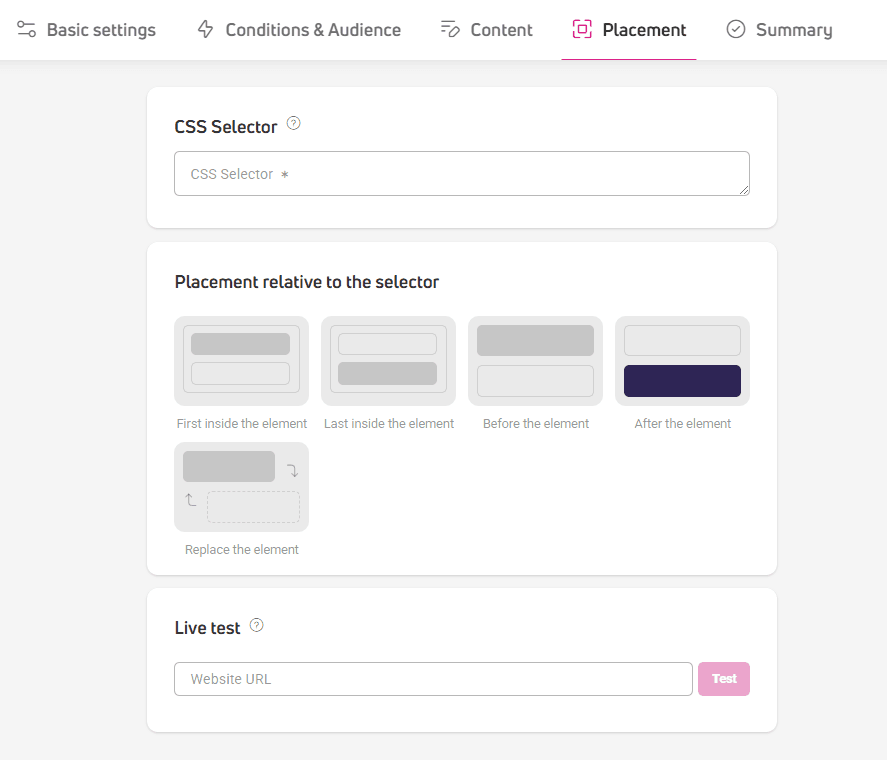
In the CSS Selector section, enter the name, ID, or class of the selector that will be the reference point for the banner. According to this selector, we’ll place the banner on your store’s page. How do you find a CSS selector on any page?
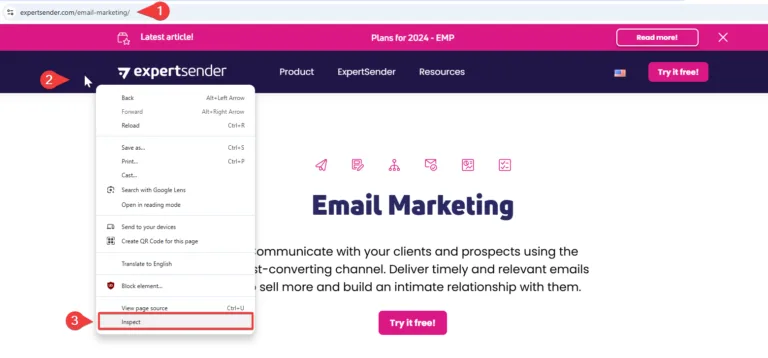
- Open the page where you want to place the banner in a separate tab.
- Hover your cursor over the element relative to which you want to place it (above, below, or inside the element).
- Right-click on the element and select Inspect from the context menu.

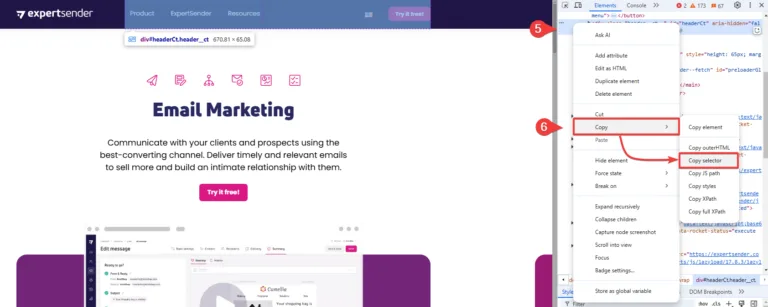
- A window with the page code will open on the right side of the browser.
- You’ll see your selected page element highlighted in blue.
- Hover over it with your cursor, right-click and select Copy > Copy selector.

- Go to the banner editor and paste the copied text in the CSS Selector section. Note whether the ID selector is preceded by a hash and the class selector by a dot.


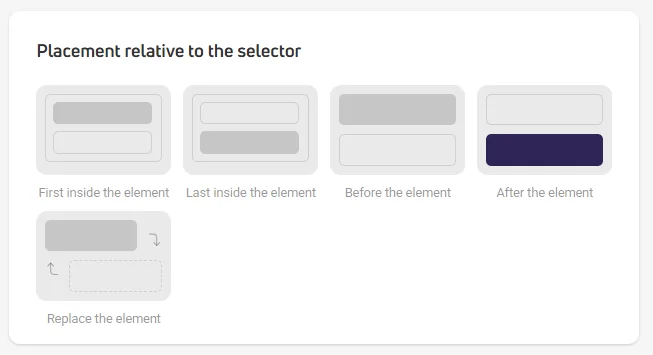
In the Placement relative to selector section, choose the banner placement relative to the previously selected selector on your page in relation to other elements that are on it:
- First inside the element – the banner will display as the first element in a group of other elements. This can be a fixed module visible on the store page, containing e.g., text, photos, and buttons. The banner will display inside such a module, before the elements in it.
- Last inside the element – the banner will display as the last element inside a group of other elements.
- Before the element – the banner will display before a single element, e.g., a text block or product photo.
- After the element – the banner will display right under a single element, e.g., a text block or product photo.
- Replace the element – the content from the given selector will be replaced with the banner created in ECDP.

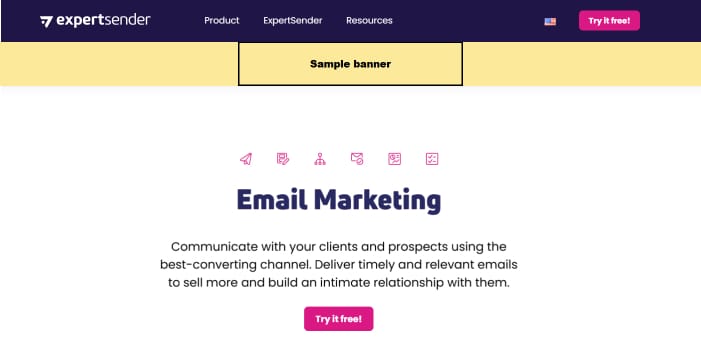
Live test — enter the address of subpages where you want to display the banner and click

Test. Check if your designed banner displays correctly. Remember that the preview will only work on pages where our tracking script is placed.
What is a CSS selector?
A CSS selector points to a specific element on a webpage, e.g., text or image, but also entire modules composed of many elements, e.g., menu bar, page footer, blog article module, etc.
With a selector, you can find the element you’re interested in within the page code and give it a unique style, e.g., change its color or size.
In banners, the CSS selector is used as a reference point. It indicates relative to which element on the page you can locate the banner, e.g., relative to the menu bar or a given product’s image.
The following selectors are used in banners:
- name – e.g., ‘p’ is an element named ‘paragraph’, ‘h’ is ‘heading’: h1
- id – element identifier, e.g., footer; this selector is always preceded by a hash: #footer
- class – always preceded by a dot: .yellow
Step 5: Summary
In the Summary, a checklist is displayed with elements necessary for displaying the banner and their status:
- Elements filled in correctly are highlighted in green.
- Blue is usually additional, marketing information that can add value to your content.
- Options that you need to correct or complete are highlighted in red. Click the pencil icon to go to the settings of that element. Red markings will also appear on the top bar next to steps that need checking.
- Orange marking will appear next to elements whose performance can be improved. If you don’t make changes, it won’t affect the banner display.
With the checklist, you can quickly verify if your selected settings are correct. If you decide to change any element, click the pencil icon to proceed to editing.
At the access bar level, there are two buttons:
- Save and close – will save the banner as a draft and take you to the banner list in the control panel.
- Activate – the banner will start displaying on your store’s page.
How to set up a custom event
A custom event takes the form of a function: $ecdp.api.getContent(type, id, maxWaitTime).
This function contains three parameters related to the content you want to display:
- type – required – specifies the content type, e.g. banner.
- id – required – specifies the identifier of the specific content you want to display. You’ll find the ID in Automation > Banners > ‘ID’ column.
- maxWaitTime – optional parameter (in milliseconds) – determines for how long the system will try to display the banner after a user action. The time range is 0-10,000 milliseconds (defaults to 0 ms). You don’t need to include the maxWaitTime parameter.
For the custom event to work correctly and the banner to display on the desired action, please wait for our tracking script to load.
You can check this using the function: $ecdp.helpers.websiteIsReady
Add a custom event to your page’s HTML code
You can attach the function to a specific element on your page, like a button or link. This way, your banner will appear automatically when someone clicks that element.
Here are two examples. Both use the getContent method, which triggers the banner with the specified ID.
Example 1: Button
<button id="myButton">Display banner</button>

<script>
document.getElementById("myButton").addEventListener("click", function() {
    $ecdp.api.getContent("banner", 586);
});
</script>
Example 2: Link
<a href="#" id="bannerLink">Display a banner</a>

<script>
document.getElementById("bannerLink").addEventListener("click", function(event) {
event.preventDefault(); // Prevents the link from navigating
    $ecdp.api.getContent("banner", 586);
});
</script>
In both cases, the function:
- “listens” for clicks.
- triggers the banner with ID 586 when clicked.
Make sure the selected banner has Active status, otherwise it won’t display.
Example 3: Checking if the script has been loaded before triggering the banner
// Check if ECDP script is ready and trigger banner
if ($ecdp.helpers.websiteIsReady) {
    // Website is ready, trigger the banner
    $ecdp.api.getContent("banner", 586);
} else {
    // ECDP script not ready yet, wait and check periodically
    const checkReady = setInterval(() => {
        if ($ecdp.helpers.websiteIsReady) {
            $ecdp.api.getContent("banner", 586);
            clearInterval(checkReady);
        }
    }, 100);
}
Add a custom event in the drag & drop editor
If you prefer not to edit your page code directly, you can use the HTML content block in the drag & drop editor. This method requires JavaScript code.
In the drag & drop editor:
- Find and add the HTML content block.
- Insert the JavaScript code from the examples above.
- Adjust the element IDs and banner parameters to fit your needs.
Important notes
- The banner will only load after the function is called.
- It will display only once per page view, for the same combination of type and ID parameters.
- Custom events only work for banners with Active status.
Add a custom event using Google Tag Manager
If you don’t want to manually edit your page code, you can use Google Tag Manager to add a custom event. This solution works well if you’re already using GTM and want to use custom events without developer help.
To use this method, you need a Google Tag Manager account connected to your store.
Create a tag with a custom event that triggers the banner
- Go to Google Tag Manager.
- Navigate to the container connected to the page where you’ll place the code.
- Go to the Tags tab.
- Click New to create a new tag.
- Name your tag, for example ‘Custom event – link click’ then click Tag Configuration.
- Select Custom HTML.
- In the HTML section, insert the function with defined type and id parameters, for example: $ecdp.api.getContent(“banner”, 586); These parameters specify which content created in ECDP will be triggered by the link click.
Set when the tag should fire
- Go to the Triggers section, where you configure the rule that will trigger the tag.
- Select Click – All Elements from the list.
- In the This trigger fires on section, select Some Clicks.
- In the Fire this trigger when an Event occurs and all these conditions are true section:
- in the first field, select Click Text.
- in the second field, set the condition to equals.
- In the last field, enter the text that should trigger the banner when clicked.
- Save your changes.
If you don’t see Click Text variable in the dropdown menu, make sure it’s active:
- Go to the Variables tab.
- Click Configure.
- In the Clicks section, check Click Text.
Test if the tag works
- Test if the code was added correctly – click Preview in the upper right corner of the screen.
- Then go to your page and click the text that triggers the banner function.
- Return to the preview window and check if the created tag was triggered.
Close the preview window and click Publish.
How to live test an opt-in prompt triggered by a custom event
The function must be called in the browser when you want to test the prompt with a custom event using the “Live test” option:
- Go to your store page and open the Inspect tool:
- using your keyboard by pressing F12,
- or right-clicking and selecting it from the context menu.
- Select the Console tab.
- Type or paste the copied function with the prompt parameters.
- Press Enter to run the script.
This will trigger the prompt directly from the console, which is necessary to activate the custom event.