Segmentation
Segmentation involves grouping customers based on common attributes, needs, or conditions. It is used to:
- Target marketing communication more effectively,
- Response faster and more accurately to customer behavior on your website,
- Maintain the customer database in good condition.
Segmentation dashboard
To access the segmentation dashboard, go to Customers > Segmentation. Here, you can view all the segments you have created for email messages, scenarios (workflows), or pop-ups.
All the segments are listed in a table with the following details:
- ID – a segment identifying number,
- Name and description – a short phrase describing how or when to use it, such as ‘Spent min 200 USD’ or ‘Discount for Loyal (RFM segment)’.
- Edited by – the email of the user who last edited the segment.
- Last edit – a date of the last edit.
- Last count – the current number of customers in the segment. Click the arrow to refresh the count.
- Count date – the date and time of the last count refresh, based on your account’s time zone.
- Action buttons: Segment statistics, usage history, edit, duplicate, delete.
To filter segments by categories, use the quick search function above the grid table. You can also adjust the number of displayed segments or use the pagination tool below the grid to browse the segment list efficiently.
Create a customer segment
Click the Create segment button in the top right corner of the dashboard to add name and description.
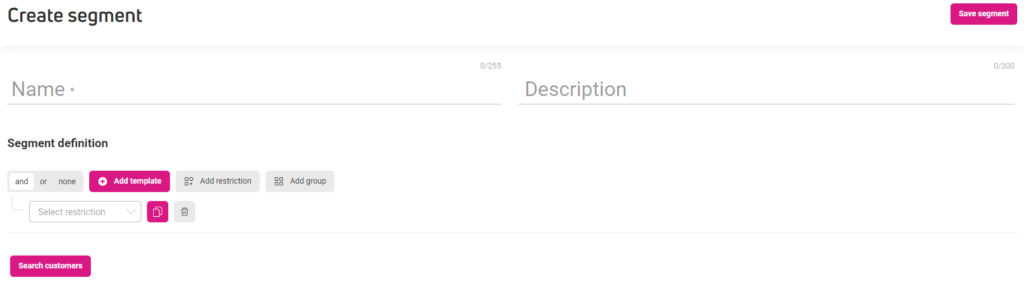
In Segment definition, set the conditions the customer must meet to be included in the segment. You can do that with the following options.
Logic operators: and, or, none
Logic operators serve as an initial filter to the customer database. Each operator represents a single condition that the customer must meet to fit in the segment. Think of them as a link between consecutive restrictions:
- I am looking for customers who are new AND have spent at least $200 on an order.
- I am looking for customers who have placed 4 orders OR spent at least $1,000 on an order.
- I am looking for customers, NONE of whom has placed an order.
Basic restriction types#
Basic restrictions enable detailed filtering, along with ‘and’, ‘or’, and ‘none’ operators. Each of the basic restrictions can be further narrowed down:
- Customer – this restriction contains both system and custom attributes. Depending on the attribute, you can limit its scope using additional restrictions or by entering a value, date or expression, e.g., domain name.
- Consent – filter customers based on consent types and statuses.
- RFM – filters customers by their RFM segment, which is determined by customer behavioral data.
- Order – filters customers by the order value or the number of orders placed.
- Email – filters customers based on their reaction to your email messages, such as sent, opened, clicked, not sent, not opened, not clicked.
- SMS – filters customers based on their reaction to your SMS messages, such as sent, clicked, not sent, not clicked.
- Web push – filters customers based on their reaction to your web push notifications, such as sent, viewed, clicked, not sent, not viewed, not clicked.
- Current cart – segments customers based on cart total value, including those with an empty cart. You can narrow down this segment by the following product attributes: product ID, name, category, or product URL. We store the cart content information:
- Up to 90 days if your store visitor is also a customer.
- Up to 30 days if the visitor is not a store customer.
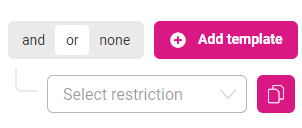
Segment templates
If you need to quickly build a simple customer segment, use one of the pre-built template. You can combine and customize them to create more detailed segments. Don’t forget to save your work by hitting the Save segment button in the top right corner.
Click Add template to display and choose from a set of the most popular restrictions used in ecommerce.
Customer attributes section contains presets for the most popular customer attributes, such as birthday or gender:
- Birthday – create a segment for customers celebrating their birthday on a specific date.
- Men, women – create a segment based on customers’ gender.

Engagement contains segment presets based on common customer responses to your communication
- Engaged customers – create a segment based on customers’ reaction to your newsletters or if they visited your website within the last 30 days.
- Unengaged customers – create a segment based on customers’ lack of interaction with your newsletters or website.
- Engaged in email channel – create a segment based on customers’ engagement in your emails within last 30 days.
- Unengaged in email channel – create a segment based on customers’ lack of engagement in your emails within last 30 days.
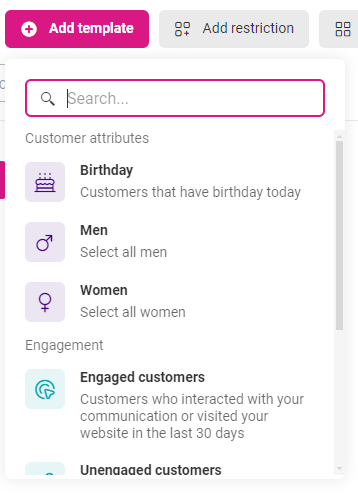
Add single restriction
Click Add Restriction to add a single restriction. This is the fundamental building block for creating complex segments. You can expand and combine single restrictions to create customer segments that closely match your marketing goals, or to tailor your communication to the promising audience segment you have just identified.
Add a group of restrictions
Click Add group to add a subset of restrictions. This filter allows you to group multiple conditions together, enabling you to narrow down and refine your existing set of conditions. Use it to precisely target specific segments, enhancing the accuracy and effectiveness of your marketing efforts.
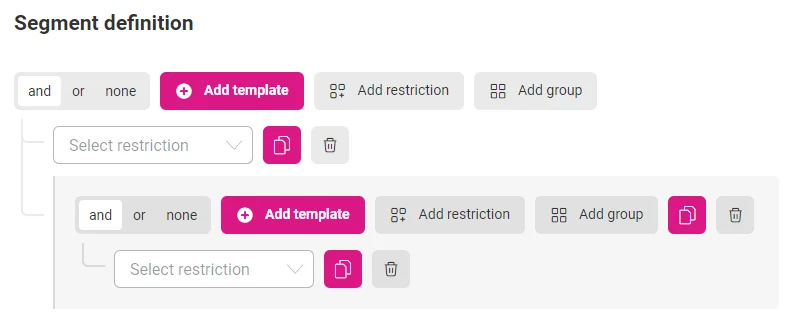
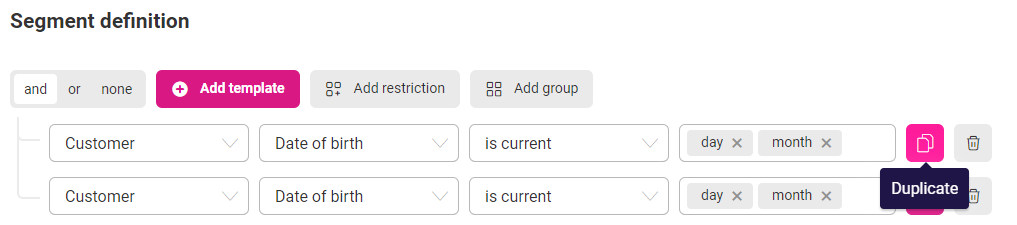
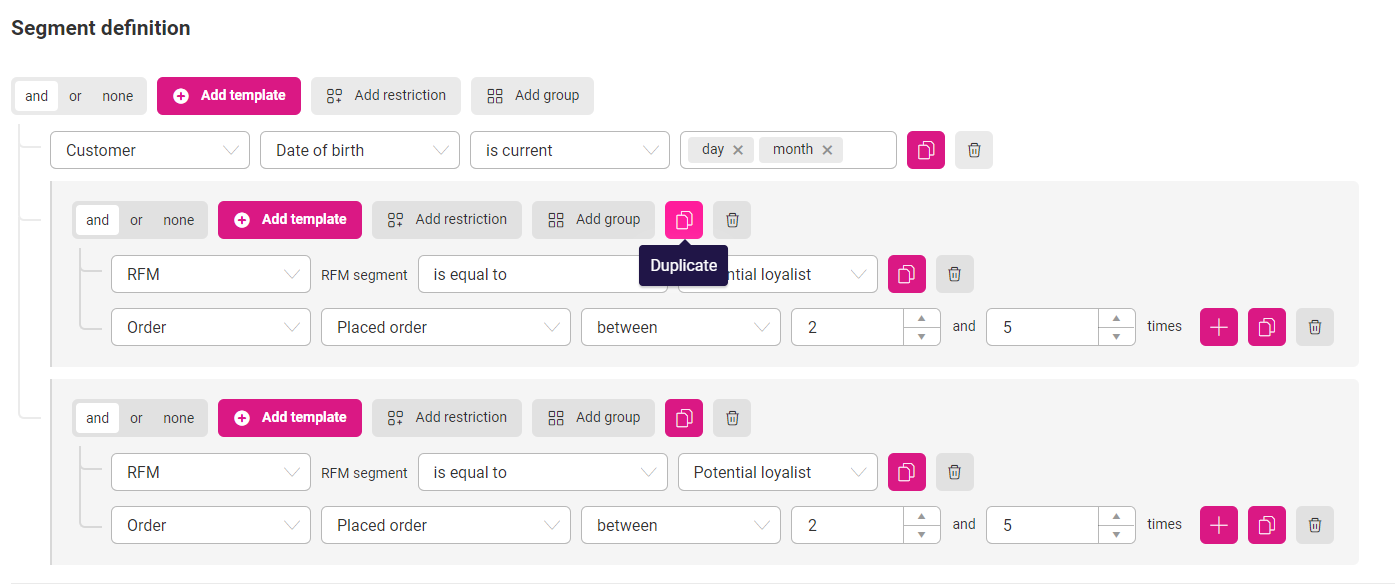
Duplicate and delete restrictions
The last two action buttons allow you to duplicate and delete single or group restrictions.
Duplicate a single restriction
Duplicate a group of restriction
If you narrow the time range using the hour, month, and year labels simultaneously, and you enter a value for only one of these labels, the value won’t be duplicated.
However, if you enter values for all these labels, the values will be duplicated.
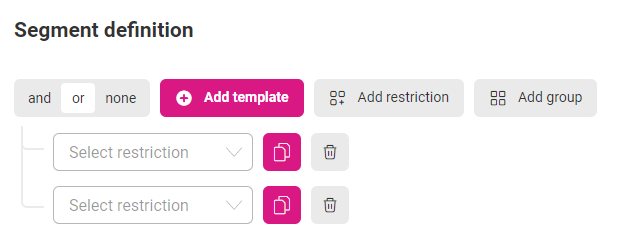
Search for customers that meet segment restrictions#
Once the segment is ready, click Search customers to see how many customers math the conditions. The search function is active after you select at least one condition.
A list of customers, who met the segment criteria, will be displayed in a grid table under the segment, along with direct access to their 360 profiles.
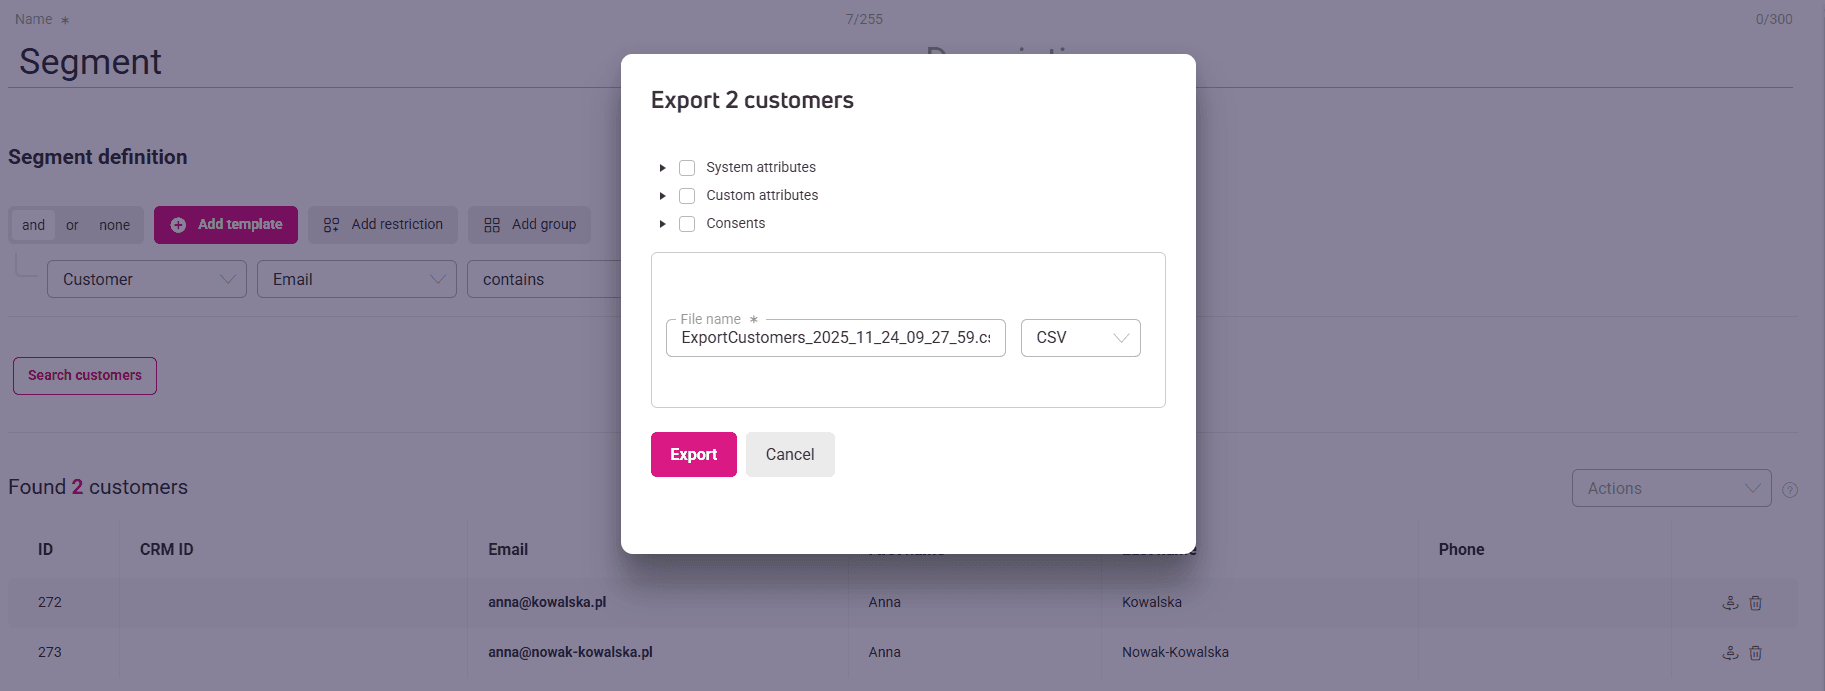
Exporting customer data from a selected segment
You can export the data to a CSV or XLSX file, including system and customer attributes, and consents.
Use the Action option available above the grid and select Export customers.
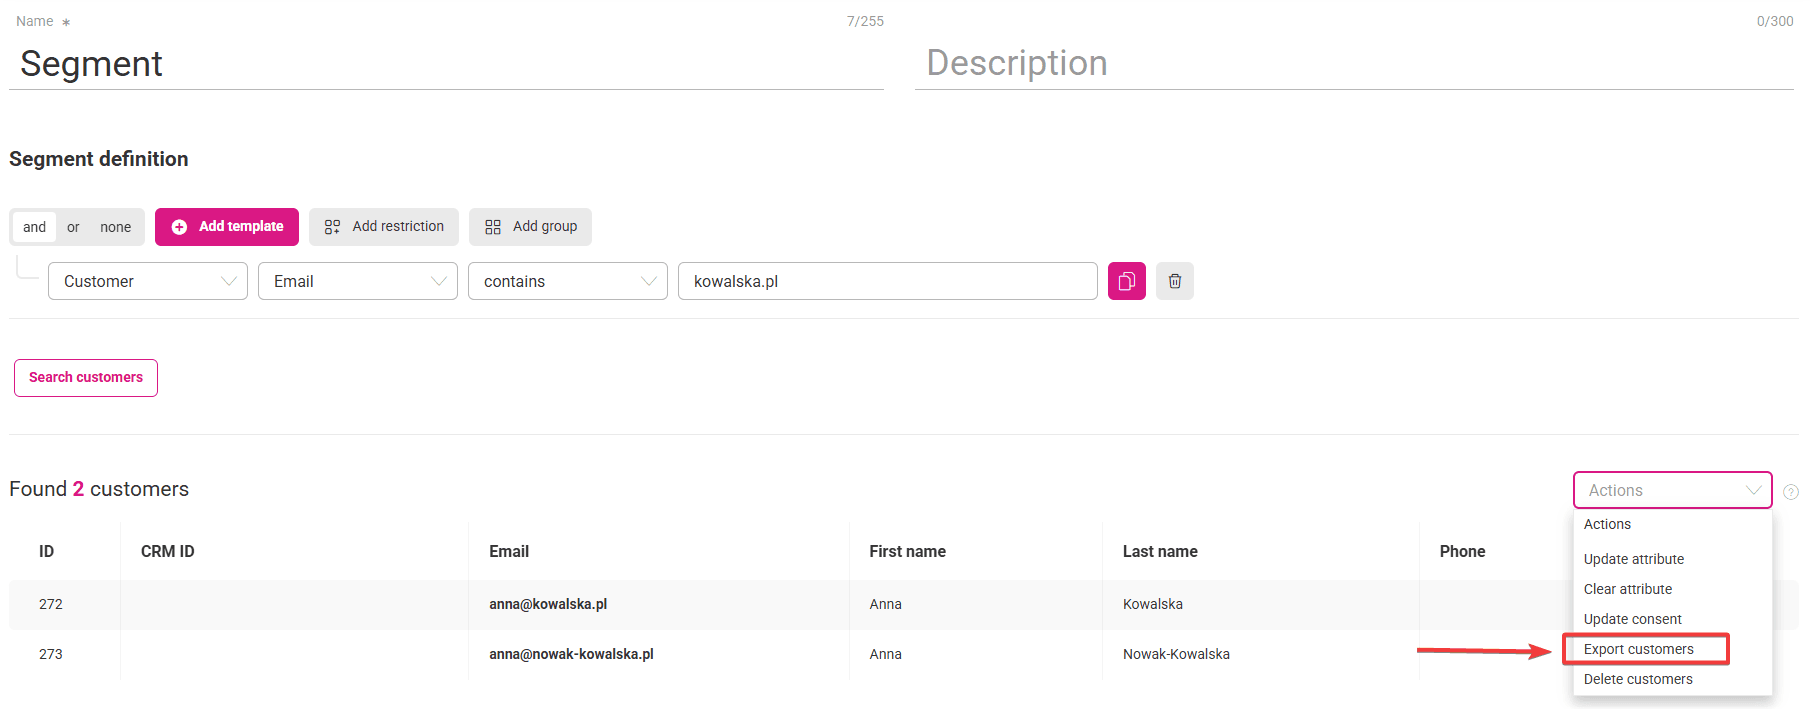
Next, check all the system and customer data you want to include in the file.
Creating customer segments may seem tedious and overly complicate, but it is actually quite the opposite. Instead of importing the customer list every time you need to email a specific group of customers, simply filter them in the Segmentation section. You will instantly receive a tailored audience for your marketing campaign.