Importing and exporting customer data
Importing customer data from a file
For large amounts of customer data, including customer attributes, we recommend using a file import.
How to prepare the data file for import?
Importing customer data from a file allows you to add large amounts of data to the platform at once by uploading the file directly. Accepted file formats include CSV, TXT, XLS, XLSX, or ZIP, with a maximum size of 28 MB. If your file exceeds this size, split it into smaller files.
The file should contain at least one of the following types of customer data:
- CRM ID (the customer ID assigned by your CRM system, if applicable)
- Email address
- Phone number with country code
Additional customer data that can be included are first name, last name, and date of birth.
For date, time, and numeric fields, use the following formats:
- Date and time: DD.MM.YYYY hh:mm (e.g., 30.09.2022 10:09)
- Numeric values: Use either a comma or space as a thousand separator, e.g., 5,290 or 5 290. Maintain a consistent format throughout the file.
- Phone number: must include a prefix (country code). Apart from digits, the phone number is allowed to contain a plus sign ‘+’, left and right brackets ‘(‘ and ‘)’, or leading zeros. Regardless of input format, the phone number will be saved as an integer up to 20 characters long. Here is how a valid phone number will be stored in the database:
- +48501228855 = 48501228855
- (+48)501228855 = 48501228855
- +48 (501) 228855 = 48501228855
- 0048 501 22 88 55 = 48501228855
File import instructions#
In the first step, prepare the platform settings for import.
- Go to main menu and select Settings > Customers > Customers.
- Choose the customer information required when importing customer data:
- Email.
- Phone number.
- CRM ID.
- Next, decide:
- If all of the above customer information should be required in the import file,
- Or if including any of the above data is sufficient.
- Select the default matching mode to identify the customer within the platform, assign custom fields, and connect order data. Choose one of the following data:
- Email.
- Phone number.
- CRM ID.
- GUID.
- Handle the duplicated data while uploading. The duplicates will be identified by the default matching mode:
- Ignore duplicates – only the first customer data set will be uploaded. If any duplicates occur later while importing, they will be ignored.
- Process all – all duplicated customer data sets will be merged into one set. If any duplicates occur later while importing, they will overwrite the existing data.
- Save the changes.
In the second step, upload the file:
- Prepare the import file following the instructions in How to prepare a data file for import?
- Go to main menu and select Customers > Customers.
- Click the Import customers button.
- Click Select file.
- Select the file location on your computer and click Open. The file will be uploaded to the platform.
In the third step, manage the file settings:
- Choose the import type to handle data for both new and existing customers, in case you import them multiple times:
- Add new and update existing customers.
- Add new customers without updating the existing ones.
- Update existing customers without adding new ones.
- Choose the primary identifier for each customer:
- Email.
- Phone number.
- CRM ID.
- Toggle on Replace with empty value if you want to import customer data with missing data in the mentioned primary identifier field.
- Click Advanced settings to:
- Select the separator used in your file. For a CSV file, the separator character will be a comma, and for TXT format, it will be a tab.
- Indicate if your file has headers by toggling on if you file include headers (column names).
- Select the character encoding applied in your file.
- You see a sample of how your data will look after import. If the result is not as expected, proceed to the next step – column mapping.
Column mapping on data import
The last step is column mapping, which ensures that your data is displayed properly in the tables used across the ExpertSender platform.
What is column mapping? The data columns in your file may be sorted in a different order than the data columns in ExpertSender CDP. To display data correctly after import, you must assign the columns from your file to the corresponding columns in the platform.
When mapping, columns from the file will be displayed in a horizontal orientation. The data contained in each column will appear as rows. For this reason, the terms “columns” and “rows” are used interchangeably in the article.
To map the columns:
- Click the dropdown list displayed on the left side of each row.
- Select a unique attribute for each row. For example, if the row displays email addresses, select E-mail from the list. If you see customers’ names in the row, select Name from the list. Repeat this step for all the rows.
- The dropdown list displays both system attributes and custom attributes. We recommend adding custom attributes before starting with data imports. Read the instructions on how to add custom attributes.
- When you finish mapping, click Save.
The import will start, which usually takes a few minutes and depends on the amount of data in the file. The more data, the longer it will take.
After the import is complete, you will receive a notification in the Notification section of the main menu.
Importing customer data manually
This method is suitable for adding a few customer records to the system and doesn’t require column mapping.
- Go to main menu and select Customers > Customers.
- Click the Add new customer button.
- Fill in the fields with the respective customer information in the Customer data section. Fields marked with * are mandatory.
- In the Custom attributes section, select or type in the required data.
- In the Consents section, assign consents for marketing communication granted by the customer. The list will include all the consents imported by you or added manually. Read the instructions on how to add consents to the platform.
- Click Save.
How to export customer data
- Go to main menu and select Customers > Customers.
- Click the dropdown menu located above the grid, to the right-hand side.
- Chose Export customers from the list.
- Select the system and custom attributes, as well as consents, that you want to export from the provided list.
- Name your file and choose the preferred export format in the fields below the list.
- Click Export.
- Go to the Notification section in the main menu.
- Once the data file is ready, a notification with a download button will appear.
- Click Download file.
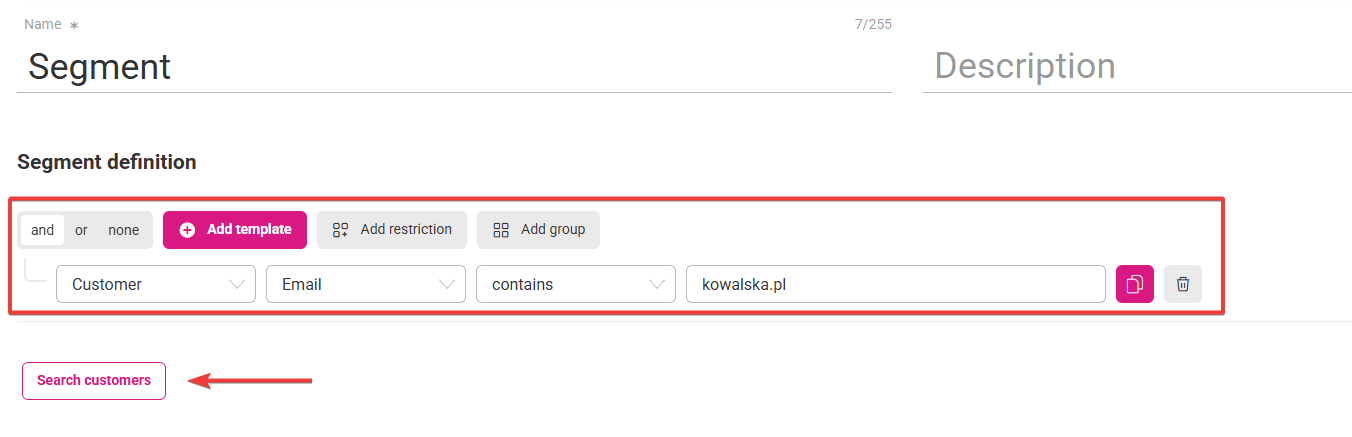
Exporting customer data from a segment
You can also export customer data from a segment. Here’s how:
- Go to Customers > Segmentation.
- Select or create a segment you want to export data from.
- Choose one or more segmentation criteria and click Find customers.

- Go to Actions, available above the table on the right side, and select Export customers.

- Choose which data you want to download and the file format.

- Export selected data.