Bannery
Chcesz zwiększyć wartość zamówień w swoim sklepie i zachęcić klientów do większych zakupów? Bannery to narzędzie, które pomoże Ci osiągnąć ten cel.
Platforma ECDP umożliwia tworzenie standardowych, statycznych bannerów oraz bannerów dynamicznych, które wyświetlają:
- Zawartość koszyka: produkty, które klient już wybrał.
- Rekomendacje produktów: spersonalizowane sugestie oparte na zachowaniach klientów i danych o produktach.
Oba typy bannerów działają w czasie rzeczywistym, dopasowując treść do bieżących działań klienta na stronie.
Dodając banner na swojej stronie zwiększysz wartość zamówienia i poprawisz doświadczenia zakupowe klientów, oferując im łatwy podgląd produktów, które zamierzają kupić.
Możesz też dotrzeć do swoich klientów z szerszą ofertą i tym samym podnieść wartość zamówień.
Bannery te są wszechstronnym narzędziem zwiększającym konwersję w sklepie. Klienci doceniają personalizowane podejście i intuicyjne sugestie zakupowe.
Umieścisz je na dowolnych stronach swojego sklepu, takich jak:
- strona główna,
- podstrona z opisem produktu,
- strona koszyka,
- strona z potwierdzeniem płatności promocji i kampanii marketingowych.
Dzięki prostemu edytorowi możesz dostosować wygląd i treść bannerów, aby idealnie pasowały do stylu Twojego sklepu.
Wymagania
Oba rodzaje bannerów działają na podstawie danych pozyskanych ze strony Twojego sklepu. Żeby wyświetlały się prawidłowo, upewnij się, że kanał Web Tracking jest poprawnie skonfigurowany .
Bannery – statusy i metryki marketingowe
Informacje o statusach wszystkich utworzonych bannerów oraz ich skuteczności znajdziesz w tabeli dostępnej w sekcji Automatyzacja > Bannery. Z jej pomocą możesz monitorować efektywność każdego banneru i optymalizować strategię sprzedaży.
Stworzone przez Ciebie bannery są pogrupowane według statusów:
- Wszystkie – tu znajdziesz zbiór wszystkich stworzonych bannerów.
- Aktywny – wyświetla bannery, które są w użyciu. Masz do dyspozycji opcje podglądu aktywnych bannerów, możesz wstrzymać ich wyświetlanie lub je usunąć. Nie możesz ich edytować.
- Nieaktywny – na tej liście znajdują się wszystkie niewyświetlane już bannery. Z tego miejsca możesz je podejrzeć, edytować, aktywować oraz usunąć.
- Szkice – wyświetla bannery w trakcie tworzenia. Ich szkice możesz podejrzeć, edytować lub usunąć.
- Usunięty – trafia tu każdy usunięty banner. Masz do dyspozycji jedynie opcję podglądu.
Metryki marketingowe dostępne w tabeli to:
- Wyświetlenia – informuje, ile razy został wyświetlony dany banner.
- Kliknięcia – informuje, ile razy klient kliknął banner.
Szczegółowe ustawienia danego bannera znajdziesz w podglądzie.
Tworzenie bannerów
Przejdź do Automatyzacja > Bannery > Stwórz nowy banner.
Na górze znajdziesz pasek postępu z kolejnymi etapami tworzenia bannera. Jest ich pięć. Etap, nad którym aktualnie pracujesz podkreślony jest kolorową linią. Możesz swobodnie poruszać się między etapami klikając na nie. Nie spowoduje to utraty wprowadzonych danych.
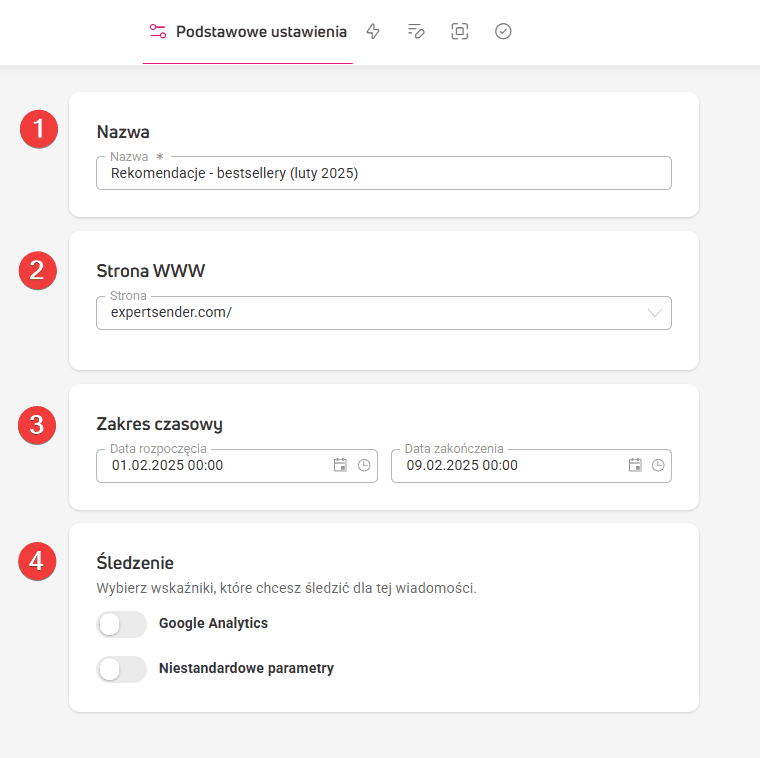
Etap 1: Podstawowe ustawienia
W tym miejscu:
- Wpisz nazwę bannera, będzie ona widoczna w tabeli ze statystykami dostępnej w panelu.
- Z rozwijalnej listy wybierz adres strony WWW, na której będzie wyświetlany banner.
- Opcjonalnie ustaw zakres czasowy – datę i czas – w jakim ma wyświetlać się banner.
- W sekcji Śledzenie włączysz śledzenie parametrów niestandardowych i Google Analytics.
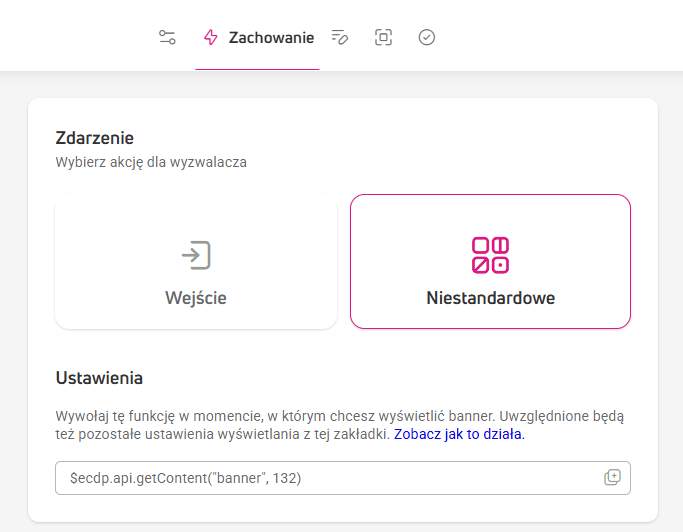
Etap 2: Zachowanie
Tutaj zadecydujesz, w jakiej sytuacji wyświetli się banner. W polu Zdarzenie wybierz jedną z akcji:
- Wejście – banner wyświetli się, przy wejściu użytkownika na stronę.
- Zdarzenie niestandardowe – banner wyświetli się w wyniku wykonania jakiejś akcji przez użytkownika w Twoim sklepie, np. kliknięcia przycisku lub linku, zamiast od razu po wejściu na stronę. Aby skorzystać ze zdarzenia niestandardowego, trzeba wykonać kilka dodatkowych kroków. Instrukcję znajdziesz w sekcji Jak skonfigurować zdarzenie niestandardowe.
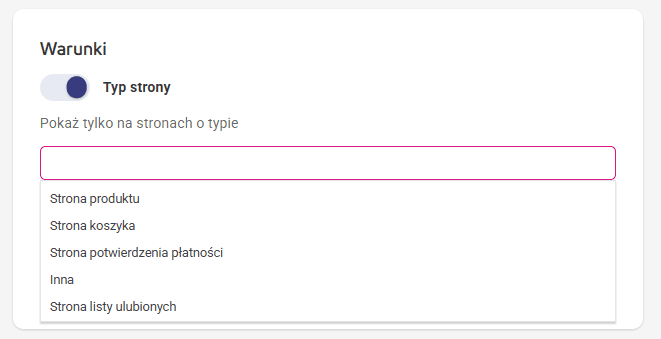
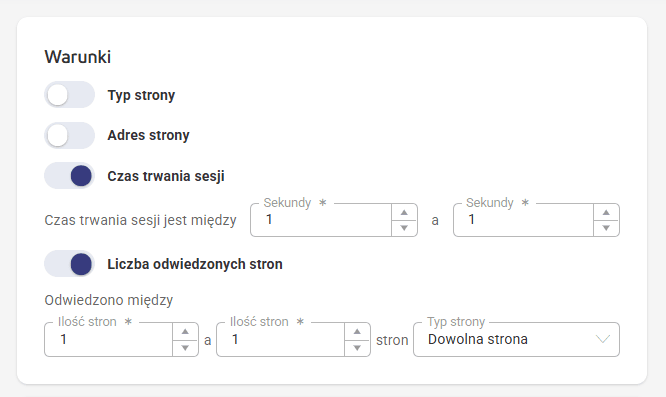
W sekcji Warunki ustawisz:
- Typ strony – zawęź możliwość wyświetlania bannera do wybranego typu strony, np. np. strona produktu, koszyka lub potwierdzenia płatności.

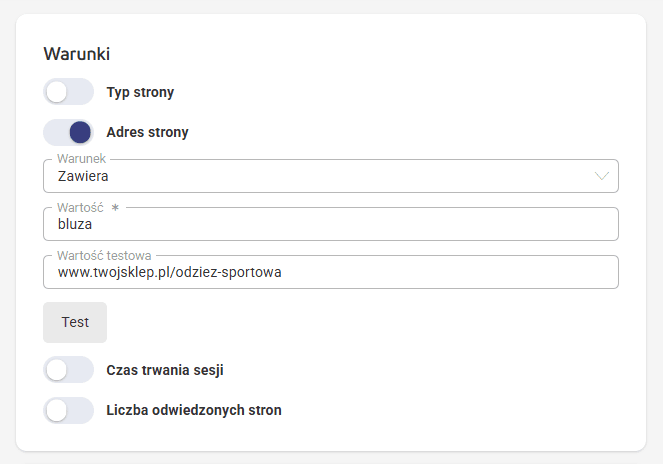
- Adres strony – doprecyzuj, jakie słowa kluczowe, frazy lub elementy nazwy domeny muszą znaleźć się w adresie URL strony, żeby wyświetlił się na niej banner. Do wyboru masz:
- Warunek: równa się, rozpoczyna się, zawiera, wyrażenie regularne. – opcja ta otwiera okno na wprowadzenie maksymalnie 10 wyrażeń regularnych.
- Wartość – pole, w którym umieszczasz słowo kluczowe lub adres URL.
- Wartość testowa – – wprowadź adres strony lub podstrony, na której chcesz przetestować banner. Po wprowadzeniu kliknij Test i sprawdź, czy banner wyświetla się na stronie.

- Czas trwania sesji – ustaw przedział czasowy, po którym wyświetli się banner, gdy użytkownik wejdzie na stronę, np. między 10 a 20 sekund.
- Liczba odwiedzonych stron – ustaw liczbę stron, po których ma się wyświetlić banner. Wskaż również typ strony, jakie musiał odwiedzić użytkownik, aby banner został wyświetlony: dowolna strona, strona produktu, strona koszyka, strona potwierdzenia płatności.

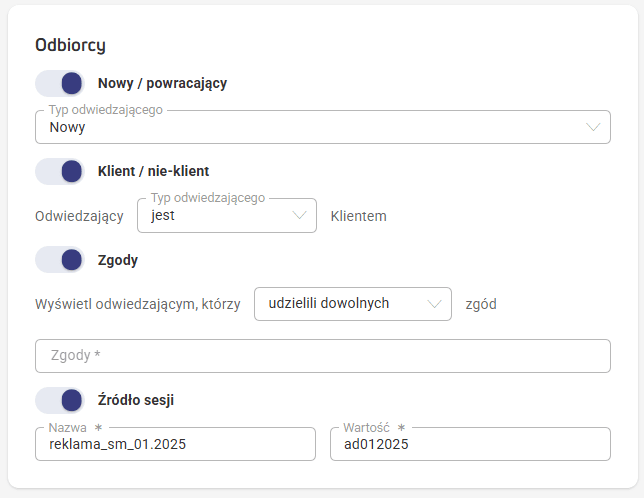
W sekcji Odbiorcy zdecydujesz, którzy klienci zobaczą banner:
- Nowy / powracający – wybierz typ użytkownika z rozwijanej listy.
- Klient / nie-klient – wybierz, czy banner ma się wyświetlić aktualnym klientom Twojego sklepu, czy wyłącznie osobom, które nie są jeszcze Twoimi klientami.
- Zgody – zdecyduj, ile i jakich zgód muszą udzielić odbiorcy, żeby można było im wyświetlić banner.
- Źródło sesji – wskaż, skąd mają przyjść klienci, którym wyświetli się banner.
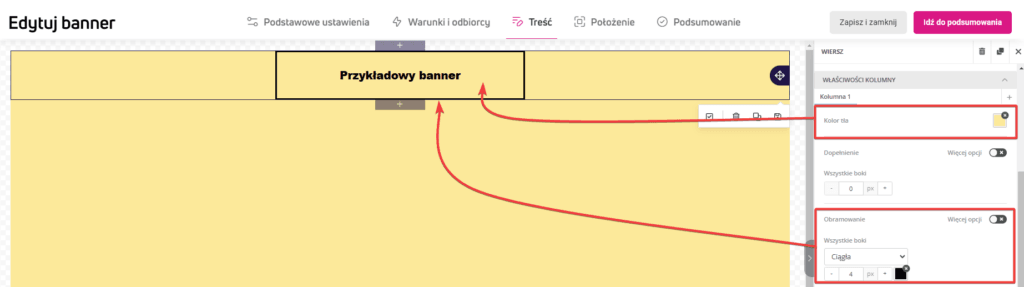
Etap 3: Treść
Do projektowania bannerów służy edytor treści. Takiego samego edytora używasz w ECDP do tworzenia e-maili, formularzy i pop-upów.
Jeśli to Twoja pierwsza styczność z edytorem w platformie ExpertSender, dokładny opis jego funkcji oraz bloków treści znajdziesz w artykule: Jak działa edytor treści?
Często wyświetlaną treścią w bannerach jest zawartość koszyka klienta oraz spersonalizowane rekomendacje produktów. W tym artykule znajdziesz instrukcję jak stworzyć taką treść w edytorze: Konfiguracja koszyka i rekomendacji w różnych rodzajach treści
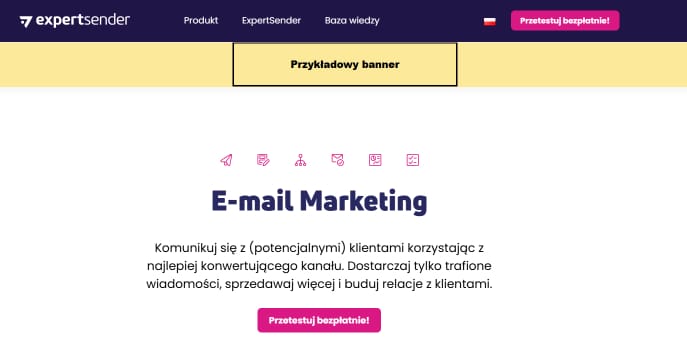
Jeśli chcesz przetestować wyświetlanie się bannerów na Twojej stronie, stwór testopwy banner za pomocą bloku Tekst, i podstawowego stylowania.
Etap 4: Położenie
W tym miejscu wybierzesz miejsce w Twoim e-sklepie, w którym wyświetli się banner. Służą do tego selektory CSS – krótkie wyjaśnienie czym one są znajdziesz w sekcji Czym jest selektor CSS?
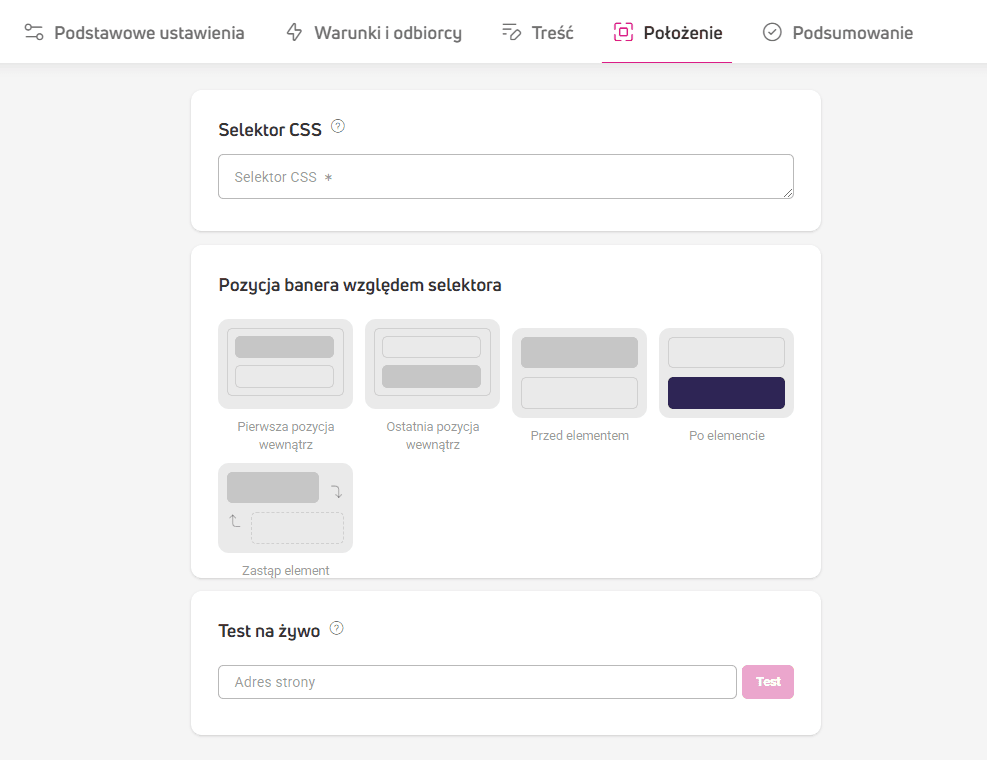
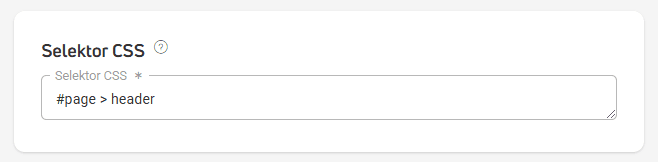
W sekcji Selektor CSS wprowadź nazwę, ID lub klasę selektora, który będzie punktem orientacyjnym dla bannera. Według tego selektora umiejscowimy banner na stronie Twojego sklepu. Jak znajdziesz selektor CSS na dowolnej stronie?
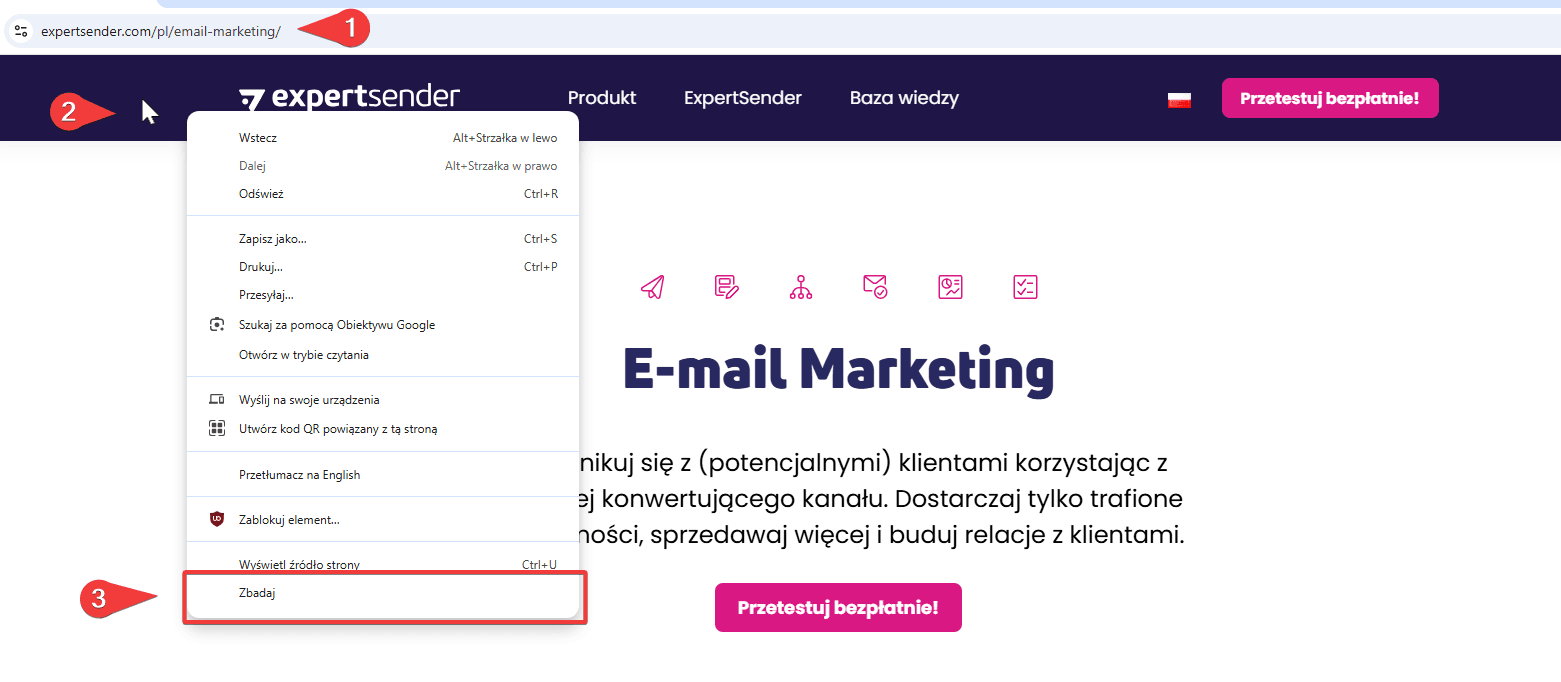
- W osobnej karcie otwórz stronę, na której chcesz umieścić banner.
- Najedź kursorem na element na stronie, względem, którego chcesz go umieścić (nad, pod lub wewnątrz elementu).
- Kliknij prawym przyciskiem myszy na element i z podręcznego menu wybierz Zbadaj lub Inspect.

- Po prawej stronie przeglądarki otworzy się okno z kodem strony.
- Zobaczysz podświetlony na niebiesko wybrany przez Ciebie element strony.
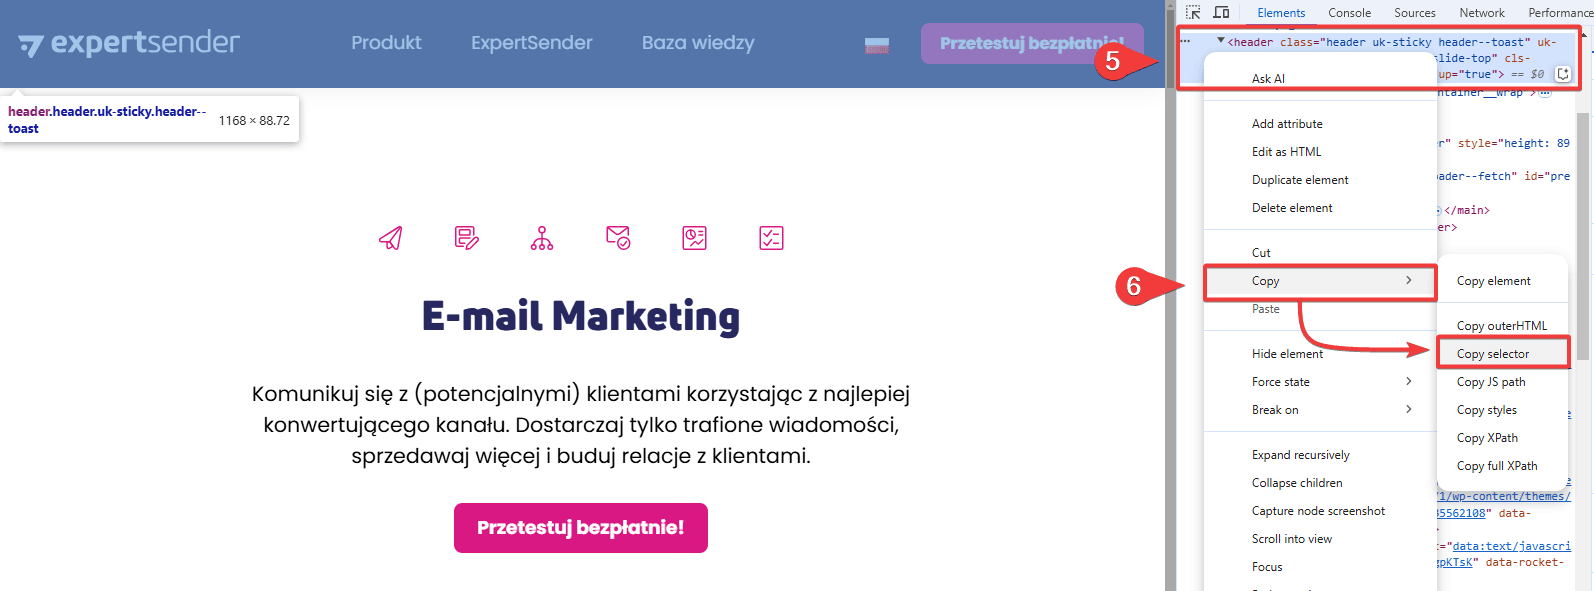
- Najedź na niego kursorem, kliknij prawy przycisk myszy i wybierz pozycję Copy > Copy selector.

- Przejdź do edytora bannerów i w sekcji Selektor SCC wklej skopiowany tekst. Zwróć uwagę czy selektor id jest poprzedzony haszem a selektor klasy – kropką.

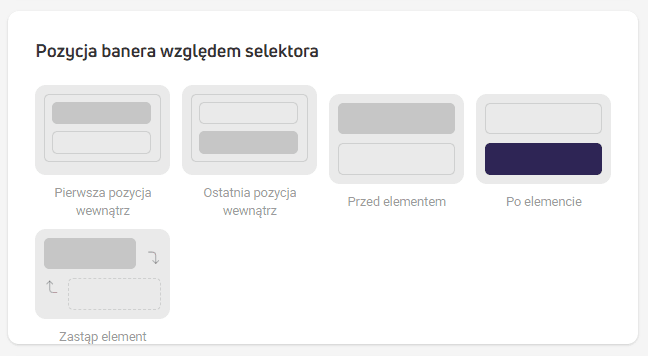
W sekcji Pozycja bannera względem selektora wybierz umiejscowienie bannera względem wybranego wcześniej selektora: na Twojej stronie względem innych elementów, które się na niej znajdują:
- Pierwsza pozycja wewnątrz – banner wyświetli się jako pierwszy element w grupie innych elementów. Może to być stały moduł widoczny na stronie sklepu, zawierający np. tekst, zdjęcia i przyciski. Banner wyświetli się wewnątrz takiego modułu, przed znajdującymi się w nim elementami.
- Ostatnia pozycja wewnątrz – banner wyświetli się jako ostatni element wewnątrz grupy innych elementów.
- Przed elementem – banner wyświetli się przed pojedynczym elementem, np. blokiem tekstu lub zdjęciem produktu.
- Po elemencie – banner wyświetli się zaraz pod pojedynczym elementem, np. blokiem tekstu lub zdjęciem produktu.
- Zastąp element – treść z podanego selektora zostanie zastąpiona bannerem.
Test na żywo – wstaw adres podstrony, na których chcesz wyświetlić banner i kliknij Test.
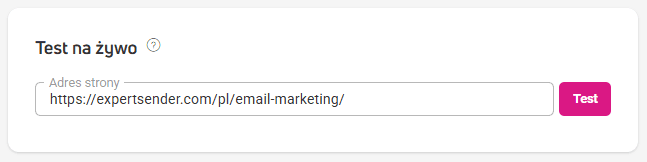
Sprawdź, czy zaprojektowany przez Ciebie banner wyświetla się poprawnie. Pamiętaj, że podgląd zadziała wyłącznie na stronach, na których umieszczony jest nasz skrypt śledzący.
Czym jest selektor CSS?
Selektor CSS wskazuje konkretny element na stronie WWW, np. tekst lub zdjęcie, ale też całe moduły złożone z wielu elementów, np. pasek menu, stopka strony, moduł z artykułami blogowymi itp.
Dzięki selektorowi odnajdziesz w kodzie strony element, który Cię interesuje i nadasz mu unikalny styl, np. zmienisz kolor lub wielkość.
W banerach selektor CSS używany jest jako punkt orientacyjny. Wskazuje, względem którego elementu na stronie możesz ulokować banner, np. względem paska menu lub zdjęcia danego produktu.
W bannerach używane są następujące selektory:
- nazwa – np. ‘p’ to element o nazwie ‘akapit’, ‘h’ to ‘nagłówek’: h1
- id – identyfikator elementu, np. footer; selektor ten jest zawsze poprzedzony haszem: #footer
- klasa – zawsze poprzedzona znakiem kropki: .yellow
Podsumowanie
W Podsumowaniu wyświetlana jest lista kontrolna z elementami niezbędnymi do wyświetlenia bannera oraz ich statusem:
- Na zielono podświetlone są elementy wypełnione prawidłowo,
- Na czerwono podświetlone są opcje, które musisz poprawić lub uzupełnić. Kliknij ikonę ołówka, żeby przejść do ustawień danego elementu. Czerwone oznaczenia pojawią się też na górnej listwie przy krokach, które wymagają sprawdzenia.
- Pomarańczowe oznaczenie pojawi się przy elementach, których wydajność można poprawić. Jeśli nie wprowadzisz zmian, nie wpłynie na wyświetlenie bannera.
- Kolorem niebieskim oznaczane są sugestie jak ulepszyć treść pod kątem marketingowym.
Dzięki liście kontrolnej szybko sprawdzisz, czy wybrane przez Ciebie ustawienia są prawidłowe. Jeśli zdecydujesz się na zmianę któregoś elementu, kliknij ikonę ołówka, aby przejść do edycji.
Na poziomie paska dostępu znajdują się dwa przyciski:
- Zapisz i zamknij – zapisze banner jako szkic i przeniesie Cię do listy bannerów w panelu kontrolnym.
- Aktywuj – banner zacznie wyświetlać się na stronie Twojego sklepu.
Jak skonfigurować zdarzenie niestandardowe?
Zdarzenie niestandardowe ma postać funkcji: $ecdp.api.getContent(type, id, maxWaitTime).
Zawiera ona trzy parametry odnoszące się do treści, którą chcesz wyświetlić. Są to:
- type – musi być zdefiniowany – oznacza typ treści, np. banner.
- id – musi być zdefiniowany – oznacza identyfikator konkretnej treści, którą chcesz wyświetli. ID znajdziesz w Automatyzacja > Bannery > kolumna ‘ID’.
- maxWaitTime – parametr opcjonalny (w milisekundach) – określa jak szybko system będzie próbował wyświetlić banner po wykonaniu akcji przez użytkownika. Zakres czasowy to 0-10 000 milisekund. Nie musisz podawać parametru maxWaitTime.
Dodaj zdarzenie niestandardowe w kodzie HTML strony
Możesz podpiąć funkcję do konkretnego elementu na stronie, np. przycisku lub linku. Dzięki temu banner wyświetli się automatycznie po kliknięciu tego elementu.
Poniżej znajdziesz dwa przykłady. W obu przypadkach wykorzystywana jest metoda getContent, która uruchamia banner o wskazanym ID.
Przykład 1: Przycisk
<button id="myButton">Otwórz banner</button>

<script>
document.getElementById("myButton").addEventListener("click", function() {
    $ecdp.api.getContent("banner", 586);
});
</script>
Przykład 2: Link
<a href="#" id="bannerLink">Otwórz banner</a>

<script>
document.getElementById("bannerLink").addEventListener("click", function(event) {
event.preventDefault(); // Zapobiega domyślnej akcji linku
    $ecdp.api.getContent("banner", 586);
});
</script>
W obu przypadkach funkcja:
- „nasłuchuje” kliknięcia,
- po kliknięciu uruchamia banner o ID 586.
Upewnij się, że wybrany banner ma status Aktywny, w przeciwnym razie nie zostanie wyświetlony.
Dodaj zdarzenie niestandardowe w edytorze drag&drop
Jeśli nie chcesz edytować kodu swojej strony bezpośrednio, możesz skorzystać z bloku treści HTML w edytorze drag&drop. Skorzystanie z tej metody wymaga użycia kodu JavaScript.
W edytorze drag&drop:
- Znajdź i dodaj blok HTML.
- Wstaw w nim kod JavaScript z przykładów powyżej.
- Dostosuj ID elementów i parametry banneru do swoich potrze
Ważne informacje
- Banner zostanie załadowany dopiero po wywołaniu funkcji.
- Zostanie wyświetlony tylko raz na odsłonę wybranej strony, dla tej samej kombinacji parametrów type i ID.
- Zdarzenie niestandardowe działa tylko dla bannerów o statusie Aktywny.
Dodaj zdarzenie niestandardowe za pomocą Google Tag Manager
Jeśli nie chcesz edytować kodu swojej strony ręcznie, możesz użyć Google Tag Managera, żeby dodać zdarzenie niestandardowe. To rozwiązanie sprawdzi się, jeśli korzystasz z GTM i chcesz użyć zdarzenia niestandardowego bez pomocy programisty.
Żeby skorzystać z tego sposobu, musisz mieć konto w Google Tag Manager połączone z Twoim sklepem.
Utwórz tag ze zdarzeniem niestandardowym wywołującym banner
- Przejdź do narzędzia Google Tag Manager.
- Przejdź do kontenera, który jest połączony ze stroną, na której umieścisz kod.
- Przejdź do zakładki Tagi.
- Kliknij Nowy, żeby utworzyć nowy tag.
- Nadaj tagowi nazwę, np. ‘Zdarzenie niestandardowe – kliknięcie linku’ a następnie kliknij Konfiguracja tagu.
- Wybierz Niestandardowy kod HTML.
- W sekcji HTML wstaw funkcję ze zdefiniowanymi parametrami type i id, np.: $ecdp.api.getContent(„banner”, 586); Parametry wskazują, którą treść stworzoną w ECDP wywoła kliknięcie linku.
Ustal, kiedy tag ma się uruchomić
- Przejdź do sekcji Reguły (triggers), w której konfigurujesz zasadę, według której zostanie wywołany tag.
- Wybierz z listy regułę Kliknięcie – Wszystkie elementy.
- W sekcji Reguła aktywuje się dla zaznacz opcję Niektóre kliknięcia.
- W sekcji Aktywuj tę regułę, gdy wystąpi zdarzenie i wszystkie z poniższych warunków będą spełnione:
- w pierwszym polu wybierz Click Text.
- w drugim polu ustaw warunek równa się.
- W ostatnim polu wpisz tekst, którego kliknięcie ma wyświetlić banner.
- Zapisz wprowadzone zmiany.
Jeśli nie widzisz zmiennej Click Text w rozwijanym menu, upewnij się, że jest aktywna:
- Przejdź do zakładki Zmienne.
- Kliknij Skonfiguruj.
- W sekcji Kliknięcia zaznacz Click Text.
Sprawdź, czy tag działa
- Przetestuj, czy kod został dodany prawidłowo – kliknij Podgląd w prawym górnym rogu ekranu.
- Następnie przejdź na swoją stronę i kliknij tekst, pod który podpięta jest funkcja wywołująca banner.
- Wróć do okna podglądu i sprawdź, czy utworzony tag został wywołany.
- Zamknij okno podglądu i kliknij Publikuj.
Jak przetestować na żywo prośbę o zgodę wywołaną przez zdarzenie niestandardowe?
Funkcja musi zostać wywołana w przeglądarce również wtedy, gdy chcesz przetestować prośbę ze zdarzeniem niestandardowym za pomocą opcji „Test na żywo”:
- Przejdź na stronę swojego sklepu i uruchom funkcję Zbadaj (Inspect):
- za pomocą klawiatury, wybierając F12,
- lub klikając prawym przyciskiem myszy wybierz ją z menu podręcznego.
- Wybierz zakładkę Console.
- Wpisz lub wklej skopiowaną funkcję z parametrami prośby.
- Naciśnij Enter, aby uruchomić skrypt.
- Spowoduje to wywołanie prośby bezpośrednio z konsoli, co jest konieczne do aktywacji zdarzenia niestandardowego.