Add presonalization tag to your email message
Personalization tags are useful for creating targeted emails that include personal information about your subscribers.
A personalization tag acts as a text template you insert into your email. When email is sent, the tag is replaced with a corresponding content, such as subscriber’s first name, last name, or coordinates.
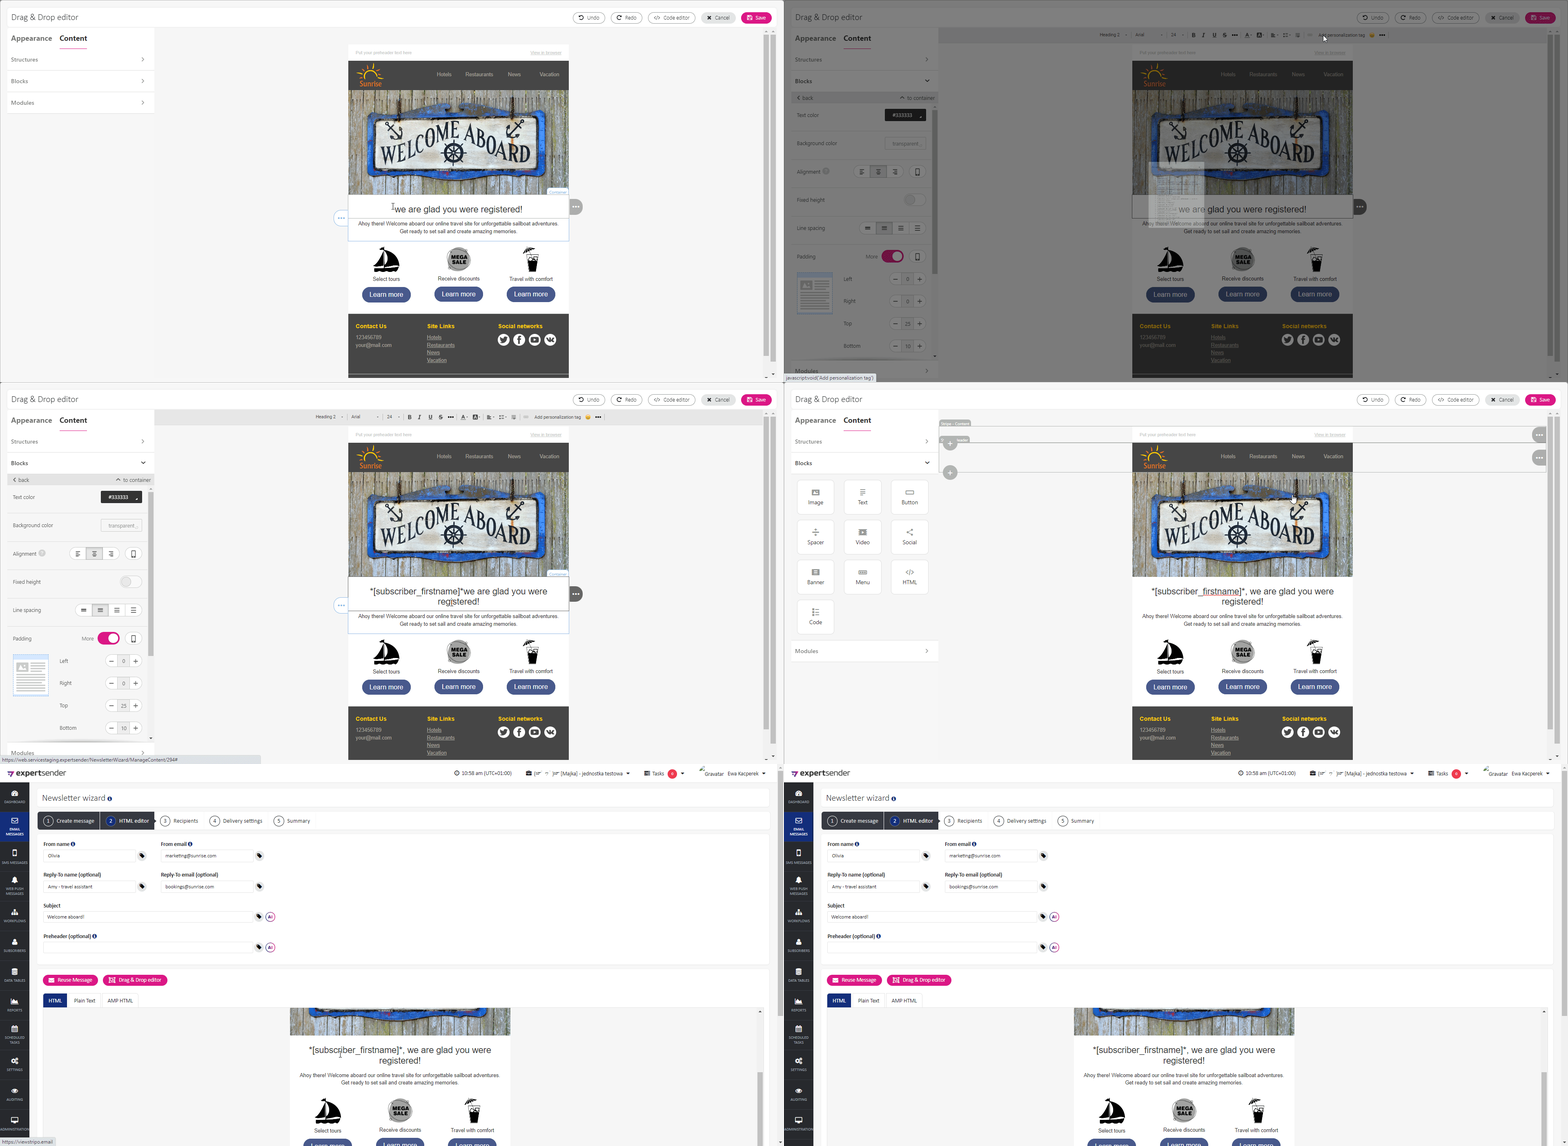
To add a subscriber’s first name to your email using the new Drag&Drop editor, follow these simple steps:
1.Open the Drag&Drop editor.
2.Go to Content menu > Blocks.
3.Drag and drop a Text block onto the working space.
4.If you already have a prepared email template, navigate to the text area where you want to insert the personalization tag.
5.Choose the location in the text where you want to insert the personalization tag.
6.Click the Personalization tag option in the text edit toolbar above the email template.
7.A window will open. Select the desired tag you want to add to your email. In this case, we will choose *[subscriber_firstname]*, which will be replaced with the subscriber’s name once the message is sent.
8.Save your work.
9.Your personalized email message is now ready to be sent to your subscribers.

Here is how your message will appear to your subscriber when they read it.
