Shoper – syncing orders, customers, and marketing consents
To enable data transfer from Shoper to ECDP, create a webhook that will pass information about customers, subscribers, and orders.
Data scope handled by the webhook
The ECDP webhook handles the following events:
Orders:
- creating a new order.
- editing an order.
- confirming payment.
- changing order status.
- deleting an order.
Customers:
- creating a customer.
- editing customer data.
- deleting a customer.
Subscribers (marketing consents):
- adding a subscriber.
- editing subscriber data.
- deleting a subscriber.
Creating a webhook in Shoper panel
- Log in to your Shoper admin panel.
- Go to Add-ons and integrations > Webhooks.
- Click the Add webhook button.
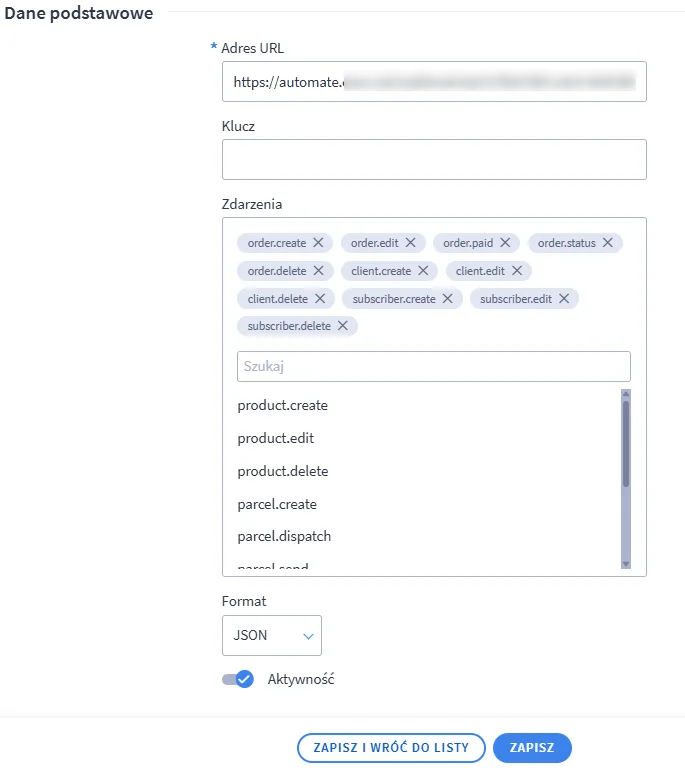
- Fill in the fields according to the instructions below:
- URL address – the address provided by the ExpertSender team.
- Format – JSON.
- Status – active / enabled.
- In the Events section, select all of the following:
- order.create.
- order.edit.
- order.paid.
- order.status.
- order.delete.
- client.create.
- client.edit.
- client.delete.
- subscriber.create.
- subscriber.edit.
- subscriber.delete.
- Save the webhook and inform the ExpertSender team that it’s running to complete the configuration.
A correctly configured webhook looks like this:
Webhook ready – what’s next?
Once you’ve created the webhook, data from your store will automatically flow into ECDP. You can use it to create campaigns based on actual purchases and customer behavior.